HP Z6100ps HP Designjet Z6100 Printer Series - Setup Poster (60 inch) - Page 13
Insert the maintenance cartridge, pushing it
 |
UPC - 882780990135
View all HP Z6100ps manuals
Add to My Manuals
Save this manual to your list of manuals |
Page 13 highlights
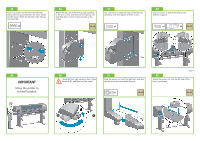
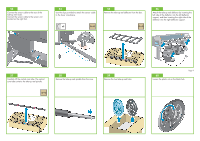
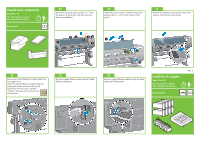
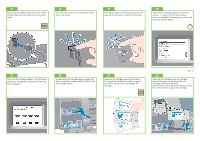
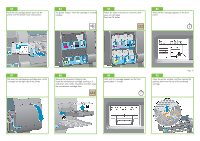
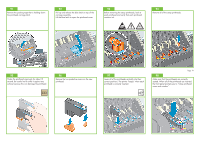
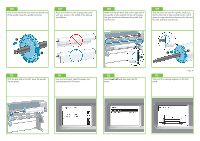
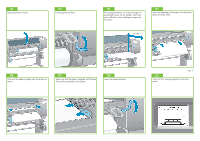
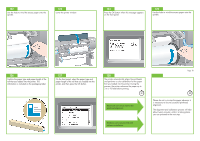
83 Push the ink cartridge drawer back into the printer until the drawer locks into position. 84 The printer "beeps" when the cartridge is correctly installed. 85 Follow the same instructions to insert the other seven ink cartridges. Press the OK button. 86 Wait until this message appears on the front panel. 2' 87 Pull open the maintenance cartridge door, which is located on the right side of the printer. 88 Remove the transparent shipping tray. Insert the maintenance cartridge, pushing it in and down until it clicks into place, and then close the maintenance cartridge door. 89 Wait until this message appears on the front panel (about 1 minute). 1' Page 13 90 Open the printer window, and then remove the packing foam from the top of the printhead carriage.
-
 1
1 -
2
-
3
-
4
-
5
-
6
-
7
-
 8
8 -
 9
9 -
 10
10 -
 11
11 -
 12
12 -
 13
13 -
 14
14 -
 15
15 -
 16
16 -
 17
17 -
 18
18 -
19
-
20
-
21
-
22
 |
 |
