HP Z6100ps HP Designjet Z6100 Printer Series - Setup Poster (60 inch) - Page 14
Make sure that the printheads are correctly
 |
UPC - 882780990135
View all HP Z6100ps manuals
Add to My Manuals
Save this manual to your list of manuals |
Page 14 highlights
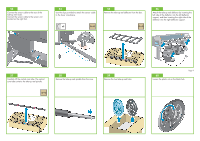
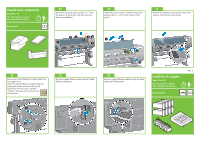
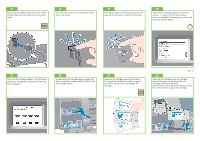
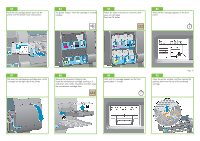
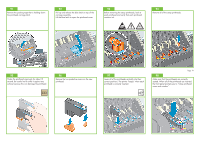
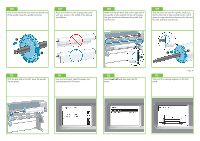
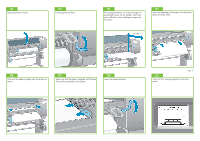
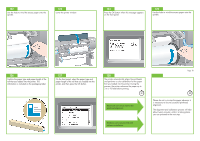
91 Remove the packing tape that is holding down the printhead carriage latch. 92 Pull up and release the blue latch on top of the carriage assembly. Lift the blue latch to open the printhead cover. 93 Before removing the setup printheads, look at each printhead and verify that each printhead contains ink. 94 Remove all of the setup printheads. 95 Shake the printhead vigorously for about 15 second. Be careful not to strike it against any surface because this can damage the printhead. 96 Remove the two protective covers on the new printhead. 97 Lower all of the printheads vertically into their correct positions. The printer "beeps" when each printhead is correctly inserted. Page 14 98 Make sure that the printheads are correctly seated. When all of the printheads are inserted, the front panel prompts you to "Close printhead cover and window".
-
 1
1 -
2
-
3
-
4
-
5
-
6
-
7
-
8
-
 9
9 -
 10
10 -
 11
11 -
 12
12 -
 13
13 -
 14
14 -
 15
15 -
 16
16 -
 17
17 -
 18
18 -
 19
19 -
20
-
21
-
22
 |
 |
