HP nx9030 HP Compaq nx9020, nx9030 and nx9040 Notebook PCs- Startup Guide - Page 36
If the Screen Is Difficult to Read, If an External Display Does Not Work, Hard Drive Problems - bios
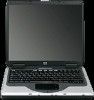 |
View all HP nx9030 manuals
Add to My Manuals
Save this manual to your list of manuals |
Page 36 highlights
Troubleshooting If the Screen Is Difficult to Read ■ Try setting the display resolution to its default setting of 1024 × 768 or higher, depending on your model. Select Start > Control Panel > Appearance and Themes > Display. ■ Try adjusting the size of the desktop icons and labels. If an External Display Does Not Work ■ Check the connections. ■ The external monitor may not be detected. In the BIOS Setup utility, try setting Video Display Device to Both in the System Devices menu. ■ If you are using a TV connected to the optional S-Video port, you must activate the TV. Hard Drive Problems If the Notebook Hard Drive Does Not Spin ■ Make sure the notebook has power. If necessary, connect the AC adapter, and make sure it is fully plugged into a power source and into the back of the notebook. ■ Remove and reinsert the hard drive. 4-2 Startup Guide
-
 1
1 -
2
-
3
-
4
-
5
-
6
-
7
-
8
-
9
-
10
-
11
-
12
-
13
-
14
-
15
-
16
-
17
-
18
-
19
-
20
-
21
-
22
-
23
-
24
-
25
-
26
-
27
-
28
-
29
-
30
-
 31
31 -
 32
32 -
 33
33 -
 34
34 -
 35
35 -
 36
36 -
 37
37 -
 38
38 -
 39
39 -
 40
40 -
 41
41 -
42
-
43
-
44
-
45
-
46
-
47
-
48
-
49
-
50
 |
 |
