HP rp7405 nPartition Administrator's Guide, Second Edition - Page 213
Configuring and Deconfiguring Cells, From the BCH Configuration Menu use
 |
View all HP rp7405 manuals
Add to My Manuals
Save this manual to your list of manuals |
Page 213 highlights
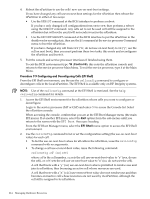
4. Exit Partition Manager. From Partition Manager Version 1.0, select the File→Exit action. From Partition Manager Version 2.0, select Log off parmgr or exit the Web browser when finished. Configuring and Deconfiguring Cells You can configure and deconfigure cells by using any one of the following procedures: • "Configuring and Deconfiguring Cells (BCH Menu)" (page 213) • "Configuring and Deconfiguring Cells (EFI Shell)" (page 214) • "Configuring and Deconfiguring Cells (nPartition Commands)" (page 215) • "Configuring and Deconfiguring Cells (Partition Manager)" (page 216) You can deconfigure (make inactive) a cell that is assigned to an nPartition by setting its use-on-next-boot value to "n" (do not use). This causes the cell to remain assigned to the nPartition, but the cell will be inactive the next time its nPartition boots, meaning the cell hardware resources will not be used. Whenever you configure or deconfigure cells, you must reboot the corresponding nPartition for the configuration change to take effect. NOTE: Configuring and deconfiguring cells may be restricted based on any Instant Capacity contract for the server complex. Procedure 7-8 Configuring and Deconfiguring Cells (BCH Menu) From the BCH Configuration Menu use the CELLCONFIG command to configure and deconfigure cells assigned to the local nPartition. The BCH Menu is available only on HP 9000 systems. 1. Access the BCH Main Menu for the nPartition whose cells you want to configure or deconfigure. Login to the service processor (MP or GSP) and enter CO to access the Console list. Select the nPartition console. When accessing the console, confirm that you are at the BCH Main Menu (the Main Menu: Enter command or menu> prompt). If at a BCH menu other than the Main Menu, then enter MA to return to the BCH Main Menu. 2. Enter CO to access the Configuration Menu. 3. From the BCH Configuration menu, use the CELLCONFIG command to list or set the use-on-next-boot value for each cell. • To list the use-on-next-boot values for all cells in the nPartition, issue the CELLCONFIG command with no arguments. • To change a cell use-on-next-boot value, issue the following command: CELLCONFIG cell [ON|OFF] where cell is the cell number, ON sets the cell use-on-next-boot value to "y" (yes, do use the cell), or OFF sets the cell use-on-next-boot value to "n" (no, do not user the cell). A cell that boots with a "y" (ON) use-on-next-boot value is permitted to rendezvous and join its nPartition, thus becoming an active cell whose resources are used. A cell that boots with a "n" (OFF) use-on-next-boot value does not rendezvous and thus becomes an inactive cell whose resources are not used by its nPartition, although the cell still is assigned to its nPartition. Configuring and Deconfiguring Cells 213
-
 1
1 -
2
-
3
-
4
-
5
-
6
-
7
-
8
-
9
-
10
-
11
-
12
-
13
-
14
-
15
-
16
-
17
-
18
-
19
-
20
-
21
-
22
-
23
-
24
-
25
-
26
-
27
-
28
-
29
-
30
-
31
-
32
-
33
-
34
-
35
-
36
-
37
-
38
-
39
-
40
-
41
-
42
-
43
-
44
-
45
-
46
-
47
-
48
-
49
-
50
-
51
-
52
-
53
-
54
-
55
-
56
-
57
-
58
-
59
-
60
-
61
-
62
-
63
-
64
-
65
-
66
-
67
-
68
-
69
-
70
-
71
-
72
-
73
-
74
-
75
-
76
-
77
-
78
-
79
-
80
-
81
-
82
-
83
-
84
-
85
-
86
-
87
-
88
-
89
-
90
-
91
-
92
-
93
-
94
-
95
-
96
-
97
-
98
-
99
-
100
-
101
-
102
-
103
-
104
-
105
-
106
-
107
-
108
-
109
-
110
-
111
-
112
-
113
-
114
-
115
-
116
-
117
-
118
-
119
-
120
-
121
-
122
-
123
-
124
-
125
-
126
-
127
-
128
-
129
-
130
-
131
-
132
-
133
-
134
-
135
-
136
-
137
-
138
-
139
-
140
-
141
-
142
-
143
-
144
-
145
-
146
-
147
-
148
-
149
-
150
-
151
-
152
-
153
-
154
-
155
-
156
-
157
-
158
-
159
-
160
-
161
-
162
-
163
-
164
-
165
-
166
-
167
-
168
-
169
-
170
-
171
-
172
-
173
-
174
-
175
-
176
-
177
-
178
-
179
-
180
-
181
-
182
-
183
-
184
-
185
-
186
-
187
-
188
-
189
-
190
-
191
-
192
-
193
-
194
-
195
-
196
-
197
-
198
-
199
-
200
-
201
-
202
-
203
-
204
-
205
-
206
-
207
-
 208
208 -
 209
209 -
 210
210 -
 211
211 -
 212
212 -
 213
213 -
 214
214 -
 215
215 -
 216
216 -
 217
217 -
 218
218 -
219
-
220
-
221
-
222
-
223
-
224
-
225
-
226
-
227
-
228
-
229
-
230
-
231
-
232
-
233
-
234
-
235
-
236
-
237
-
238
-
239
-
240
-
241
-
242
-
243
-
244
-
245
-
246
-
247
-
248
-
249
-
250
-
251
-
252
-
253
-
254
-
255
-
256
-
257
-
258
-
259
-
260
-
261
-
262
-
263
-
264
-
265
-
266
 |
 |
