HP t5745 Hardware Reference Guide HP t5740/t5745 Thin Clients - Page 28
Installing a SO-DIMM, Hardware Changes
 |
View all HP t5745 manuals
Add to My Manuals
Save this manual to your list of manuals |
Page 28 highlights
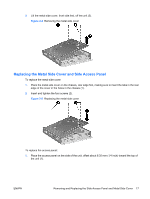
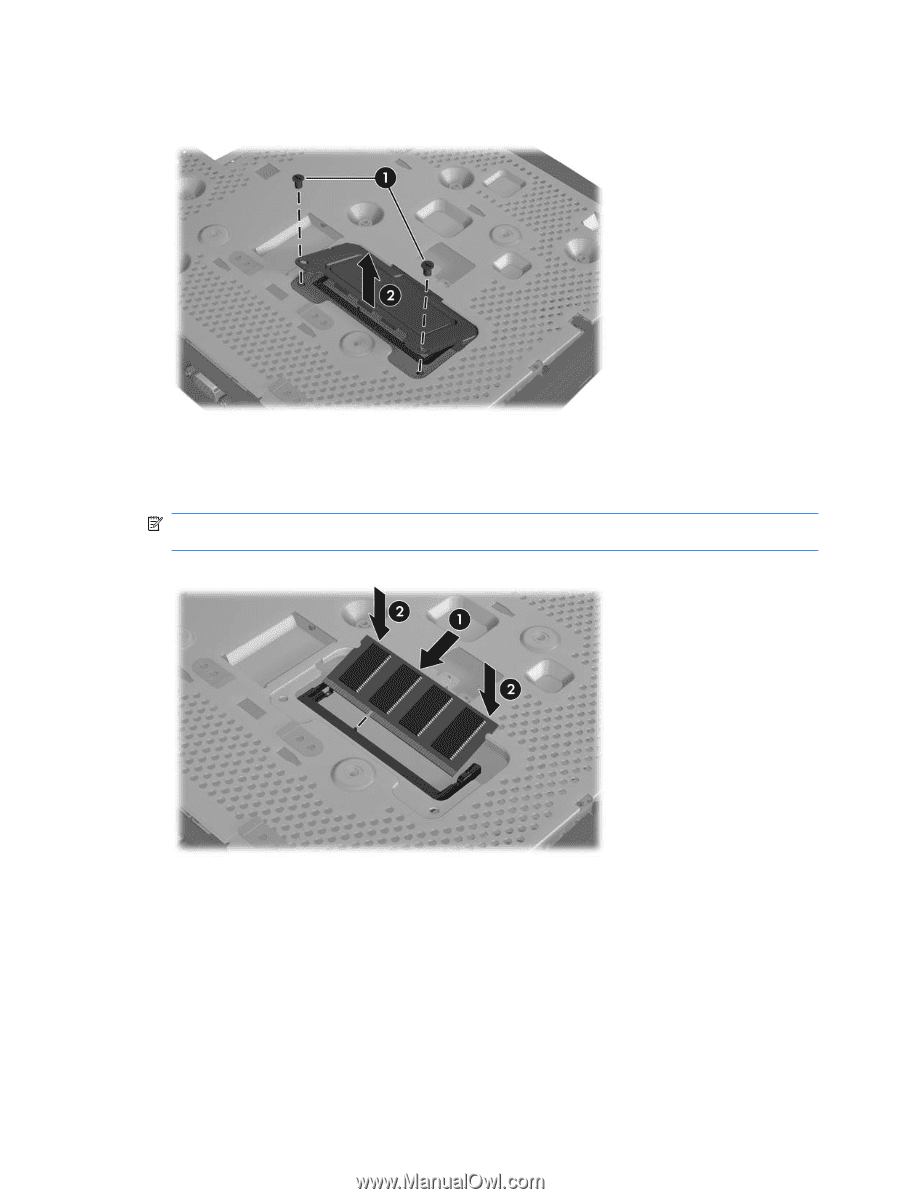
2. Remove the access plate: Figure 2-10 Removing the SO-DIMM access plate a. Remove the two screws securing the access plate to the chassis. b. Lift the rear edge of the plate and pull the plate back and up off the chassis. 3. Hold the SO-DIMM at about a 20-degree angle and insert the SO-DIMM into the socket. NOTE: A memory module can be installed in only one way. Match the notch on the module with the tab on the memory socket. Figure 2-11 Installing a SO-DIMM 4. Push the module into the socket, ensuring that the module is fully inserted and properly seated. 5. Press the module down into the compartment. 22 Chapter 2 Hardware Changes ENWW
-
 1
1 -
2
-
3
-
4
-
5
-
6
-
7
-
8
-
9
-
10
-
11
-
12
-
13
-
14
-
15
-
16
-
17
-
18
-
19
-
20
-
21
-
22
-
 23
23 -
 24
24 -
 25
25 -
 26
26 -
 27
27 -
 28
28 -
 29
29 -
 30
30 -
 31
31 -
 32
32 -
 33
33 -
34
-
35
-
36
-
37
-
38
-
39
-
40
-
41
-
42
-
43
-
44
 |
 |
2.
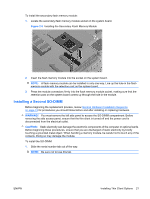
Remove the access plate:
Figure 2-10
Removing the SO-DIMM access plate
a.
Remove the two screws securing the access plate to the chassis.
b.
Lift the rear edge of the plate and pull the plate back and up off the chassis.
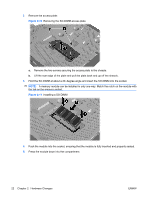
3.
Hold the SO-DIMM at about a 20–degree angle and insert the SO-DIMM into the socket.
NOTE:
A memory module can be installed in only one way. Match the notch on the module with
the tab on the memory socket.
Figure 2-11
Installing a SO-DIMM
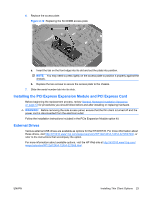
4.
Push the module into the socket, ensuring that the module is fully inserted and properly seated.
5.
Press the module down into the compartment.
22
Chapter 2
Hardware Changes
ENWW