HP wp110 HP Wireless Print Server wp110 - (English) Setup Guide - Page 9
Macintosh, In the Embedded Web Server, select - os x utility
 |
View all HP wp110 manuals
Add to My Manuals
Save this manual to your list of manuals |
Page 9 highlights
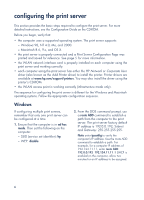
3. Enter 192.0.0.192 as the URL in a browser to open the print server's Embedded Web Server. Note Disable the web proxy if one is being used on the computer. 4. In the Embedded Web Server, select the Wireless Settings option from the Configuration menu. Then: a. Set the print server to the desired mode (ad hoc or infrastructure). b. Set the print server SSID to match the SSID of the WLAN. c. If WEP security is in use, enable the WEP Request and enter the appropriate WEP key as specified by your network administrator. 5. Apply the changes and reset the print server by following either the dialog screens in the Embedded Web Server or selecting Reset from the menu. 6. Reconfigure the computer to match the mode of the print server, if necessary. 7. For each computer using the print server, insert the print server CD-ROM and select Install from the CD-ROM menu. Follow the on-screen instructions. Macintosh 1. Ensure that the computer is set for computer to computer communications. Then open the AirPort menu and select the hp computer-to-computer network. 2. Ensure that AppleTalk is set to use AirPort. 3. Insert the print server CD-ROM. From the menu, open the appropriate hp wp110 utility for the operating system. 4. Use the utility to: - set the print server to the desired mode (computer to computer or AirPort Network). - ensure that the print server SSID matches the SSID of the WLAN. - enable the WEP Request and enter the appropriate Network Equivalent Password to activate the WEP feature, if appropriate. - establish TCP/IP settings (OS X only). 5. Reset the print server. 6. Reconfigure the computer to match the mode of the print server, if necessary. 7. Run the Chooser to select the printer. 7
-
 1
1 -
2
-
3
-
 4
4 -
 5
5 -
 6
6 -
 7
7 -
 8
8 -
 9
9 -
 10
10 -
 11
11 -
 12
12 -
 13
13 -
 14
14 -
15
-
16
 |
 |