Hikvision DS-2CE12DFT-PIRXOF User Manual - Page 9
Secure screws on the Junction Box's Cover
 |
View all Hikvision DS-2CE12DFT-PIRXOF manuals
Add to My Manuals
Save this manual to your list of manuals |
Page 9 highlights
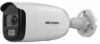
3). Rotate the main body to adjust the rotation position [0° to 360°]. 2.2.2 Ceiling/Wall Mounting with Junction Box Before you start: You need to purchase a junction box in advance. The installation of ceiling mounting and wall mounting are similar. Following takes wall mounting as an example. Steps: 1. Paste the drill template on the wall. 2. Drill screw holes and the cable hole (optional) on the wall according to the drill template. Figure 2-14 Drill Template Note: Drill the cable hole, when adopting ceiling outlet to route the cable. 3. Take apart the junction box, and align the screw holes of the mounting base with those on the junction box's cover. 4. Install the mounting base to the junction box's cover with three PM4 screws. Figure 2-15 Secure screws on the Junction Box's Cover 5. Secure the junction box's body on the wall with four PA4 × 25 screws. Figure 2-16 Secure the Junction Box's Body 6. Route the cables through the bottom cable hole, or the side cable hole of the junction box. 7. Combine the junction box's cover with its body.
-
 1
1 -
2
-
3
-
 4
4 -
 5
5 -
 6
6 -
 7
7 -
 8
8 -
 9
9 -
 10
10 -
 11
11 -
 12
12 -
 13
13 -
 14
14 -
15
 |
 |
