Hitachi DZ-MV270A Owners Guide - Page 13
PC connection terminal TO PC
 |
View all Hitachi DZ-MV270A manuals
Add to My Manuals
Save this manual to your list of manuals |
Page 13 highlights
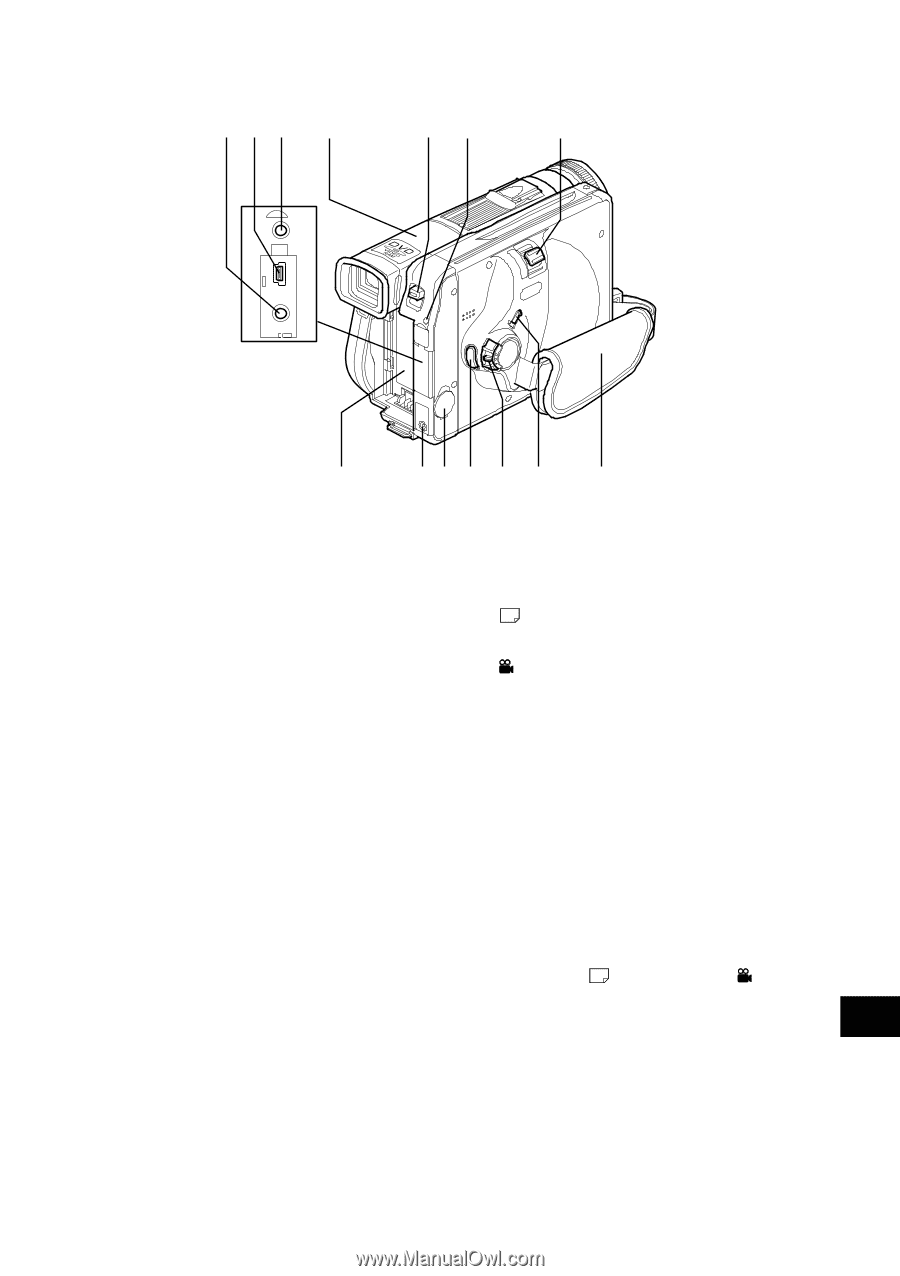
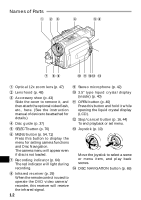
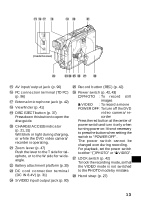
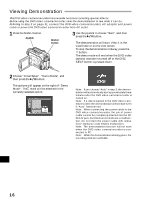
&() ~ +, - TO PC A / V (Inside the cover) . /: ; < = > & AV input/output jack (p. 90) ( PC connection terminal (TO PC) (p. 96) ) External microphone jack (p. 42) ~ Viewfinder (p. 41) + DISC EJECT button (p. 37) Press down this button to open the disc guide. , CHARGE/ACCESS indicator (p. 21, 31) Will blink or light during charging, or while the DVD video camera/ recorder is operating. - Zoom lever (p. 47) Push the lever to the T side for telephoto, or to the W side for wideangle. . Battery attachment platform (p. 30) / DC cord connection terminal (DC IN 8.4V) (p. 31) : S-VIDEO input/output jack (p. 90) ; Record button (REC) (p. 42) < Power switch (p. 42, 43) PHOTO : To record still images VIDEO : To record a movie POWER OFF : To turn off the DVD video camera/recorder Press the red button at the center of power switch and turn it only when turning power on: It is not necessary to press the button when setting the switch to "POWER OFF". The power switch cannot be changed over during recording. For playback, set the power switch to either " PHOTO" or " VIDEO". = LOCK switch (p. 42) English To lock the recording mode, so that the VIDEO mode is not switched to the PHOTO mode by mistake. > Hand strap (p. 27) 13
-
 1
1 -
2
-
3
-
4
-
5
-
6
-
7
-
 8
8 -
 9
9 -
 10
10 -
 11
11 -
 12
12 -
 13
13 -
 14
14 -
 15
15 -
 16
16 -
 17
17 -
 18
18 -
19
-
20
-
21
-
22
-
23
-
24
-
25
-
26
-
27
-
28
-
29
-
30
-
31
-
32
-
33
-
34
-
35
-
36
-
37
-
38
-
39
-
40
-
41
-
42
-
43
-
44
-
45
-
46
-
47
-
48
-
49
-
50
-
51
-
52
-
53
-
54
-
55
-
56
-
57
-
58
-
59
-
60
-
61
-
62
-
63
-
64
-
65
-
66
-
67
-
68
-
69
-
70
-
71
-
72
-
73
-
74
-
75
-
76
-
77
-
78
-
79
-
80
-
81
-
82
-
83
-
84
-
85
-
86
-
87
-
88
-
89
-
90
-
91
-
92
-
93
-
94
-
95
-
96
-
97
-
98
-
99
-
100
-
101
-
102
-
103
-
104
-
105
-
106
-
107
-
108
-
109
-
110
-
111
-
112
-
113
-
114
 |
 |