Hitachi P42A202 Owners Guide - Page 30
Other Video Menu Settings Adjustment
 |
UPC - 050585127012
View all Hitachi P42A202 manuals
Add to My Manuals
Save this manual to your list of manuals |
Page 30 highlights
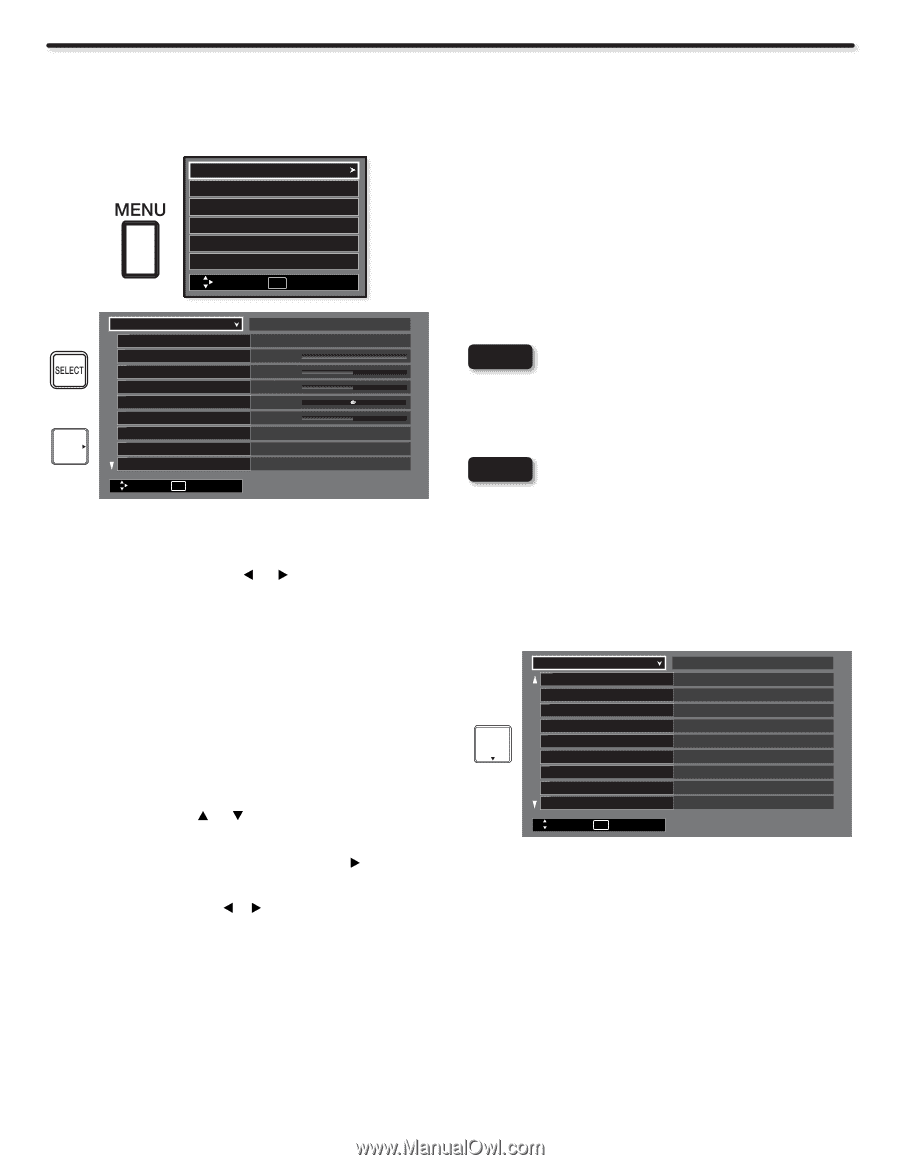
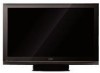
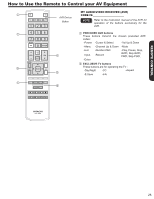
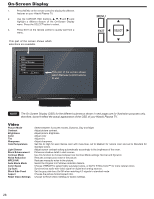
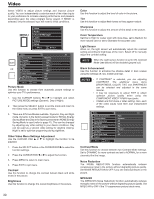
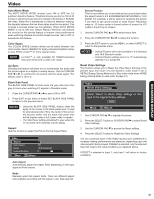
Video Select VIDEO to adjust picture settings and improve picture quality. You can independently customize each of the video inputs to your preference to increase viewing performance and pleasure depending upon the video program being viewed. If RESET is selected, only the selected input will reset to initial conditions. Video Audio Channel Manager Locks Timers Setup Move SEL Select Video Air Picture Mode Dynamic Contrast 100% Brightness 50% Color 50% OR Tint 0 Sharpness 50% Color Temperature High Light Sensor Off Black Enhancement High Move SEL Select Picture Mode Use this function to choose from automatic picture settings to optimize your TV's performance. 1. Use the CURSOR buttons or to highlight and select PICTURE MODE settings (Dynamic, Day or Night). 2. Then press the SELECT button to set the mode and return to the Video menu or press EXIT to quit menu. 3. There are 3 Picture Modes available : Dynamic, Day and Night mode. Dynamic is the factory preset mode for RETAIL Energy Saving Mode and Day is the factory preset when HOME Energy Saving Mode is used (refer to page 41). This can be changed by adjusting any video setting to your desire conditions. Day can be used as a second video setting for daytime viewing. Night is set to optimize programing during nigthtime. Other Video Menu Settings Adjustment Use the CURSOR PAD or to highlight the function to be adjusted. 1. Press the SELECT button or the CURSOR PAD to select the function settings. 2. Press the CURSOR PAD or to adjust the function. 3. Press MENU to return to main menu. 4. Press EXIT to quit menu. Contrast Use this function to change the contrast betwen black and white levels in the picture. Brightness Use this function to change the overall brightness in the picture. Color Use this function to adjust the level of color in the picture. Tint Use this function to adjust flesh tones so they appear natural. Sharpness Use this function to adjust the amount of fine detail in the picture. Color Temperature Set this to High for cooler color with more blue, set to Medium for more natural color or set to Standard for accurate color. Light Sensor When on, the light sensor will automatically adjust the contrast setting according to brightness of the room. Select off to manually adjust the contrast setting. NOTE When the Light sensor function is set to ON, Contrast Mode (see below) will be disabled (grayed out). Black Enhancement Use this function to enhance the shadow detail in dark scenes using the settings off, low, middle and high. NOTES • If CONTRAST is selected, you are adjusting CONTRAST. The additional menu items BRIGHTNESS, COLOR, TINT, and SHARPNESS can be selected and adjusted in the same manner. • It may be necessary to adjust TINT to obtain optimum picture quality when using the COMPONENT VIDEO Y-PBPR input jacks. • CABLE and AIR share a Video setting. Also, each of the video inputs have their own independent settings. Video Air Black Enhancement High Contrast Mode Dynamic Noise Reduction Off MPEG-NR Off Auto Movie Mode Off Color Space Vibrant Lip Sync 0 Black Side Panel Off Aspect Move SEL Select Contrast Mode Use this function to choose between two Contrast Mode settings. Set to DYNAMIC for more contrast and set to NORMAL for a more cinematic film like image. Noise Reduction The NOISE REDUCTION function automatically reduces conspicuous noise in the picture without degrading picture quality. Set NOISE REDUCTION to OFF if you see individual blocks in the picture. MPEG NR The MPEG NR (Noise Reduction) function automatically reduces mosquito noise in the picture without degrading picture quality. Set MPEG NR to OFF if the TV experiences picture block noise. 30
-
 1
1 -
2
-
3
-
4
-
5
-
6
-
7
-
8
-
9
-
10
-
11
-
12
-
13
-
14
-
15
-
16
-
17
-
18
-
19
-
20
-
21
-
22
-
23
-
24
-
 25
25 -
 26
26 -
 27
27 -
 28
28 -
 29
29 -
 30
30 -
 31
31 -
 32
32 -
 33
33 -
 34
34 -
 35
35 -
36
-
37
-
38
-
39
-
40
-
41
-
42
-
43
-
44
-
45
-
46
-
47
-
48
-
49
-
50
-
51
-
52
-
53
-
54
-
55
-
56
-
57
-
58
-
59
-
60
-
61
-
62
 |
 |