Honeywell CT3355A1003 Owner's Manual
Honeywell CT3355A1003 Manual
 |
View all Honeywell CT3355A1003 manuals
Add to My Manuals
Save this manual to your list of manuals |
Honeywell CT3355A1003 manual content summary:
- Honeywell CT3355A1003 | Owner's Manual - Page 1
MagicStat®/3355 Programmable Thermostat by Honeywell OWNER'S GUIDE Weekday/Weekend (5-day/ 2-day) Programmable Heat and/or Cool Low Voltage (20 to 30 Vac) Thermostat and Mounting Plate Model CT3355 1 6699--11001122 - Honeywell CT3355A1003 | Owner's Manual - Page 2
with your new Honeywell MagicStat® Programmable Thermostat. Your new thermostat will automatically control the temperature in your home, keeping you comfortable while saving energy when programmed according to the instructions in this manual. RECYCLING THERMOSTAT If this thermostat is replacing - Honeywell CT3355A1003 | Owner's Manual - Page 3
as Required 18 Step 7: Mount Thermostat Mounting Plate 21 Step 8: Wire Thermostat Terminals 23 Step 9: Mount Thermostat ...27 Step 10: Check Thermostat Operation After Programming and Installing 28 Step 11: Set Fan and System Switches 30 Troubleshooting Guide ...32 Limited One-Year Warranty - Honeywell CT3355A1003 | Owner's Manual - Page 4
No Heat Pumps/Multistage Equipment No Not compatible with any 120/240 volt circuit. a Compatible with 2-wire Honeywell Zone Valves. Isolating relay required for 3-wire thermostats for zone valves. Not compatible with 2-wire White-Rodgers no. 1361 Valves. b Compatible with hot water baseboard - Honeywell CT3355A1003 | Owner's Manual - Page 5
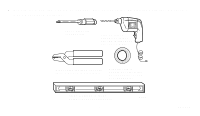
HOLES IN WALL WIRE CUTTER/STRIPPER OR SHARP KNIFE, IF NEEDED TO STRIP WIRES MASKING TAPE, IF NEEDED TO LABEL WIRES AS DISCONNECTED FROM OLD THERMOSTAT LEVEL, IF NEEDED TO LEVEL THERMOSTAT FOR APPEARANCE 5 M878B 69-1012 - Honeywell CT3355A1003 | Owner's Manual - Page 6
to system at the furnace, or at the fuse/circuit breaker panel. s Carefully unpack your new thermostat and mounting plate; save package of screws, instructions and receipt. s Remove the cover from the old thermostat. If it does not snap off when pulled firmly from the bottom, check for a screw used - Honeywell CT3355A1003 | Owner's Manual - Page 7
so return the product to the place of purchase. If you would like information about which programmable thermostats work with your system, call Honeywell Customer Assistance at 1-800-468-1502. Three thermostat wires? If you have three wires for heating only and can operate the fan using the fan - Honeywell CT3355A1003 | Owner's Manual - Page 8
two AA alkaline batteries; nonalkaline batteries do not last as long, and can leak, causing damage to the thermostat or the wall surface. We recommend Energizer® batteries. s Make sure the thermostat is set to the OFF position. s Use a coin to remove the battery door. s Install the fresh batteries - Honeywell CT3355A1003 | Owner's Manual - Page 9
to remove. If you insert the new batteries within 20 to 30 seconds of removing the old ones, you do not have to reprogram the thermostat. However, if the display is blank, the batteries are dead or incorrectly installed and you must reprogram. See pages 14 and 15 to reprogram. IMPORTANT - Honeywell CT3355A1003 | Owner's Manual - Page 10
be easily programmed in your hand, before it is installed on the wall. If you prefer to program the thermostat after it is installed on the wall, skip to page 18, and return later to this programming section. The following Personal Programming Chart (pages 12 - Honeywell CT3355A1003 | Owner's Manual - Page 11
time periods are available. Fill in the times and temperatures you desire for weekdays and weekends. If you decide not to program the thermostat, it will automatically control heating at 68°F (20°C), and cooling at 78°F (26°C), 24 hours a day. Also, you do not need to enter a time and temperature - Honeywell CT3355A1003 | Owner's Manual - Page 12
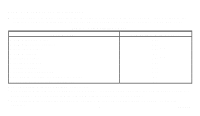
Personal Programming Chart Weekdays WAKE 1 LEAVE RETURN 1 SLEEP Heating Program Start Time Weekends WAKE 1 SLEEP 2 Heating Temperature 1 WAKE and RETURN start times should include extra lead time based on outside temperature and furnace response time, to give your furnace a head start to heat - Honeywell CT3355A1003 | Owner's Manual - Page 13
the house. 2 The temperatures cannot be set any higher than 88°F (31°C) or any lower than 45°F (7°C). NOTE: If you decide not to program the thermostat, it automatically controls heating at 68°F (20°C), and cooling at 78°F (26°C), 24 hours a day. 13 69-1012 - Honeywell CT3355A1003 | Owner's Manual - Page 14
This guide can be used for programming your new thermostat. NOTE: Batteries are required for operation and programming. When inserting batteries, set system switch to OFF. Remove the battery door (on the thermostat left side) using a coin at the bottom. Follow instructions on pages 8 and 9. Time - Honeywell CT3355A1003 | Owner's Manual - Page 15
to program WAKE temperature for Sat-Sun. Repeat sequence for SLEEP. Cooler M1 00A Cooling Program With system switch at COOL, follow the same instructions as for the Heating Program. After programming, adjust the fan and system switches, as desired. Press and release Run Program to start the - Honeywell CT3355A1003 | Owner's Manual - Page 16
A quick guide for operating or making changes follows: NOTE: System switch must be set to Heat or Cool to perform the following. Temp Warmer Temporarily Change temperature - Honeywell CT3355A1003 | Owner's Manual - Page 17
Heating Program section or Cooling Program section (pages 14 through 16), as applicable. Run Return to normal program or start program - press Program . Questions? Call Honeywell Customer Assistance 1-800-468-1502. 17 69-1012 - Honeywell CT3355A1003 | Owner's Manual - Page 18
another type of system, adjust the on-time accordingly by setting screws A and B on the back of the thermostat. Use the heating system table shown in the illustration (page 20) as a guide. Optimize the system on-time according to the type of system to minimize room temperature swings. Setting the - Honeywell CT3355A1003 | Owner's Manual - Page 19
Furnace-Leave at the Warm Air Furnace setting (A-leave in, B-leave in). NOTE: This thermostat does not have a setting for steam/gravity air. Cycles would not be long enough for accurate temperature control. IMPORTANT When using a high efficiency furnace such as a 90% or greater AFUE (Average Fuel - Honeywell CT3355A1003 | Owner's Manual - Page 20
THERMOSTAT BACK A DISPLAY °F C-IN DISPLAY °C C-OUT 1 TURN B FOR HIGH EFFICIENCY FURNACE (90%+ AFUE) ADJUST: SCREW A-OUT ONE TURN SCREW B-IN FUEL SWITCH - F POSITION FUEL SWITCH F E C ADJUST - Honeywell CT3355A1003 | Owner's Manual - Page 21
Step 7: Mount Thermostat Mounting Plate s Position the mounting plate on the wall. Use a level to make sure the mounting plate is level. Use a pencil to mark the two - Honeywell CT3355A1003 | Owner's Manual - Page 22
s Level for appearance only; thermostat functions properly even when not level. Tighten the mounting screws. LEVEL M1714A 22 69-1012 - Honeywell CT3355A1003 | Owner's Manual - Page 23
, call your local heating/air conditioning contractor. Refer to masking tape labels you placed on the wires when you removed your old thermostat. s In 5-wire installations only, be sure to remove the factory-installed jumper connecting terminals R and Rc. METHOD TO INCREASE WIRE LENGTH WIRE - Honeywell CT3355A1003 | Owner's Manual - Page 24
its matching terminal. See illustration (lower right) for wire insertion technique. Securely tighten the terminals. s Plug the hole in the wall with insulation to help prevent drafts from adversely affecting the thermostat operation. 5/16 in. (8 mm) STRIP INSERT STRAIGHT UNDER SCREW HEAD Rc - Honeywell CT3355A1003 | Owner's Manual - Page 25
2-WIRE HEAT-ONLY (JUMPER INTACT) A C B D W Y G JUMPER R Rc HEATING RELAY OR VALVE COIL L1 (HOT) 1 L2 1 POWER SUPPLY. PROVIDE DISCONNECT MEANS AND OVERLOAD PROTECTION AS REQUIRED. M8793 4-WIRE HEAT/COOL (JUMPER INTACT) A C B D W Y G JUMPER R Rc HEATING RELAY OR VALVE COIL - Honeywell CT3355A1003 | Owner's Manual - Page 26
5-WIRE HEAT/COOL (JUMPER REMOVED) A C B D W Y G R Rc 3-WIRE COOL-ONLY (JUMPER INTACT) A C B D W Y G R Rc JUMPER HEATING RELAY OR VALVE COIL FAN RELAY 1 L1 (HOT) L2 COOLING CONTACTOR COIL 1 L1 (HOT) L2 1 POWER SUPPLY. PROVIDE DISCONNECT MEANS AND OVERLOAD PROTECTION AS REQUIRED - Honeywell CT3355A1003 | Owner's Manual - Page 27
Step 9: Mount Thermostat NOTE: To remove the thermostat from the wall, first pull out at the bottom of the thermostat, then remove the top. A. ENGAGE TABS AT TOP OF THERMOSTAT AND MOUNTING PLATE. B. PRESS LOWER EDGE OF CASE TO LATCH. C. SWING OPEN COVER TO CHECK OPERATION. M1734A 27 69-1012 - Honeywell CT3355A1003 | Owner's Manual - Page 28
Installing Heating Do not check heating system operation by jumpering thermostat terminals at the primary control such as the gas valve, zone valve, or oil burner control. This damages the thermostat, instead, jumper R and W wires at the thermostat. Cool Off Heat Auto On Move the system switch to - Honeywell CT3355A1003 | Owner's Manual - Page 29
damage, do not operate the cooling system when outside temperature is below 50°F (10°C). See compressor manufacturer instructions for further information. NOTE: When cooling setting is changed, thermostat may delay up to five minutes before turning on the air conditioner. This delay protects the - Honeywell CT3355A1003 | Owner's Manual - Page 30
usually runs on high with the air conditioner and on low with the furnace. Exception: If the fan operation switch on the back of the thermostat is set to the E position (see page 20), the fan operates only with the furnace. FAN ON: The fan runs continuously. Use for improved air - Honeywell CT3355A1003 | Owner's Manual - Page 31
Then set the system switch. COOL: The thermostat controls your air conditioning system. OFF: Both the heating and air conditioning systems are off. HEAT: The thermostat controls your heating system. Cool Off Heat Cool Off Heat M1707 Cool Off Heat M1703 31 69-1012 - Honeywell CT3355A1003 | Owner's Manual - Page 32
Troubleshooting Guide If... Display will not come on. Temperature display will not go lower than sure the current day and time are correct. Reprogram if necessary. s Check that the switch on the thermostat is set to HEAT. s Check the system fuse or circuit breaker and replace or reset if necessary. - Honeywell CT3355A1003 | Owner's Manual - Page 33
fresh batteries. s If temperature setting is higher than current temperature, and the display shows HEAT, contact Honeywell Customer Assistance at 1-800-468-1502. s Check that the switch on the thermostat is set to COOL. s Check the system fuse or circuit breaker and replace or reset if necessary - Honeywell CT3355A1003 | Owner's Manual - Page 34
temperature protection and shut down. If the air conditioner does not come on after the ten minutes and the display shows COOL, contact Honeywell Customer Assistance at 1-800-468-1502. s If 2- or 4-wire installation, verify R-Rc jumper is installed. s Press PRESENT SETTING key to check the current - Honeywell CT3355A1003 | Owner's Manual - Page 35
setting does not match the display temperature to within ±1°. Incorrect room temperature showing on thermostat display. bAt Lo remains on display after fresh batteries are installed. s Readjust system on-time according to instructions on pages 18 and 19. s Check that the wiring hole in the wall - Honeywell CT3355A1003 | Owner's Manual - Page 36
TYPICAL ENERGY SAVINGS FOR REPRESENTATIVE CITIES IN THE U.S. AND CANADA Approximate percentage of energy cost savings Savings for Once-A-Day 10°F (5°C) decrease Savings for Twice-A-Day 10°F (5°C) decrease* Savings for 5°F (3°) summer increase 30% 28% 26% 24% 22% 20% 18% 16% 14% 12% 10 - Honeywell CT3355A1003 | Owner's Manual - Page 37
37 69-1012 - Honeywell CT3355A1003 | Owner's Manual - Page 38
38 69-1012 - Honeywell CT3355A1003 | Owner's Manual - Page 39
a short description of the malfunction, and mail it, postage prepaid, to the following address: Honeywell Inc. in Canada: Honeywell Limited/Honeywell Limitée Return Goods Department Product Services ON30 1050 Berkshire Lane 155 Gordon Baker Road Plymouth, MN 55441-4437 North York, Ontario - Honeywell CT3355A1003 | Owner's Manual - Page 40
Limitée 155 Gordon Baker Road North York, Ontario M2H 2C9 69-1012 6-96 J.S. Printed in U.S.A. Copyright © 1996 Honeywell Inc. All Rights Reserved ® U.S. Registere4d0Trademark Helping You Control Your World Printed on recycled paper containing at least 10% post-consumer pa6p9e-r1fi0be1r2s.
-
 1
1 -
 2
2 -
 3
3 -
 4
4 -
 5
5 -
 6
6 -
 7
7 -
8
-
9
-
10
-
11
-
12
-
13
-
14
-
15
-
16
-
17
-
18
-
19
-
20
-
21
-
22
-
23
-
24
-
25
-
26
-
27
-
28
-
29
-
30
-
31
-
32
-
33
-
34
-
35
-
36
-
37
-
38
-
39
-
40
 |
 |

OWNER’S GUIDE
MagicStat
®
/3355
Programmable Thermostat by Honeywell
Weekday/Weekend (5-day/ 2-day)
Programmable Heat and/or Cool
Low Voltage (20 to 30 Vac)
Thermostat and Mounting Plate
Model CT3355
69-1012