Honeywell HCM6011I Owners Manual - Page 5
Power, Output / Fan Speed Control - replacement filter
 |
UPC - 092926344320
View all Honeywell HCM6011I manuals
Add to My Manuals
Save this manual to your list of manuals |
Page 5 highlights
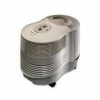
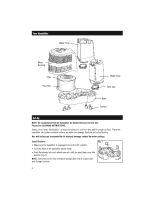
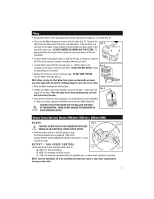
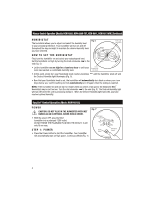
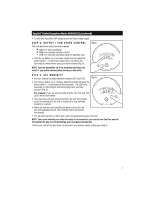
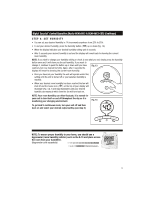
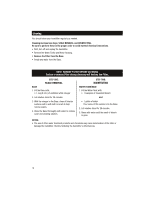
Filling • Remove the Water Tanks by grasping the handle and pulling straight up. Set aside (Fig. 2). • Lift up on the Motor Housing to remove and set aside (Fig. 3). Remove the Filter from the Base before filling the unit with water. Soak the Filter in a sink full of cool water to help reduce mineral buildup and place back in the humidifier while wet. DO NOT SQUEEZE OR WRING OUT THE FILTER. To help extend the life of your Filter, repeat this step each time you fill your humidifier. Fig. 2 • Turn the Water Tank upside down so that the Fill Cap is facing up; unscrew the Fill Cap by turning it counter-clockwise and set aside. • Fill each Water Tank with COOL tap water (Fig. 4). Distilled water is not Fig. 3 necessary as the water is filtered by the Filter. DO NOT USE HOT WATER. Doing so may damage the humidifier. • Replace the Fill Cap by turning it clockwise . DO NOT OVER-TIGHTEN. Turn the Water Tank right-side up. NOTE: When carrying the filled Water Tank please use the handle and place your other hand under the tank for additional support. Carry only one at a time. • Place the Motor Housing back into the Base. • Position each Water Tank in the humidifier and push into place. Some water will empty into the Base. Note: The tanks do not drain simultaneously, one tank will drain before the other. Fig. 4 • Once the filled tanks have been positioned, do not attempt to move the humidifier. If it has to be moved, unplug the humidifier and remove the Water Tanks first. CAUTION: DO NOT POUR WATER INTO THE GRILLE IN THE FRONT OF THE HUMIDIFIER. DOING SO MAY DAMAGE THE HUMIDIFIER OR CAUSE PERSONAL INJURY. Manual Control Operation (Models HCM-6009, HCM-6011, HCM-6011WW) POWER CAUTION: DO NOT PLUG IN THE HUMIDIFIER WITH WET HANDS AS AN ELECTRICAL SHOCK COULD OCCUR. Fig. 5 Humidistat Knob Power Light (Illuminated) • With the power switch in the OFF position, plug the filled humidifier into a polarized 120V outlet. DO NOT FORCE THE POLARIZED PLUG INTO THE OUTLET; it will only fit one way. OUTPUT / FAN SPEED CONTROL Desired Set the fan speed to the desired position (Fig. 5). Humidity Light HIGH: For fast humidifying MED: For everyday moisture control LOW: For minimum operation (ideal for nighttime use, or when silent operation is needed) Fan Speed Knob NOTE: Turn the humidifier off if the humidity level feels too moist or you notice condensation forming on the walls. 5
-
 1
1 -
 2
2 -
 3
3 -
 4
4 -
 5
5 -
 6
6 -
 7
7 -
 8
8 -
 9
9 -
 10
10 -
 11
11 -
12
-
13
-
14
-
15
-
16
-
17
-
18
-
19
-
20
-
21
-
22
-
23
-
24
-
25
-
26
-
27
-
28
-
29
-
30
-
31
 |
 |
