Honeywell HWM910 Owners Manual - Page 6
Operation
 |
UPC - 092926343101
View all Honeywell HWM910 manuals
Add to My Manuals
Save this manual to your list of manuals |
Page 6 highlights
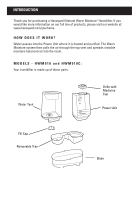
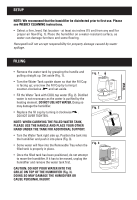
OPERATION POWER CAUTION: DO NOT PLUG IN THE HUMIDIFIER WITH WET HANDS AS AN ELECTRICAL SHOCK COULD OCCUR. • Plug the filled humidifier into a polarized 120V outlet. DO NOT FORCE THE POLARIZED PLUG INTO THE OUTLET; it will only fit one way. HUMIDITY CONTROL 1. Set the Power Knob to the desired position (Fig. 4). HIGH: For fast humidifying. LOW: For more gradual humidification. Fig. 4 NOTE: You will not hear a difference when turning the humidifier from High to Low. 2. Press down and release the Start lever to TURN ON the humidifier. NOTE: Allow 5-10 minutes for the humidifier to begin producing moisture. 3. THE START LEVER MUST BE PRESSED EVERY TIME THE WATER TANK IS REMOVED FROM THE BASE OR REFILLED.
-
 1
1 -
 2
2 -
 3
3 -
 4
4 -
 5
5 -
 6
6 -
 7
7 -
 8
8 -
 9
9 -
 10
10 -
 11
11 -
 12
12 -
13
-
14
-
15
-
16
-
17
-
18
-
19
-
20
-
21
-
22
-
23
-
24
-
25
-
26
-
27
-
28
-
29
-
30
-
31
-
32
-
33
-
34
-
35
-
36
 |
 |

POWER
CAUTION: DO NOT PLUG IN THE HUMIDIFIER WITH WET HANDS AS AN
ELECTRICAL SHOCK COULD OCCUR.
•
Plug the filled humidifier into a polarized 120V outlet. DO NOT FORCE THE
POLARIZED PLUG INTO THE OUTLET; it will only fit one way.
HUMIDITY CONTROL
1. Set the Power Knob to the desired position (Fig. 4).
HIGH:
For fast humidifying.
LOW:
For more gradual humidification.
NOTE:
You will not hear a difference when turning the
humidifier from High to Low.
2. Press down and release the Start lever to TURN ON
the humidifier.
NOTE: Allow 5-10 minutes for the humidifier to begin
producing moisture
.
3. THE START LEVER MUST BE PRESSED EVERY TIME
THE WATER TANK IS REMOVED FROM THE BASE
OR REFILLED.
Fig. 4
OPERATION