Honeywell TE653ELW User Manual - Page 11
Atomic Clock, Time And Calendar Display Modes, Manual Settings - time zone
 |
UPC - 012345626869
View all Honeywell TE653ELW manuals
Add to My Manuals
Save this manual to your list of manuals |
Page 11 highlights
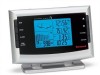
atomic time signal from the NIST Atomic clock in Boulder, Colorado. The WWVB tower icon on the unit's display will flash indicating a radio signal reception from the WWVB station. If the tower icon is not fully lit, or if the time and date are not set automatically, please consider the following: • During night-time hours, atmospheric disturbances are typically less severe and radio signal reception may improve. A single daily reception is sufficient enough to keep the clock accuracy within 1 second. • Make sure the unit is positioned at 8 feet (2 meters) distance from any interference source such as a TV, computer monitor, microwave, etc. • Within concrete wall rooms such as basements or office buildings, the received signal may be weakened. Always place the Weather Forecaster near the window for better reception. ATOMIC CLOCK Immediately after establishing communication between the main unit and remote sensor, the atomic time signal receiver will open and start to search for the atomic time signal. The search usually takes between 5-8 minutes. NOTE: Do not press any buttons on the main unit during auto search as it may interrupt product's operation, and you will need to start set up procedure again. Once the atomic time signal is received, the date and time will be set automatically, and the [ ] icon will appear. NOTE: It is necessary to set your Time Zone, having in mind that the default zone is a US Pacific Standard Time (PST). (Refer to MANUAL SETTINGS section) If the time signal has not been received in 8 minutes, you may use the MODE button to set the time and date manually. (Refer to the MANUAL SETTINGS section). 21 After the clock is set manually, place the Weather Forecaster by the window for the better reception. The atomic clock receiver is programmed that it will continue to search for the atomic time signal daily for every hour between 1:00 am and 4:30 am. Once the time signal has been successfully received, the time and date will be updated automatically. TIME AND CALENDAR DISPLAY MODES The Barometric Weather Forecaster displays current time in two display modes - in hour-minutes-seconds format and in hour-minutes-day. The date is displayed in month-date format. MANUAL SETTINGS NOTE: Use buttons on the front It is necessary to set the desired US TIME ZONE. TIME ZONE • Press MODE button once so that the Day of the Week abbreviation is displayed to the right of the time; for example: pm 2:37tu • Select the Time Zone by pressing and holding UP ( ▲) button for 3 seconds • Keep holding UP ( ▲) button until the desired US Time Zone (Pacific, Mountain, Central or Eastern) is highlighted on the display's US map, located to the right of the time display and above the day of the week • Release the UP ( ▲) button. The Time Zone is set CLOCK • Press and hold MODE button for 3 seconds: the year will flash. Press UP ( ▲) or DOWN ( ▼) to change flashing digits. • After the year is set, press MODE button to confirm and move to the 21 22
-
 1
1 -
2
-
3
-
4
-
5
-
 6
6 -
 7
7 -
 8
8 -
 9
9 -
 10
10 -
 11
11 -
 12
12 -
 13
13 -
 14
14 -
 15
15
 |
 |
