Honeywell TE653ELW User Manual - Page 3
Product Overview
 |
UPC - 012345626869
View all Honeywell TE653ELW manuals
Add to My Manuals
Save this manual to your list of manuals |
Page 3 highlights
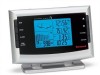
and maintenance. We recommend cleaning the remote sensor periodically, as the dirt and debris may affect sensor accuracy. PRODUCT OVERVIEW REMOTE TEMPERATURE & HUMIDITY SENSOR FEATURES • Remote data transmission to the main unit via 433 MHz frequency • LCD displays temperature, humidity and channel • Selection of the temperature display in Celsius or Fahrenheit • Three (3) transmission channels selection • Case can be wall mounted using built-in hanger A. LED INDICATOR • Flashes once when the remote sensor transmits a reading to the main unit. • Flashes twice when battery power is low. B. BATTERY COMPARTMENT • Holds two AA-size batteries C. RESET • Resets all previous settings 5 D. CHANNEL SWITCH • Selects the desired channel -1,2 or 3 E. WALL-MOUNT RECESSED OPENING • Keeps the remote sensor on the wall F. °C/°F SWITCH • Selects the temperature display in Fahrenheit or Celsius NOTE: Install the batteries; select the channel and temperature in °C or °F before mounting the sensor. BATTERY INSTALLATION • Remove the screws from the battery compartment with a small Phillips screwdriver. • Set the channel 1 through 3. The switch is located in the battery compartment. Channel 1 is typically selected if only one remote sensor is being used. • Install 2 "AA" size alkaline batteries (not included) matching the polarities shown in the battery compartment. • Select the temperature unit in °F or °C by pressing °C/°F switch with a paper clip or similar tool • Replace the battery compartment door and secure the screws. • Secure the remote sensor in the desired location. MOUNTING • The remote thermo-hygrometer sensor can be placed on the flat surface or mounted on the wall in vertical position • Use the wall mount hardware and screws when mounting the thermo-hygrometer sensor on the wall PLACEMENT • The remote thermo-hygrometer sensor should be placed in the area 5 6
-
 1
1 -
 2
2 -
 3
3 -
 4
4 -
 5
5 -
 6
6 -
 7
7 -
 8
8 -
 9
9 -
10
-
11
-
12
-
13
-
14
-
15
 |
 |
