Hoover F5914 900 Product Manual - Page 13
Tools - hose replacement
 |
UPC - 073502025550
View all Hoover F5914 900 manuals
Add to My Manuals
Save this manual to your list of manuals |
Page 13 highlights
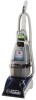
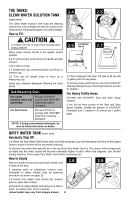
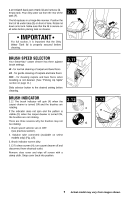
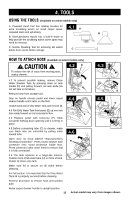
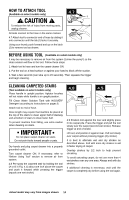
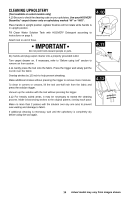
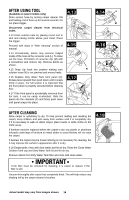
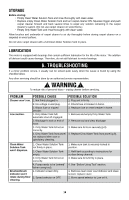
4. TOOLS Using the tools (Available on select models only) A. Powered Hand Tool has rotating brushes for extra scrubbing action on small carpet areas, 4.1 A carpeted stairs and upholstery. B B. Stair/Upholstery Nozzle has a built-in brush to help provide the scrubbing action some spots may need for removal. C. Nozzle Cleaning Tool for removing lint and/or debris from nozzle before storage C How to attach hose (Available on select models only) ! CAUTION ! To reduce the risk of injury from moving parts, unplug cleaner. 4.2 D 34..230 E 4.2 To prevent possible leaking, remove Clean Water Solution Tank by pressing down on tank handle (D) and pulling forward; set tank aside (do not set tank on furniture). E Remove hose from storage rack. Step on handle release pedal and lower carpet cleaner handle until it rests on the floor. Unlatch back part of Dirty Water Tank and remove lid. 4.4 4.5 G 4.3 Pull Dirty Water Tank front panel (E) up one inch then rotate forward so it is horizontal to floor. F 4.4 Replace panel with converter (F). Slide converter halfway down opening until it is firmly in place. 4.5 Before connecting tube (G) to cleaner, make sure black tabs are extended by pulling collar toward tube. 4.6 Open door on hood labeled "Stair/upholstery Cleaning Connection". Press round solution tube H connector onto round projection inside door. Press connector collar down firmly to ensure that it is fully connected. 4.6 The tank replaces in a hinge-like manner. Position front of lid under tabs (H) on front of tank. Rotate lid down onto tank. Make sure lid is secure on all sides before cleaning. For full suction, it is important that the Dirty Water Tank lid is properly secured before cleaning. Reverse procedure to remove hose and solution tube. Raise carpet cleaner handle to upright position. 13 Actual model may vary from images shown.
-
 1
1 -
2
-
3
-
4
-
5
-
6
-
7
-
 8
8 -
 9
9 -
 10
10 -
 11
11 -
 12
12 -
 13
13 -
 14
14 -
 15
15 -
 16
16 -
 17
17 -
 18
18 -
19
-
20
-
21
-
22
-
23
-
24
-
25
-
26
-
27
-
28
-
29
-
30
-
31
-
32
-
33
-
34
-
35
-
36
-
37
-
38
-
39
-
40
-
41
-
42
-
43
-
44
-
45
-
46
-
47
-
48
-
49
-
50
-
51
-
52
-
53
-
54
-
55
-
56
-
57
-
58
-
59
-
60
-
61
-
62
-
63
 |
 |