Hoover F8100900 Product Manual - Page 9
Attach Handle, Tool Storage, How To Reattach Tool Door
 |
UPC - 073502029268
View all Hoover F8100900 manuals
Add to My Manuals
Save this manual to your list of manuals |
Page 9 highlights
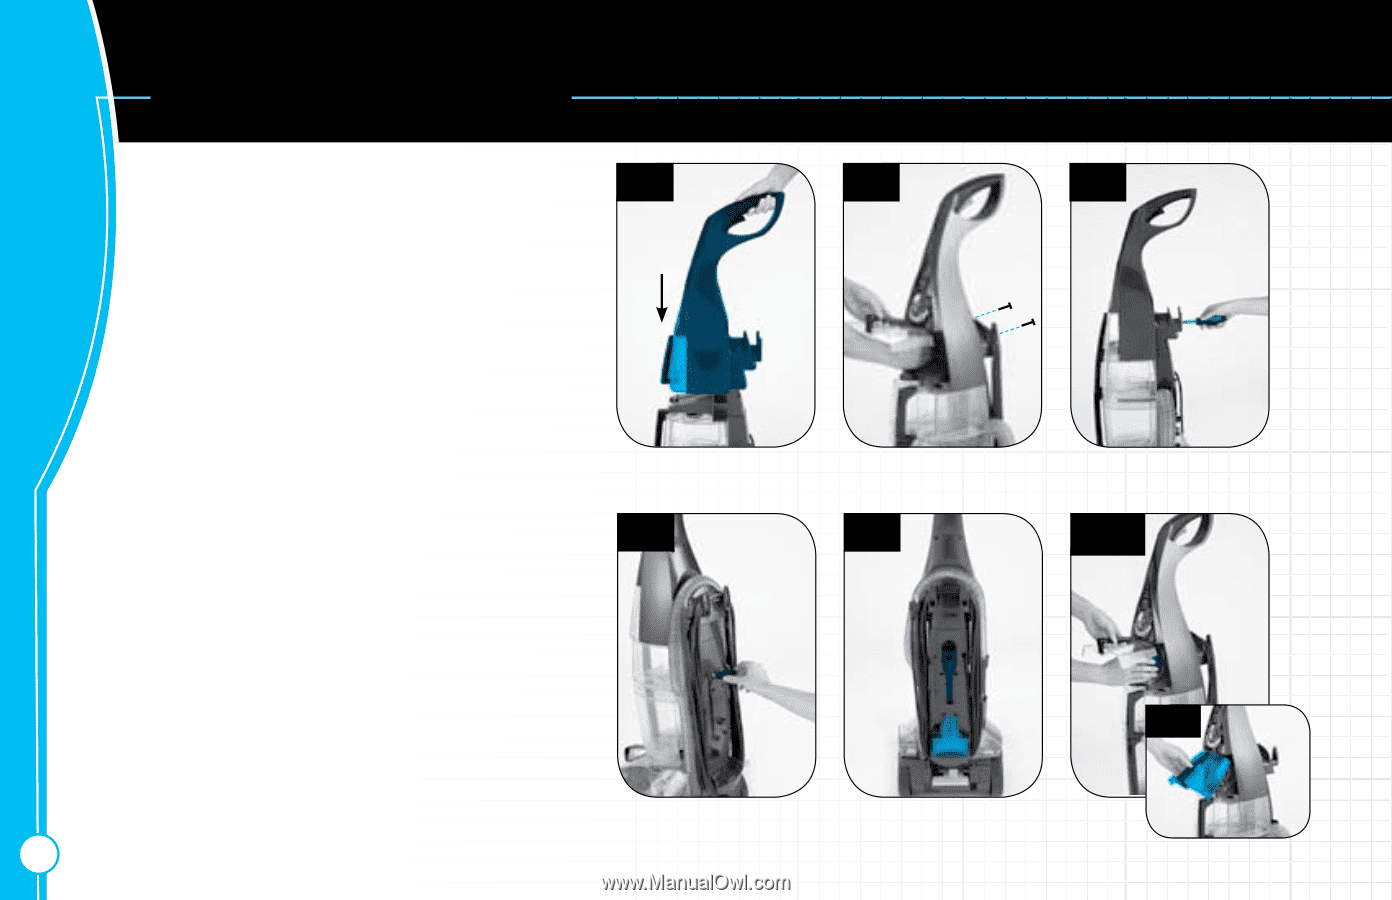
HOW TO ASSEMBLE 2. HOW TO ASSEMBLE Attach Handle TOOL REQUIRED: PHILLIPS OR FLATHEAD SCREWDRIVER 2.3 Slide upper handle down into cleaner body. 2.4 Insert bolts into center of cord hooks (H) - Open tool door on front storage area and attach nuts. 2.5 Tighten with screwdriver. 2.3 Tool Storage 2 . 6 Snap crevice tool retainer into back of cleaner. 2.7 Store crevice and brush tool on back of cleaner. (Optional tools shown.) 2.8a Store SpinScrubTM tool in front storage area located beneath the cleaner control panel. How To Reattach Tool Door 2.8b The tool door is designed with a breakaway feature which allows it to snap free if it is pushed too far open. To reattach, align hinges of cover with holes on sides of tool storage area. Snap door into place. 2.6 8 2.4 2.5 H 2.7 2.8a 2.8b
-
 1
1 -
2
-
3
-
 4
4 -
 5
5 -
 6
6 -
 7
7 -
 8
8 -
 9
9 -
 10
10 -
 11
11 -
 12
12 -
 13
13 -
 14
14 -
15
-
16
-
17
-
18
-
19
-
20
-
21
-
22
-
23
-
24
-
25
-
26
-
27
-
28
-
29
-
30
-
31
-
32
-
33
-
34
-
35
-
36
-
37
-
38
-
39
-
40
-
41
-
42
-
43
-
44
-
45
-
46
-
47
-
48
 |
 |