Hoover U5146-900 Owners Manual - Page 9
Secondary and final, filters
 |
View all Hoover U5146-900 manuals
Add to My Manuals
Save this manual to your list of manuals |
Page 9 highlights
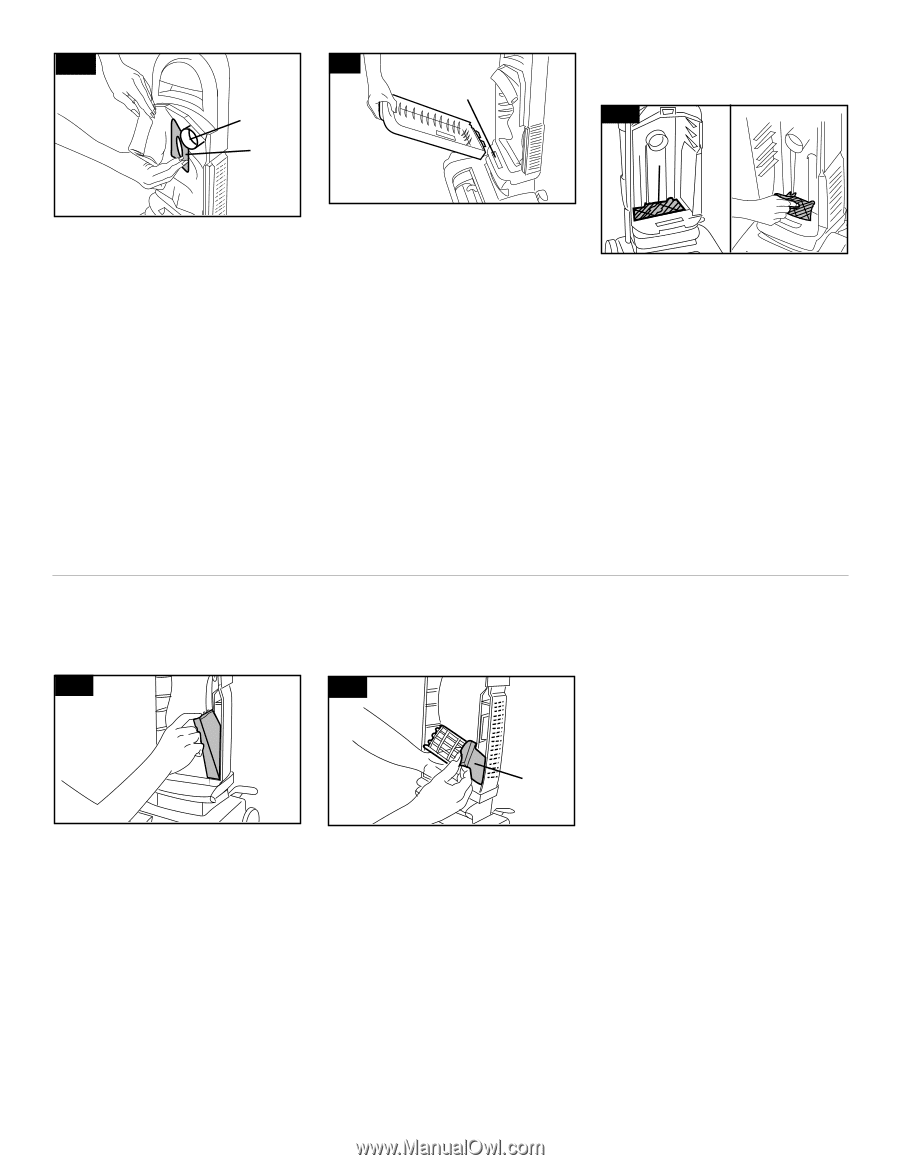
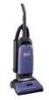
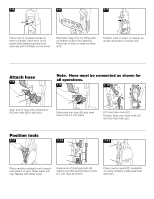
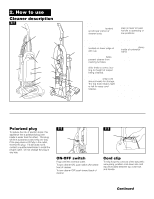
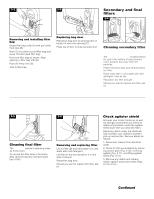
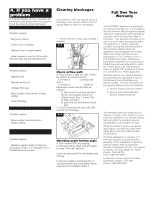
3-2 3-3 Secondary and final C filters B 3-4 A A Removing and installing filter bag Grasp filter bag collar (A) and pull collar from tube (B). Note: Do not clean out old filter bag and reuse. Discard used filter bag. Hold new filter bag as shown. Align opening in filter bag with (B). Push (A) firmly onto (B). Tuck in filter bag. Replacing bag door Reposition bag door by placing tabs on bottom of door into opening (C). Press top of door to snap securely shut. Cleaning secondary filter Disconnect cleaner from electrical outlet. The secondary filter (A), located behind the grill in the bottom of bag compartment, protects the motor from dirt particles. If filter becomes dirty, pull off grill and lift out filter. Hand wash filter in cold water with mild detergent, then air dry. Reposition dry filter and grill. Should you want to replace this filter, ask for HOOVER part No. 38765019. 3-5 Cleaning final filter The final filter assists in returning clean air to the room. To remove this filter when it becomes dirty, remove bag door and pull down top of filter. 3-6 B Removing and replacing filter Lift out filter (B) and hand wash it in cold water with mild detergent. Let filter air dry and reposition it on the side of cleaner. Reposition bag door. Should you want to replace this filter, ask for HOOVER part No. 40110004. Do not operate cleaner without either the secondary or final filter in place. Check agitator shield Because your cleaner picks up so well, we strongly recommend you check for debris accumulation under the agitator shield each time you clean the filters. Removing debris under the shield will help maintain your cleaner's excellent pick up and suction. Remove debris as follows: 1. Disconnect cleaner from electrical outlet. 2. Check for dirt accumulation by removing bottom plate (Fig. 3-10), removing agitator (Fig. 3-11), and lifting agitator shield (Fig. 3-13). 3. Remove any debris and replace shield, agitator and bottom plate (Figs. 3-13 to 3-15). Continued § 9
-
 1
1 -
2
-
3
-
 4
4 -
 5
5 -
 6
6 -
 7
7 -
 8
8 -
 9
9 -
 10
10 -
 11
11 -
 12
12
 |
 |