Hoover U6634900 Manual - Page 7
Maintenance - vacuum
 |
UPC - 719881163918
View all Hoover U6634900 manuals
Add to My Manuals
Save this manual to your list of manuals |
Page 7 highlights
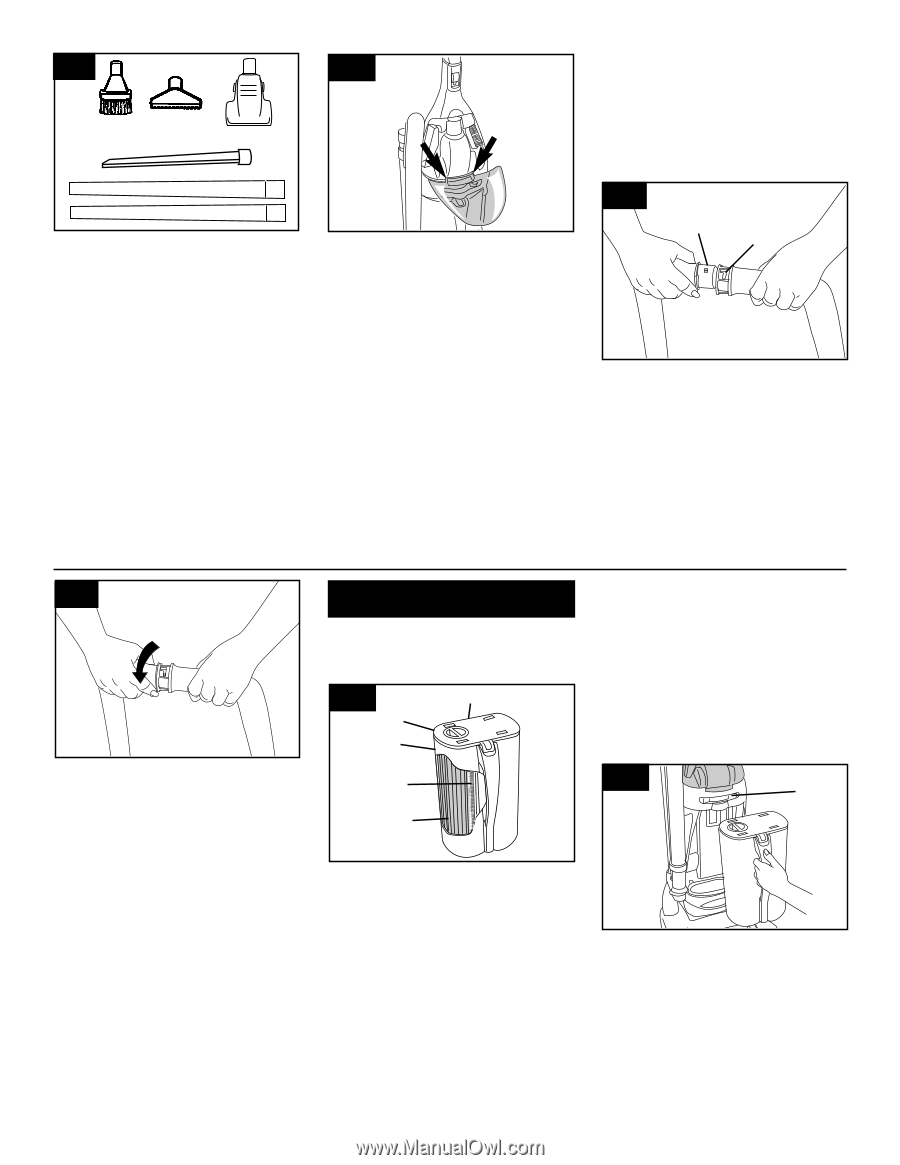
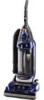
2-16 H L I K J 2-17 Select proper tool H. Dusting brush may be used for carved furniture, table tops, books, lamps, lighting fixtures, venetian blinds, baseboards, shutters, and registers. I. Furniture nozzle may be used for upholstered furniture, draperies, mattresses, clothing, automobile interiors, and carpeted stairs. J. Powered hand tool may be used for upholstered furniture, carpeted stairs and hard-to-reach places. K. Crevice wand can be used in tight spaces, corners and along edges in such places as dresser drawers, upholstered furniture, stairs, and baseboards. It can also be used for extra reach with the dusting brush and/or extension wand. L. Wands are used to give extra length to your hose. Use them with any of the above tools. 2-19 Slide hose into slots and twist hose to lock it into place. (To detach hose, reverse procedure.) Attach wands or tools to the other end of hose. How to attach tool cover The tool cover is designed with a "break-away" feature which allows it to snap free if it is pushed open too far. To reattach, align hinges of cover with slots on sides of tool storage area. Push cover down to secure in place. How to clean tools To clean the hose and the powered hand tool, wipe off dirt with a cloth dampened in a mild detergent. Rinse with a damp cloth. Do not submerge powered hand tool in water. Cleaning tools may be washed in warm water with a detergent. Rinse and air dry before using. 3. Maintenance Familiarize yourself with these home maintenance tasks as proper use and care of your cleaner will ensure continued cleaning effectiveness. 3-1 E A B C D Extra hose (available at additional cost if not included with your cleaner) The extra reach hose provides a 20 foot reach to allow easier cleaning of stairs and hard-to-reach high places. To attach hose to your vacuum cleaner, follow the instructions below. 2-18 M N Turn cleaner OFF before disconnecting and connecting hose. Align end of extra reach hose with projections (M) over slots (N) on end of attached hose. When to empty It is recommended that the dirt cup be emptied before the dirt reaches the dirt inlet opening on back of dirt cup (Fig. 3-1) or after every use if preferred. CAUTION: Very fine materials, such as face powder, cornstarch or fireplace soot, may seal the filter and cause loss of suction. When using the cleaner for this type of dust, empty the cup and clean the filters often. 3-2 F Dirt cup The dirt cup assembly consists of the following parts: Lid (A) Dirt Cup (B) Pre-filter (C) HEPA Cartridge Filter(D) Dirt Inlet Opening (E) While the cleaner is in operation, the prefilter screen will stop larger debris from entering the HEPA cartridge filter chamber. This larger debris will be seen collecting in the left side of the dirt cup. The HEPA cartridge filter will collect fine particles that have passed through the pre-filter screen. How to empty Disconnect cleaner from electrical outlet. Do not use cleaner without dirt cup or filters in place. Slide latch (F) to the left to unlock. Lift cup slightly and pull straight out to remove from cleaner. Continued § 7
-
 1
1 -
 2
2 -
 3
3 -
 4
4 -
 5
5 -
 6
6 -
 7
7 -
 8
8 -
 9
9 -
 10
10 -
 11
11 -
 12
12 -
13
-
14
-
15
-
16
-
17
-
18
-
19
-
20
-
21
-
22
-
23
-
24
-
25
-
26
-
27
-
28
-
29
-
30
-
31
-
32
-
33
-
34
-
35
-
36
 |
 |