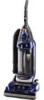
Hoover U6634900 Manual - Page 9
Headlight replacement, Final filter - parts
 |
UPC - 719881163918
View all Hoover U6634900 manuals
Add to My Manuals
Save this manual to your list of manuals |
Page 9 highlights
3-10 3-11 M 3-12 To re-assemble filter assembly, place large knob of HEPA cartridge filter in hole on bottom of pre-filter. Snap top of HEPA cartridge filter into place. L Align grooves (L) on pre-filter frame with ribs (M) in dirt cup. 3-13 3-14 N O Final filter Replacing final filter The final filter assists in the filtration process to return clean air to the room. To replace this filter when it becomes dirty, open the door on the side of the cleaner. Remove filter (N) and discard. Reposition new filter on the side of cleaner. Make sure the white side of the filter faces outward. Close door. Should you want to replace this filter, ask for part No. 40110006. Do not operate cleaner without the filter in place. Reattaching filter door The filter door is designed with a "break-away" feature which allows it to snap free if it is pushed open too far. To reattach, align hinges (O) of cover with slots on sides of filter area. Press door back into place. Headlight replacement What to buy This cleaner uses a 12 volt, wedge base type 912 bulb, Hoover part No. 27313101. 3-15 3-16 Slide filter assembly down into cup until a light snap is felt. Gently pull up on assembly to ensure that it is seated properly in the cup. Ensure that no part of pre-filter screen extends above top edge of dirt cup. Close lid and return cup to cleaner (Fig. 3-5). Note: If dirt cup lid does not close all the way, first ensure that filter assembly is pushed down all the way. Then, turn knob on lid slightly until lid closes (see Fig. 3-3). Check brush roll channels Because your cleaner picks up so well, we strongly recommend you check for debris accumulation in the channels next to the brush roll when you check the filters. Removing this debris will help maintain your cleaner's excellent pick up and suction. Remove debris as follows: Disconnect cleaner from electrical outlet. Check for debris accumulation by removing bottom plate (Fig. 3-18) and looking in the channels next to the brush roll (Fig. 3-27). Remove any accumulation. Reposition bottom plate (Fig. 3-22). 3-17 Removing lens Disconnect cleaner from electrical outlet. Using a screwdriver, remove the two screws as shown and lift off lens. Installing bulb Pull old bulb straight out of socket. Push new bulb straight into socket until locked in place Excessive force is not required. Replacing lens Reposition lens and secure with the two screws. Continued 9
-
 1
1 -
2
-
3
-
 4
4 -
 5
5 -
 6
6 -
 7
7 -
 8
8 -
 9
9 -
 10
10 -
 11
11 -
 12
12 -
 13
13 -
 14
14 -
15
-
16
-
17
-
18
-
19
-
20
-
21
-
22
-
23
-
24
-
25
-
26
-
27
-
28
-
29
-
30
-
31
-
32
-
33
-
34
-
35
-
36
 |
 |
