Husqvarna 525iLST Owner Manual - Page 13
Operation
 |
View all Husqvarna 525iLST manuals
Add to My Manuals
Save this manual to your list of manuals |
Page 13 highlights
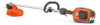
To attach the trimmer head 1. Make sure that the cutting attachment guard (A) is attached to the product. Refer to To attach the cutting attachment guard on page 12. D C B A 5. Turn the trimmer head (E) counterclockwise to tighten it to the output shaft. E 2. Make sure that the drive disc (C) is attached to the output shaft (D). 3. Put the locking pin (B) in the hole to lock the shaft. 4. Put the trimmer head (E) on the output shaft. 6. Remove the locking pin. Introduction Operation To connect the battery to the product WARNING: Read and understand the safety chapter before you use the product. Husqvarna Fleet Services™ Husqvarna Fleet Services™ is a cloud solution that gives the commercial fleet manager an overview of all products. Husqvarna Fleet Services™ can be added to 525iLST. For more information about Husqvarna Fleet Services™, refer to www.husqvarna.com. Bluetooth® wireless technology Products with built-in Bluetooth® wireless technology can connect to mobile devices and enables additional functions. The symbol for Bluetooth® wireless technology comes on when your mobile device is connected to the product. WARNING: Only use Husqvarna original batteries with the product. 1. Make sure that the battery is fully charged. 2. Push the battery into the battery holder of the product. The battery locks into position when you hear a click. To connect to the product with Husqvarna Fleet Services™ 1. Download the Husqvarna Fleet Services™ app to your mobile device. 2. Log on to the Husqvarna Fleet Services™ app. 3. Follow the instructions about how to pair the product with Husqvarna Fleet Services™. CAUTION: If the battery does not move easily into the battery holder, the battery is not installed correctly. This can cause damage to the product. 3. Make sure that the battery is installed correctly. Work position • Hold the product with 2 hands. • Hold the product on the right side of your body. • Keep the cutting attachment below waist level. • Keep body parts away from the hot surfaces. 1920 - 001 - 28.11.2022 13
-
 1
1 -
2
-
3
-
4
-
5
-
6
-
7
-
 8
8 -
 9
9 -
 10
10 -
 11
11 -
 12
12 -
 13
13 -
 14
14 -
 15
15 -
 16
16 -
 17
17 -
 18
18 -
19
-
20
-
21
-
22
-
23
-
24
-
25
-
26
-
27
-
28
-
29
-
30
-
31
-
32
-
33
-
34
-
35
-
36
-
37
-
38
-
39
-
40
-
41
-
42
-
43
-
44
-
45
-
46
-
47
-
48
-
49
-
50
-
51
-
52
-
53
-
54
-
55
-
56
-
57
-
58
-
59
-
60
-
61
-
62
-
63
-
64
 |
 |
