Husqvarna HU775L Operation Manual - Page 14
Lawn Mower - oil
 |
View all Husqvarna HU775L manuals
Add to My Manuals
Save this manual to your list of manuals |
Page 14 highlights
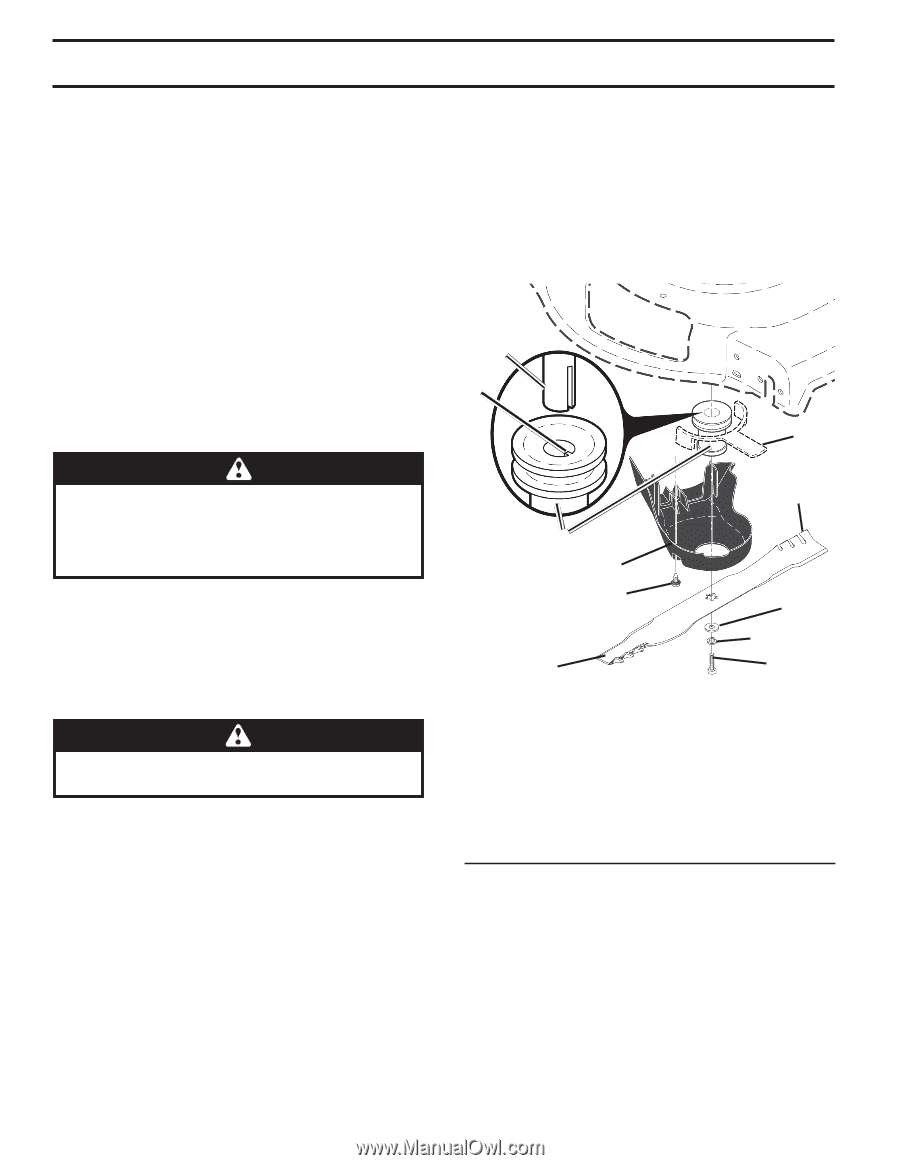
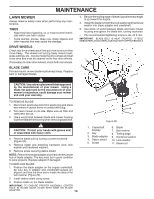
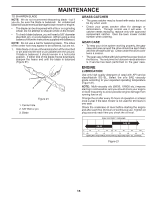
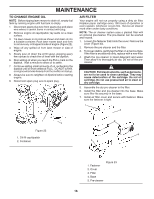
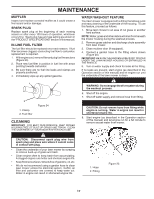
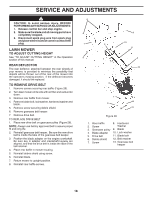
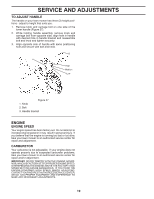
MAINTENANCE LAWN MOWER Always observe safety rules when performing any maintenance. TIRES • Keep tires free of gasoline, oil, or insect control chemicals which can harm rubber. • Avoid stumps, stones, deep ruts, sharp objects and other hazards that may cause tire damage. DRIVE WHEELS Check rear drive wheels each time you mow to be sure they move freely. The wheels not turning freely means trash, grass cuttings, etc., may be inside the drive wheel and dust cover area and must be cleaned out to free drive wheels. If necessary to clean drive wheels, check both rear wheels. BLADE CARE For best results, mower blade must be kept sharp. Replace bent or damaged blades. 4. Be sure the trailing edge of blade (opposite sharp edge) is up toward the engine. 5. Install the blade bolt with the lock washer and hardened washer into blade adapter and crankshaft. 6. Use block of wood between blade and lawn mower housing and tighten the blade bolt, turning clockwise. • The recommended tightening torque is 35-40 ft. lbs. IMPORTANT: BLADE BOLT IS HEAT TREATED. IF BOLT NEEDS REPLACING, REPLACE ONLY WITH APPROVED BOLT. 1 2 7 CAUTION: Use only a replacement blade approved by the manufacturer of your mower. Using a blade not approved by the manufacturer of your mower is hazardous, could damage your mower and void your warranty. TO REMOVE BLADE 1. Disconnect spark plug wire from spark plug and place wire where it cannot come in contact with plug. 2. Turn lawn mower on its side. Make sure air filter and carburetor are up. 3. Use a wood block between blade and mower housing to prevent blade from turning when removing blade bolt. CAUTION: Protect your hands with gloves and/ or wrap blade with heavy cloth. 4. Remove blade bolt by turning counter-clockwise (Figure 20). 5. Remove blade and attaching hardware (bolt, lock washer and hardened washer). 6. Remove screw securing debris shield. NOTE: Remove the blade adapter and check the key inside hub of blade adapter. The key must be in good condition to work properly. Replace adapter if damaged. TO REPLACE BLADE 1. Position the blade adapter on the engine crankshaft. Be sure key in adapter and crankshaft keyway are aligned; and that the drive belt is inside the tabs of the belt retainer (Figure 20). 2. Install debris shield using screw. 3. Position blade on the blade adapter. IMPORTANT: TO ENSURE PROPER ASSEMBLY, CENTER HOLE IN BLADE MUST ALIGN WITH STAR ON BLADE ADAPTER. 14 3 4 5 6 8 9 10 11 Figure 20 1. Crankshaft keyway 2. Key 3. Blade adapter 4. Debris shield 5. Screw 6. Blade 7. Belt retainer 8. Trailing edge 9. Hardened washer 10. Lock washer 11. Blade bolt
-
 1
1 -
2
-
3
-
4
-
5
-
6
-
7
-
8
-
 9
9 -
 10
10 -
 11
11 -
 12
12 -
 13
13 -
 14
14 -
 15
15 -
 16
16 -
 17
17 -
 18
18 -
 19
19 -
20
-
21
-
22
-
23
-
24
-
25
-
26
-
27
-
28
-
29
-
30
-
31
-
32
-
33
-
34
-
35
-
36
-
37
-
38
-
39
-
40
-
41
-
42
-
43
-
44
-
45
-
46
-
47
-
48
-
49
-
50
-
51
-
52
 |
 |