Husqvarna LE121P Owner Manual - Page 16
Maintenance
 |
View all Husqvarna LE121P manuals
Add to My Manuals
Save this manual to your list of manuals |
Page 16 highlights
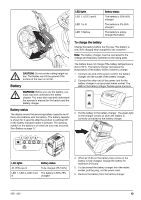
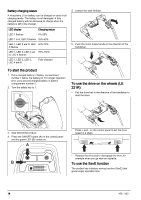
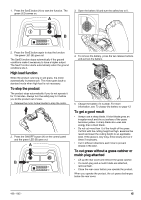
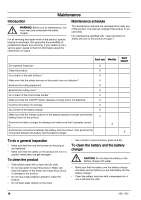
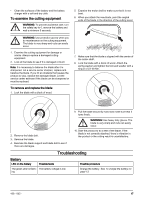
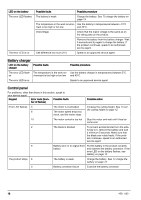
Maintenance Introduction WARNING: Before you do maintenance, you must read and understand the safety chapter. For all servicing and repair work on the product, special training is necessary. We guarantee the availability of professional repairs and servicing. If your dealer is not a service agent, speak to them for information about the nearest service agent. Maintenance schedule The maintenance intervals are calculated from daily use of the product. The intervals change if the product is not used daily. For maintenance identified with * see instructions in Safety devices on the product on page 7. Each use Monthly Do a general inspection X Clean the product X Do a check of the start inhibitor * X Make sure that the safety devices on the product are not defective * X Examine the cutting equipment X Examine the cutting cover * X Do a check of the motor brake handle * X Make sure that the ON/OFF button operates correctly and is not defective X Examine the battery for damage X Do a check of the battery charge X Make sure that the release buttons on the battery operates correctly and that the battery locks into the product X Examine the battery charger for damage and make sure that it operates correctly. X Examine the connections between the battery and the product. Also examine the connection between the battery and the battery charger. Each season X To do a general inspection • Make sure that the nuts and screws on the product are tightened. • Make sure that the cables on the product are not in a position where they can get damaged. To clean the product • Clean plastic parts with a clean and dry cloth. • Do not use water to clean the product. Water can enter the battery or the motor and cause short circuit or damage to the product. • Do not use a high pressure washer to clean the product. • Do not flush water directly on the motor. • Use a brush to remove leaves, grass and dirt. To clean the battery and the battery charger CAUTION: Do not clean the battery or the battery charger with water. • Make sure that the battery and the battery charger are clean and dry before you put the battery into the battery charger. • Clean the battery terminals with compressed air or use a soft and dry cloth. 16 428 - 002 -
-
 1
1 -
2
-
3
-
4
-
5
-
6
-
7
-
8
-
9
-
10
-
 11
11 -
 12
12 -
 13
13 -
 14
14 -
 15
15 -
 16
16 -
 17
17 -
 18
18 -
 19
19 -
 20
20 -
 21
21 -
22
-
23
-
24
-
25
-
26
-
27
-
28
-
29
-
30
-
31
-
32
-
33
-
34
-
35
-
36
-
37
-
38
-
39
-
40
-
41
-
42
-
43
-
44
-
45
-
46
-
47
-
48
-
49
-
50
-
51
-
52
-
53
-
54
-
55
-
56
-
57
-
58
-
59
-
60
-
61
-
62
-
63
-
64
-
65
-
66
-
67
-
68
 |
 |
