Husqvarna ST131 Owners Manual - Page 14
MAINTENANCE, Maintenance - belt
 |
View all Husqvarna ST131 manuals
Add to My Manuals
Save this manual to your list of manuals |
Page 14 highlights
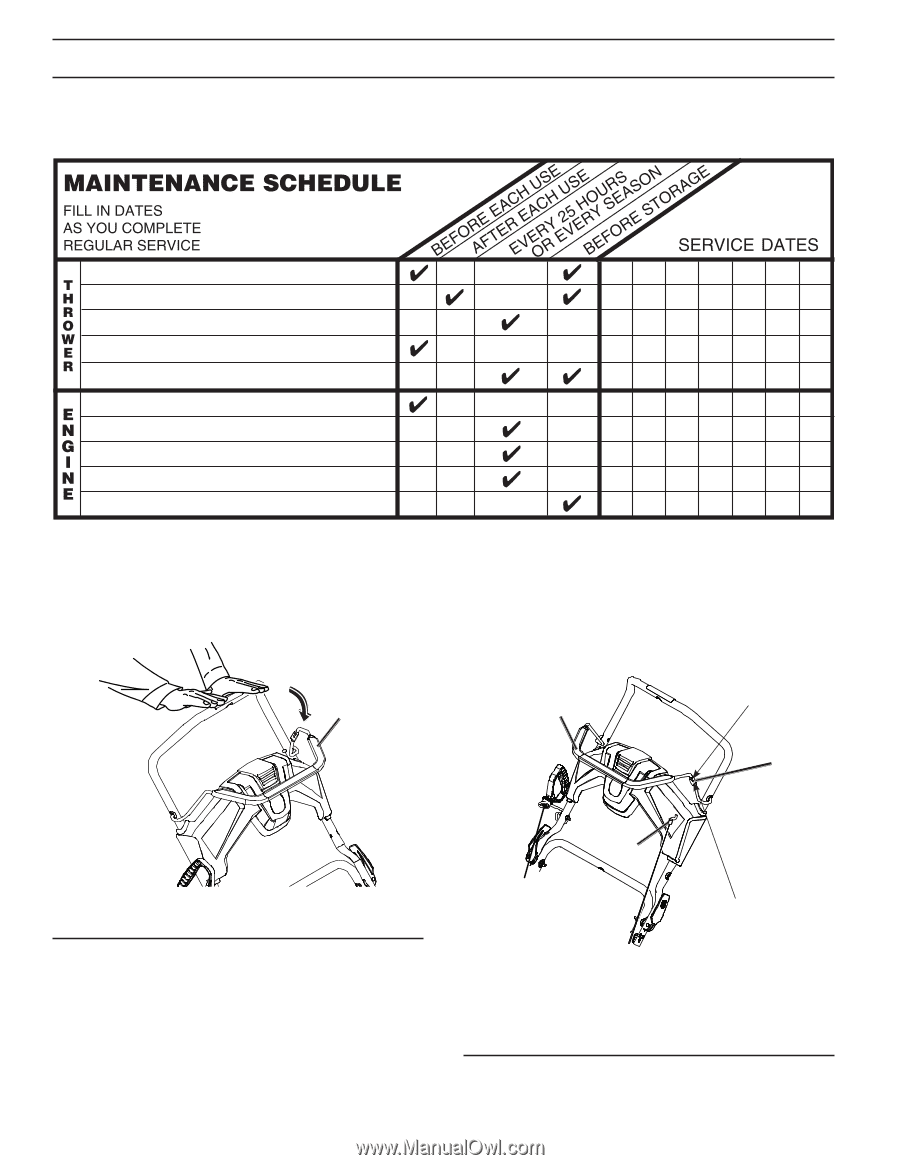
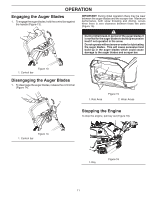
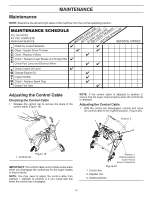
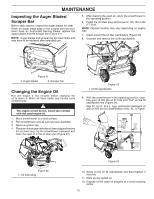
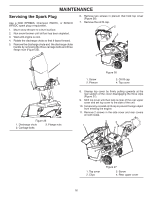
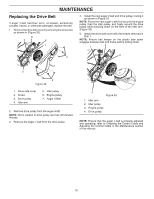
MAINTENANCE Maintenance NOTE: Determine the left and right sides of the machine from the normal operating position. Check for Loose Fasteners Clean / Inspect Snow Thrower Clean / Replace V-Belts Check / Replace Auger Blades and Scraper Bar Check Fuel Lines and Electrical Wires Check Engine Oil Level Change Engine Oil Inspect Muffler Check / Replace Spark Plug Empty Fuel Tank Adjusting the Control Cable Checking the Control Cable 1. Release the control bar to remove the slack in the control cable (Figure 19). 1 NOTE: If the control cable is adjusted to position 2, ensure that the auger stops properly when the control bar is released Adjusting the Control Cable 1. With the control bar disengaged, unhook and move the control cable to the highest position. (Figure 20). Position 2 1 3 Figure 19 1. Control bar IMPORTANT: The control cable must contain some slack when you disengage the control bar for the auger blades to stop properly. NOTE: You may need to adjust the control cable from position 1 (default) to position 2 if you notice belt slip when the control bar is engaged. 14 2 Position 1: Default position (Lower Hole as shown in illustration) Figure 20 1. Control bar 2. Adjuster link 3. Cable positions
-
 1
1 -
2
-
3
-
4
-
5
-
6
-
7
-
8
-
 9
9 -
 10
10 -
 11
11 -
 12
12 -
 13
13 -
 14
14 -
 15
15 -
 16
16 -
 17
17 -
 18
18 -
 19
19 -
20
-
21
-
22
-
23
-
24
-
25
-
26
-
27
-
28
 |
 |