IBM L170 User Guide
IBM L170 - ThinkVision - 17" LCD Monitor Manual
 |
UPC - 087944938781
View all IBM L170 manuals
Add to My Manuals
Save this manual to your list of manuals |
IBM L170 manual content summary:
- IBM L170 | User Guide - Page 1
IBM ThinkVision™ L170 Monitor User's Guide L170 English - IBM L170 | User Guide - Page 2
First Edition (April/2003) Note: For important information, refer to the Monitor Safety and Warranty manual that comes with this monitor. - IBM L170 | User Guide - Page 3
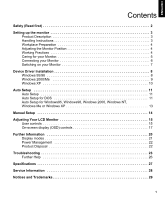
Me or Windows XP 13 Manual Setup 14 Adjusting Your LCD Monitor 15 User controls 15 On-screen display (OSD) controls 17 Further Information 20 Display modes 21 Power Management 22 Product Disposal 22 Troubleshooting 23 Further Help 26 Specifications 27 Service Information 28 Notices and - IBM L170 | User Guide - Page 4
í í í 2 - IBM L170 | User Guide - Page 5
items: • User's Guide and Installation CD • Monitor Safety and Warranty Information Manual • IBM ThinkVision L170 Monitor Setup Guide • Power Cord • IBM ThinkVision L170 Monitor • Analog Interface Cable - Attached to Monitor Handling Instructions Do not support the monitor within the screen area - IBM L170 | User Guide - Page 6
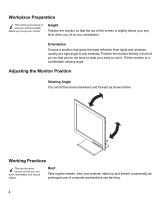
directly in front of you so that you do not have to twist your body to use it. Tilt the monitor to a comfortable viewing angle. Adjusting the Monitor Position Viewing Angle You can tilt the screen backward and forward as shown below. Working Practices This section gives advice on how you can - IBM L170 | User Guide - Page 7
rest your wrists when not typing. Consider using a wristpad. Eyesight Working with monitors, in common with any prolonged close work, can be visually demanding. Look Never use flammable cleaning material to clean your IBM monitor or any other electrical apparatus. 5 ITALIANO JAPANESE COMPL & WARR - IBM L170 | User Guide - Page 8
the 'Safety' Information located in the Monitor Safety and Warranty Information Manual before carrying out this procedure. 1. blue connector on your monitor's video cable. * If the power cord supplied is not attached to the monitor, please follow the instruction below: a. Tilt monitor all the way - IBM L170 | User Guide - Page 9
pushing and releasing the power switch marked . (To switch off your monitor, push and release the power switch again.) 3. To update or install device drivers, follow the instructions in the Device Driver Installation section on page 8. 4. To optimise the displayed image, run Auto Setup by following - IBM L170 | User Guide - Page 10
and click the HAVE DISK button. 8. Click OK. 9. Ensure that the CD drive letter is selected, and then select 'Drivers' folder. 10. Choose IBM ThinkVision L170 monitor and Click OK. The files will be copied from the CD to your hard disk drive. 11. Close all open windows and remove the CD. - IBM L170 | User Guide - Page 11
drive : and click the HAVE DISK button. 13. Click OK. 14. Ensure that the CD drive letter is selected, and then select the 'Drivers' folder. 15. Choose IBM ThinkVision L170 monitor and Click OK. The files will be copied from the CD to your hard disk drive. 16. Close all open windows and remove the - IBM L170 | User Guide - Page 12
drive : and click the HAVE DISK button. 13. Click OK. 14. Ensure that the CD drive letter is selected, and then select the 'Drivers' folder. 15. Choose IBM ThinkVision L170 monitor and Click OK. The files will be copied from the CD to your hard disk drive. 16. Close all open windows and remove the - IBM L170 | User Guide - Page 13
the display driver. The Auto Setup instructions require the monitor to be warmed up for 15 minutes. This is not required for normal operation. By pressing sure the computer's video mode is set in the range of the supported screen resolution shown in the Table on page 21. You should perform AUTO SETUP - IBM L170 | User Guide - Page 14
supported display mode is selected for your computer. 2. Wait approximately 15 minutes, until the monitor warms up. 3. Insert the User's Guide to Windows. If you use other operating systems, perform the appropriate Auto Setup for those systems using instructions given in "Auto Setup for Windows - IBM L170 | User Guide - Page 15
monitor warms up. 3. Drag the icon bar and tool bar, if they are displayed, to the bottom of the screen. 4. Insert the User's Guide and Installation CD into the computer CDROM drive. 5. Check the operating system installed on your computer and follow the instructions from the table below. Operating - IBM L170 | User Guide - Page 16
is still distorted after you perform AUTO SETUP or the Installation CD does not run on your system, perform MANUAL SETUP. 1. Have your monitor turned on for about 15 minutes, until the monitor warms up. 2. Display the image you most frequently use on the screen then go to windows shut down mode - IBM L170 | User Guide - Page 17
ELNIHGS Adjusting Your LCD Monitor User controls FRAINSÇA DUETHSC EPSAÑOL ITALIANO Thinkvision User control features • Dirct access controls When OSD is not displayed, Icon Control Description Image Setup Activates automatic image adhustment. Brightness Directly accesses to Brightness - IBM L170 | User Guide - Page 18
The image is already optimized for many display modes; however the user controls can be used to adjust the image to your liking. Operation • Press the OSD Enter button to display the main OSD menu. • Use the Arrow buttons to move among the icons. Select an icon and press - IBM L170 | User Guide - Page 19
time you turn it on each day. Thus, to achieve more accurate adjustments for parameters, allow the LCD monitor to warm up (be On) for at least 15 minutes before making any screen adjustments. The settings down. Vertical Position OK Controls and Adjustments ITALIANO JAPANESE COMPL & WARR 17 - IBM L170 | User Guide - Page 20
OSD Icon on Main Menu Submenu Image Setup Automatic Manual • Clock • Phase Image Properties Color 1. Preset Mode • 6500K • decreases 'red'. Increases or decreases 'green'. Increases or decreases 'blue'. Shows resolution, refresh rate, and product details. Note: This screen does not allow any - IBM L170 | User Guide - Page 21
of OSD. • Vertical Changes the vertical position of OSD. Factory Reset • Cancel • Reset Accessibility • Button repeat rate • Menu time out Resets monitor to the origital settings. Does not make the adjustment. Resets the settings. Changes button repeat rate and menu time out setting. Selects or - IBM L170 | User Guide - Page 22
mode changes. This is normal and the image can be readjusted using AUTO SETUP and the monitor controls. Unlike CRT monitors, which require a high refresh rate to minimize flicker, TFT technology is inherently flicker-free. If possible, configure your computer for 1280 × 1024 addressability at 60Hz - IBM L170 | User Guide - Page 23
before consulting this section. In most cases, AUTO SETUP can fix the problems. See Auto Setup for DOS on page 12 for details. Factory Set as detailed in the VESA "Display Monitor Timing Specification". Version 1.0, Revision 0.8, dated 09/17/98. ESPAÑOL ITALIANO JAPANESE COMPL & WARR 21 - IBM L170 | User Guide - Page 24
for energy efficiency. For optimal performance, switch off your monitor at the end of each working day, or whenever you expect to leave it unused for long periods during the day. State Power Indicator Screen Restoring Operation Compliance On Steady green Normal DPMS Standby Blinking green - IBM L170 | User Guide - Page 25
in the computer The display driver is trying to use a setting your monitor does not support No power to monitor Remove the other graphics adapter plugged into one of the expansion slot. If the card is built-in to the motherboard, check your system manual for instructions on how to disable the - IBM L170 | User Guide - Page 26
any key on the keyboard or move the mouse to restore operation. Check the Power Management software on your computer. Reconfigure the computer to use a supported display mode. Select Image Setup menu in the OSD. Then select MANUAL to adjust Phase/Clock settings. Adjust the Color settings. Reference - IBM L170 | User Guide - Page 27
ENGLISH FRANÇAIS Problem A few dots are missing, discolored, or inappropriately lighted. Possible Cause Suggested Action A small number of missing, discolored, or lighted dots may be present on the screen, which is an intrinsic characteristic of the TFT LCD technology and is not an LCD defect. - IBM L170 | User Guide - Page 28
number from the label on your monitor. 2. Purchase receipt. 3. Description of problem. 4. Computer type and model. 5. System configuration (hardware fitted, etc.). 6. System BIOS version number. 7. Operating System and version number. 8. Display driver version number. 9. Video Adapter Type. 26 - IBM L170 | User Guide - Page 29
monitor (Type-model 6734-**1) uses a 17-inch TFT LCD Power consumption figures are for the monitor and the power supply combined. Dimensions Weight Tilt Image Power Input Power Consumption Video Input Communications Supported Temperature: Operating: Storage: Shipping: Humidity: Operating: Storage: - IBM L170 | User Guide - Page 30
use by IBM service, or IBM authorized dealers, to support the customer warranty. Parts are for service use only. Model Type 6734 P/N 31P9560 31P9561 31P9562 31P9563 31P9564 31P9565 31P9566 Description FRU Monitor FRU Monitor FRU Stand FRU Stand FRU Video Cable User's Guide Steup Guide Color SB - IBM L170 | User Guide - Page 31
intellectual property right may be used instead. However, it is the user's responsibility to evaluate and verify the operation of any non-IBM product, program, or service. IBM may have patents or pending patent applications covering subject matter described in this document. The furnishing of this - IBM L170 | User Guide - Page 32
Trademarks The following terms, used in this publication, are trademarks or service marks of the IBM Corporation in the United States, other countries, or both: HelpCenter IBM ENERGY STAR® is a U.S. Govt. registered trademark. Microsoft® Windows®, and Windows NT are trademarks of Microsoft
-
 1
1 -
 2
2 -
 3
3 -
 4
4 -
 5
5 -
 6
6 -
 7
7 -
8
-
9
-
10
-
11
-
12
-
13
-
14
-
15
-
16
-
17
-
18
-
19
-
20
-
21
-
22
-
23
-
24
-
25
-
26
-
27
-
28
-
29
-
30
-
31
-
32
 |
 |

L170
User's Guide
IBM ThinkVision™ L170 Monitor
English