IBM L170 User Guide - Page 13
Auto Setup - driver
 |
UPC - 087944938781
View all IBM L170 manuals
Add to My Manuals
Save this manual to your list of manuals |
Page 13 highlights
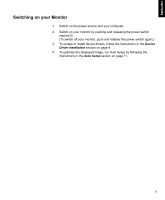
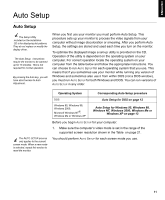
ENGLISH FRANÇAIS DEUTSCH ESPAÑOL Auto Setup Auto Setup The Setup Utility included on the installation CD is for displaying dot patterns. They do not replace or modify the display driver. The Auto Setup instructions require the monitor to be warmed up for 15 minutes. This is not required for normal operation. By pressing the Auto key, you will have direct access to Auto Adjustment. When you first use your monitor you must perform Auto Setup. This procedure sets up your monitor to process the video signals from your computer without image discoloration or smearing. After you perform Auto Setup, the settings are stored and used each time you turn on the monitor. To optimise the displayed image a set-up utility is provided on the CD. Operation of the utility is dependent on the operating system on your computer. For correct operation locate the operating system on your computer from the table below and follow the appropriate instructions. You can choose to run AUTO SETUP for each operating system that you use. This means that if you sometimes use your monitor while running any version of Windows and sometimes also use it from within DOS (not a DOS window), you must run AUTO SETUP for both Windows and DOS. You can run versions of AUTO SETUP in any order. The AUTO SETUP process only applies to the current screen mode. When a new mode is selected, repeat this section to reset the monitor. Operating System Corresponding Auto Setup procedure DOS Auto Setup for DOS on page 12 Windows 95, WIndows 98, Windows 2000, Microsoft Windows NT®, Windows Me or Windows XP Auto Setup for Windows 95, Windows 98, Windows NT, Windows 2000, Windows Me or Windows XP on page 13 Before you begin AUTO SETUP for your computer: 1. Make sure the computer's video mode is set in the range of the supported screen resolution shown in the Table on page 21. You should perform AUTO SETUP for each screen mode you use. ITALIANO JAPANESE COMPL & WARR 11
-
 1
1 -
2
-
3
-
4
-
5
-
6
-
7
-
 8
8 -
 9
9 -
 10
10 -
 11
11 -
 12
12 -
 13
13 -
 14
14 -
 15
15 -
 16
16 -
 17
17 -
 18
18 -
19
-
20
-
21
-
22
-
23
-
24
-
25
-
26
-
27
-
28
-
29
-
30
-
31
-
32
 |
 |
