Image Fitness 3.4c Instruction Manual - Page 4
Exercise Guidelines, Assembly
 |
View all Image Fitness 3.4c manuals
Add to My Manuals
Save this manual to your list of manuals |
Page 4 highlights
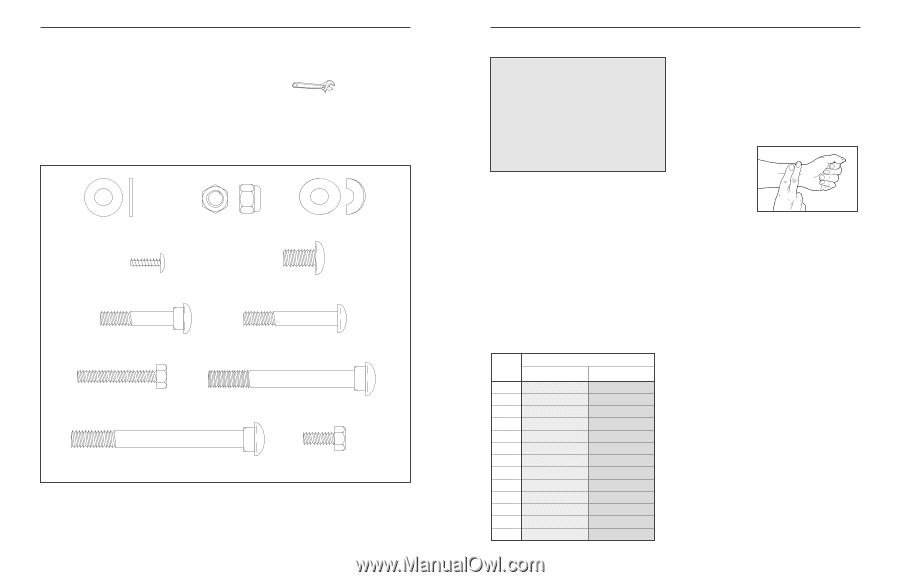
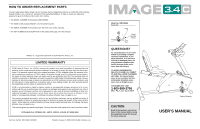
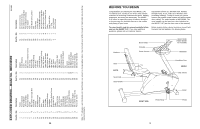
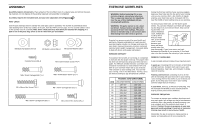
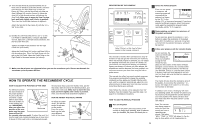
ASSEMBLY Assembly requires two persons. Place all parts of the recumbent cycle in a cleared area and remove the packing materials. Do not dispose of the packing materials until assembly is completed. Assembly requires the included tools and your own adjustable wrench . PART CHART Use the part drawings below to identify the small parts used in assembly. The number in parenthesis below each drawing refers to the key number of the part, from the PART LIST on page 14. The second number refers to the quantity used in assembly. Note: Some small parts may have been pre-attached for shipping. If a part is not in the parts bag, check to see if it has been pre-assembled. M8 Black Flat Washer (57)-16 M8 Nylon Locknut (56)-8 M8 Curved Washer (28)-7 Console Screw (20)-8 M8 x 15mm Button Screw (74)-4 M8 x 35mm Carriage Bolt (7)-4 M8 x 45mm Button Screw (17)-3 M6 x 38mm Hex Screw (73)-4 M8 x 70mm Carriage Bolt (72)-2 M8 x 80mm Carriage Bolt (63)-2 M6 x 15mm Hex Screw (29)-4 4 EXERCISE GUIDELINES WARNING: Before beginning this or any exercise program, consult your physician. This is especially important for individuals over the age of 35 or individuals with preexisting health problems. WARNING: The pulse sensor is not a medical device. Various factors may affect the accuracy of heart rate readings. The pulse sensor is intended only as an exercise aid in determining heart rate trends in general. Exercise has proven essential for good health and well-being. Regular participation in a well-rounded exercise program results in a stronger and more efficient heart, improved respiratory function, increased stamina, better weight management, increased ability to deal with stress, and greater self-esteem. EXERCISE INTENSITY To maximize the benefits of exercising, it is important to exercise with the proper intensity. The proper intensity level can be found by using your heart rate as a guide. For effective aerobic exercise, your heart rate should be maintained at a level between 70% and 85% of your maximum heart rate as you exercise. This is known as your training zone. You can find your training zone in the table below. Training zones are listed according to age and physical condition. AGE 20 25 30 35 40 45 50 55 60 65 70 75 80 TRAINING ZONE (BEATS/MIN.) UNCONDITIONED CONDITIONED 138-167 136-166 135-164 134-162 132-161 131-159 129-156 127-155 126-153 125-151 123-150 122-147 120-146 133-162 132-160 130-158 129-156 127-155 125-153 124-150 122-149 121-147 119-145 118-144 117-142 115-140 During the first few months of your exercise program, keep your heart rate near the low end of your training zone as you exercise. After a few months of regular exercise, your heart rate can be increased until it is near the middle of your training zone as you exercise. To measure your heart rate, use the built-in pulse sensor. You can also measure your heart rate by placing two fingers on your wrist as shown. Stop exercising and take a sixsecond heartbeat count. Multiply the result by ten to find your heart rate. (A six-second count is used because your heart rate drops quickly when you stop exercising.) If your heart rate is too high, decrease the intensity of your exercise. If your heart rate is too low, increase the intensity of your exercise. WORKOUT GUIDELINES A well-rounded workout includes three important parts: A warm-up, consisting of 5 to 10 minutes of stretching and light exercise. A proper warm-up increases your body temperature, heart rate, and circulation in preparation for exercise. Training zone exercise, consisting of 20 to 40 minutes of exercising with your heart rate in your training zone. (During the first few weeks of your exercise program, do not keep your heart rate in your training zone for longer than 20 minutes.) A cool-down, with 5 to 10 minutes of stretching. This will increase the flexibility of your muscles and will help to prevent post-exercise problems. EXERCISE FREQUENCY To maintain or improve your condition, plan three workouts each week, with at least one day of rest between workouts. After a few months of regular exercise, you may complete up to five workouts each week, if desired. Caution: Be sure to progress at your own pace and avoid overdoing it. Incorrect or excessive training may result in injury to your health. Remember, the key to success is make exercise a regular and enjoyable part of your everyday life. 13
-
 1
1 -
 2
2 -
 3
3 -
 4
4 -
 5
5 -
 6
6 -
 7
7 -
 8
8
 |
 |