Image Fitness 3.4c Instruction Manual - Page 5
Maintenance And Troubleshooting
 |
View all Image Fitness 3.4c manuals
Add to My Manuals
Save this manual to your list of manuals |
Page 5 highlights
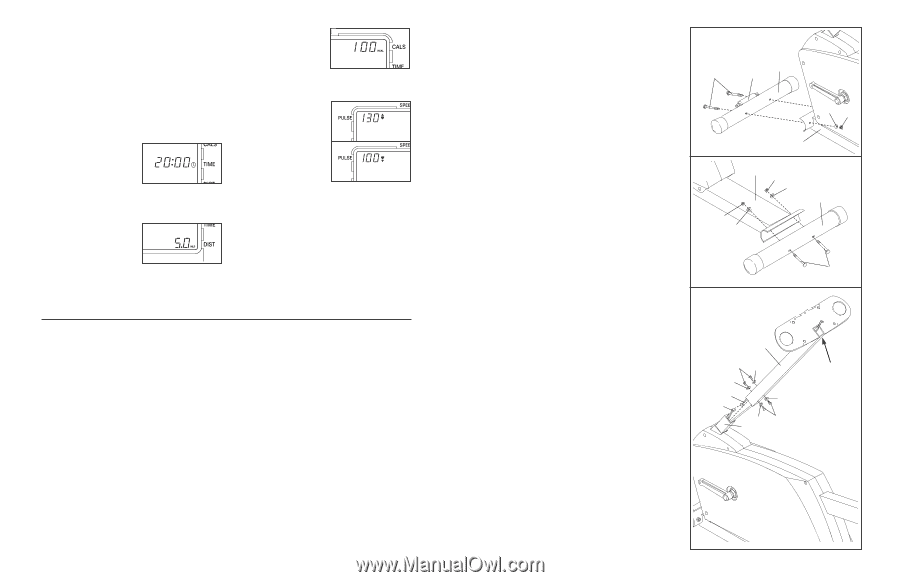
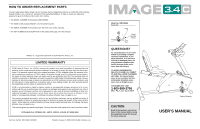
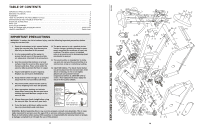
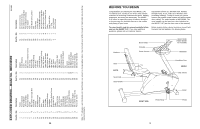
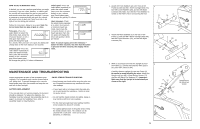
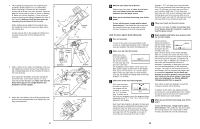
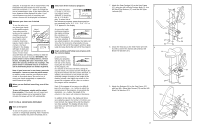
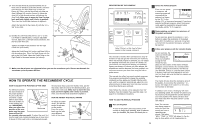
HOW TO SET A WORKOUT GOAL If desired, you can set a workout goal before you begin exercising. If you set a time, distance, or calorie goal, the console will count down the goal as you exercise and sound a tone when the goal is reached. If you set a maximum or minimum heart rate goal, the console will sound a tone to alert you if your heart rate is too high or too low during your workout. Follow the instructions below to set a goal. Note: Do not set more than one type of goal at a time. Time goal-Press the select button to select the time mode. Next, press the resistance buttons to set a time goal. Each button press will change the goal by 1 minute. After you have set a goal, the display will change back to the main display in six seconds. Distance goal-Press the select button repeatedly to select the distance mode. Next, press the resistance buttons to set a distance goal. Each button press will change the goal by 0.5 miles or kilometers. Calorie goal-Press the select button repeatedly to select the calorie mode. Next, press the resistance buttons to set a calorie goal. Each button press will change the goal by 10 calories. Heart rate goal-Press the select button repeatedly to select the maximum or minimum heart rate mode. Next, press the resistance buttons to set a heart rate goal. Each button press will change the heart rate goal by 5 beats per minute. Note: To cancel a goal, press the resistance - button for three seconds. Any time that the button is pressed for three seconds, the display will be reset. MAINTENANCE AND TROUBLESHOOTING Inspect and tighten all parts of the recumbent cycle regularly. The recumbent cycle can be cleaned with a soft, damp cloth. To prevent damage to the console, keep liquids away from the console and keep the console out of direct sunlight. BATTERY REPLACEMENT If the console does not function properly, the batteries should be replaced. To replace the batteries, the handlebar must be removed. See assembly step 5 on page 6 to remove the handlebar. Next, refer to assembly step 4 to install batteries. PULSE SENSOR TROUBLE-SHOOTING • Avoid moving your hands while using the pulse sensor. Excessive movement may interfere with heart rate readings. • If your heart rate is not shown when the pulse sensor is used, press the resistance - button to reset the pulse sensor. • Do not hold the metal contacts too tightly; doing so may interfere with heart rate readings. • For the most accurate heart rate reading, hold the metal contacts for about 15 seconds. • For optimal performance of the pulse sensor, keep the metal contacts clean. The contacts can be cleaned with a soft cloth-never use alcohol, abrasives, or chemicals. 12 1. Attach the Front Stabilizer (2) to the front of the Frame (1) with two M8 x 70mm Carriage Bolts (72), two M8 Curved Washers (28), and two M8 Nylon Locknuts (56). Make sure that the Front Stabilizer is turned so the Roller (75) is not touching the floor. 1 72 2 75 28 56 2. Attach the Rear Stabilizer (3) to the rear of the Frame (1) with two M8 x 80mm Carriage Bolts (63), two M8 Curved Washers (28), and two M8 Nylon Locknuts (56). 1 2 1 56 28 3 56 28 3. While a second person holds the Upright (6) near the Frame (1), connect the Extension Wire (18) to the Lower Wire Harness (44). Carefully slide the Upright (6) onto the Frame (1). Be careful to avoid pinching the wires. Attach the Upright with four M8 x 15mm Button Screws (74) and four M8 Black Flat Washers (57). Important: Make sure that the Upright is turned exactly as shown at the right. 3 6 74 57 57 18 57 44 57 74 1 63 Upright must be turned as shown 5
-
 1
1 -
 2
2 -
 3
3 -
 4
4 -
 5
5 -
 6
6 -
 7
7 -
 8
8
 |
 |