Insignia NS-1DVDR User Manual (English) - Page 7
Features - remote control
 |
View all Insignia NS-1DVDR manuals
Add to My Manuals
Save this manual to your list of manuals |
Page 7 highlights
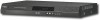
Features Front panel Back panel 12 3 Item Description Function 1 POWER Turns your recorder on and off. button 2 Disc tray Place a disc on the tray when it opens. 3 Display window Shows the current status of your recorder. lights when your recorder is in timer recording or when a timer recording is programmed. REC lights when your recorder is recording. PM lights to indicate PM time. indicates total playing time, elapsed time, remaining time, or current deck status. 4 Remote sensor Receives signals from the remote control. 5 AV IN 2 Connect the audio/video output of (Video/Audio) an external source (such as an audio system, TV, monitor, VCR, or camcorder) to these jacks. 6 Press to open or close the disc tray. OPEN/CLOSE button 7 (Play) button Press to start playback. 8 (REC) button Press to start recording. Press repeatedly to set the recording time (duration). 45 6 Item 1 2 3 4 5 6 Description Function COMPONENT OUTPUT (Y Pb Pr) Connect to the component input jacks on a TV (if available). INPUT 1 (VIDEO, AUDIO L and AUDIO R) Connect to the video and audio output jacks on an external source, such as a VCR or camcorder, to these jacks. AC power jack Plug the AC power cord into this jack. DIGITAL AUDIO OUTPUT jack Connect to the digital audio coaxial jack on an external amplifier, such as a Dolby Digital decoder. AUDIO OUTPUT (left/right) Connect to the audio input jacks (left and right) of a TV, amplifier, or other equipment. VIDEO/AUDIO OUT (VIDEO, AUDIO L and AUDIO R) Connect to the video and audio input jacks (left and right) of a TV. Caution Do not touch the inner pins of the jacks on the back panel. Electrostatic discharge may cause permanent damage to your recorder. www.insignia-products.com 5
-
 1
1 -
 2
2 -
 3
3 -
 4
4 -
 5
5 -
 6
6 -
 7
7 -
 8
8 -
 9
9 -
 10
10 -
 11
11 -
 12
12 -
13
-
14
-
15
-
16
-
17
-
18
-
19
-
20
-
21
-
22
-
23
-
24
-
25
-
26
-
27
-
28
-
29
-
30
-
31
-
32
-
33
-
34
-
35
-
36
-
37
-
38
-
39
-
40
-
41
-
42
-
43
-
44
-
45
-
46
-
47
-
48
-
49
-
50
-
51
-
52
-
53
-
54
-
55
-
56
-
57
-
58
-
59
-
60
-
61
-
62
-
63
-
64
-
65
-
66
-
67
-
68
-
69
-
70
-
71
-
72
-
73
-
74
-
75
-
76
-
77
-
78
-
79
-
80
-
81
-
82
-
83
-
84
-
85
-
86
-
87
-
88
-
89
-
90
-
91
-
92
-
93
-
94
-
95
-
96
 |
 |
