Insignia NS-DV720P User Manual (English) - Page 22
Selecting the file format for movies, Resetting to factory defaults, Simple Mode Off - mac
 |
UPC - 600603123146
View all Insignia NS-DV720P manuals
Add to My Manuals
Save this manual to your list of manuals |
Page 22 highlights
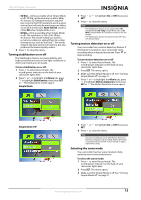
NS-DV720P/NS-DV720PBL 720p HD Digital Camcorder Selecting the file format for movies To select the file format for movies: 1 Press to enter Record mode. The record/power indicator on the back of your camcorder lights blue. 2 Press SET. The menu opens. 3 Make sure that Simple Mode is off. See "Turning Simple Mode off" on page 11. 4 Press or to highlight the Settings tab. The Settings menu opens. Resetting to factory defaults Note If you reset your camcorder to the default settings, you will have to select the menu language and set the date and time again. For more information, see "Turning on your camcorder for the first time" on page 7. To reset your camcorder to its original factory default settings: 1 Press to enter Record mode. The record/power indicator on the back of your camcorder lights blue. 2 Press SET. The menu opens. Simple Mode 5 Press to highlight File Format, then press SET or . The File Format screen opens. Simple Mode Off 6 Press or to highlight a file format then press SET. You can select: • AVI-Select this format if you are using a Windows-based computer and/or intend to use the included ArcSoft MediaImpression software to view and edit movies. • MOV-Select this format if you are using QuickTime (not included) to view movies. This setting is ideal for users of Mac computers. Note: Movies cannot be edited in ArcSoft MediaImpression if this format is selected. Note The file format cannot be changed after a recording is created. You should select the file format before you start recording. 7 Press to close the menu. 3 Press or to highlight the Settings tab. 4 Press or to highlight Factory Reset, then press SET or . The Factory Reset screen opens. 5 Press or to select Yes or No, then press SET to confirm or press to close the menu without resetting. 18 www.insigniaproducts.com
-
 1
1 -
2
-
3
-
4
-
5
-
6
-
7
-
8
-
9
-
10
-
11
-
12
-
13
-
14
-
15
-
16
-
 17
17 -
 18
18 -
 19
19 -
 20
20 -
 21
21 -
 22
22 -
 23
23 -
 24
24 -
 25
25 -
 26
26 -
 27
27 -
28
 |
 |
