Insignia NS-DV720PBL2 User Manual (English) - Page 18
Imprinting the date and time on pictures, Setting the date and time, Time Stamp, Date & Time - won t turn on
 |
UPC - 600603133848
View all Insignia NS-DV720PBL2 manuals
Add to My Manuals
Save this manual to your list of manuals |
Page 18 highlights
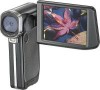
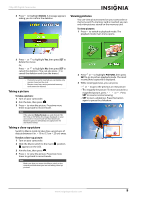
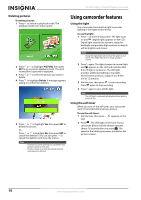
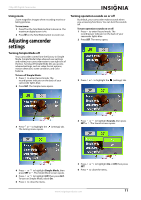
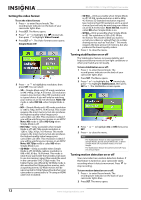
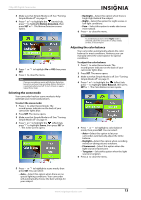
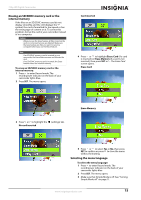
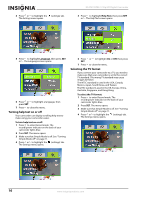
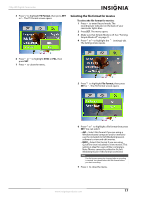
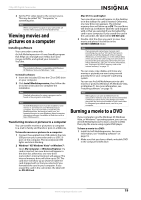
NS-DV720PBL2 720p HD Digital Camcorder Imprinting the date and time on pictures You can imprint the date or the date and time on pictures. Note Date and time cannot be imprinted on movies. To imprint the date and time on pictures: 1 Press to enter Record mode. The record/power indicator on the back of your camcorder lights blue. 2 Press SET. The menu opens. 3 Make sure that Simple Mode is off. See "Turning Simple Mode off" on page 11. 4 Press or to highlight the (settings) tab. The Settings menu opens. 6 Press or to highlight an option, then press SET. You can select: • Date & Time-Imprints the date and time on pictures. • Date-Imprints the date on pictures. • Off-Turns the time stamp feature off. 7 Press to close the menu. Note Once the date or date and time are imprinted on a picture, they cannot be removed. Setting the date and time To set the date and time: 1 Press to enter Record mode. The record/power indicator on the back of your camcorder lights blue. 2 Press SET. The menu opens. 3 Make sure that Simple Mode is off. See "Turning Simple Mode off" on page 11. 4 Press or to highlight the (settings) tab. The Settings menu opens. 5 Press to highlight Time Stamp, then press SET or . The Time Stamp screen opens. 5 Press to highlight Set Time/Date, then press SET or . The Set Time/Date screen opens. 6 Press or to move between the fields, then press or to change the values in the fields. The formats are YEAR/MONTH/DAY and HOUR:MINUTES. 7 Press SET to save your settings, then press to close the menu. 14 www.insigniaproducts.com
-
 1
1 -
2
-
3
-
4
-
5
-
6
-
7
-
8
-
9
-
10
-
11
-
12
-
 13
13 -
 14
14 -
 15
15 -
 16
16 -
 17
17 -
 18
18 -
 19
19 -
 20
20 -
 21
21 -
 22
22 -
 23
23 -
24
-
25
-
26
-
27
-
28
 |
 |