Intel D201GLY2 Product Guide - Page 25
Installing the I/O Shield,
 |
UPC - 735858197717
View all Intel D201GLY2 manuals
Add to My Manuals
Save this manual to your list of manuals |
Page 25 highlights
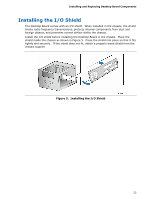
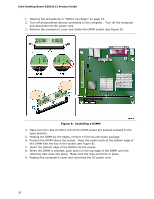
Installing and Replacing Desktop Board Components Installing the I/O Shield The Desktop Board comes with an I/O shield. When installed in the chassis, the shield blocks radio frequency transmissions, protects internal components from dust and foreign objects, and promotes correct airflow within the chassis. Install the I/O shield before installing the Desktop Board in the chassis. Place the shield inside the chassis as shown in Figure 5. Press the shield into place so that it fits tightly and securely. If the shield does not fit, obtain a properly-sized shield from the chassis supplier. Figure 5. Installing the I/O Shield 25
-
 1
1 -
2
-
3
-
4
-
5
-
6
-
7
-
8
-
9
-
10
-
11
-
12
-
13
-
14
-
15
-
16
-
17
-
18
-
19
-
 20
20 -
 21
21 -
 22
22 -
 23
23 -
 24
24 -
 25
25 -
 26
26 -
 27
27 -
 28
28 -
 29
29 -
 30
30 -
31
-
32
-
33
-
34
-
35
-
36
-
37
-
38
-
39
-
40
-
41
-
42
-
43
-
44
-
45
-
46
-
47
-
48
-
49
-
50
-
51
-
52
-
53
-
54
-
55
-
56
-
57
-
58
-
59
-
60
-
61
 |
 |
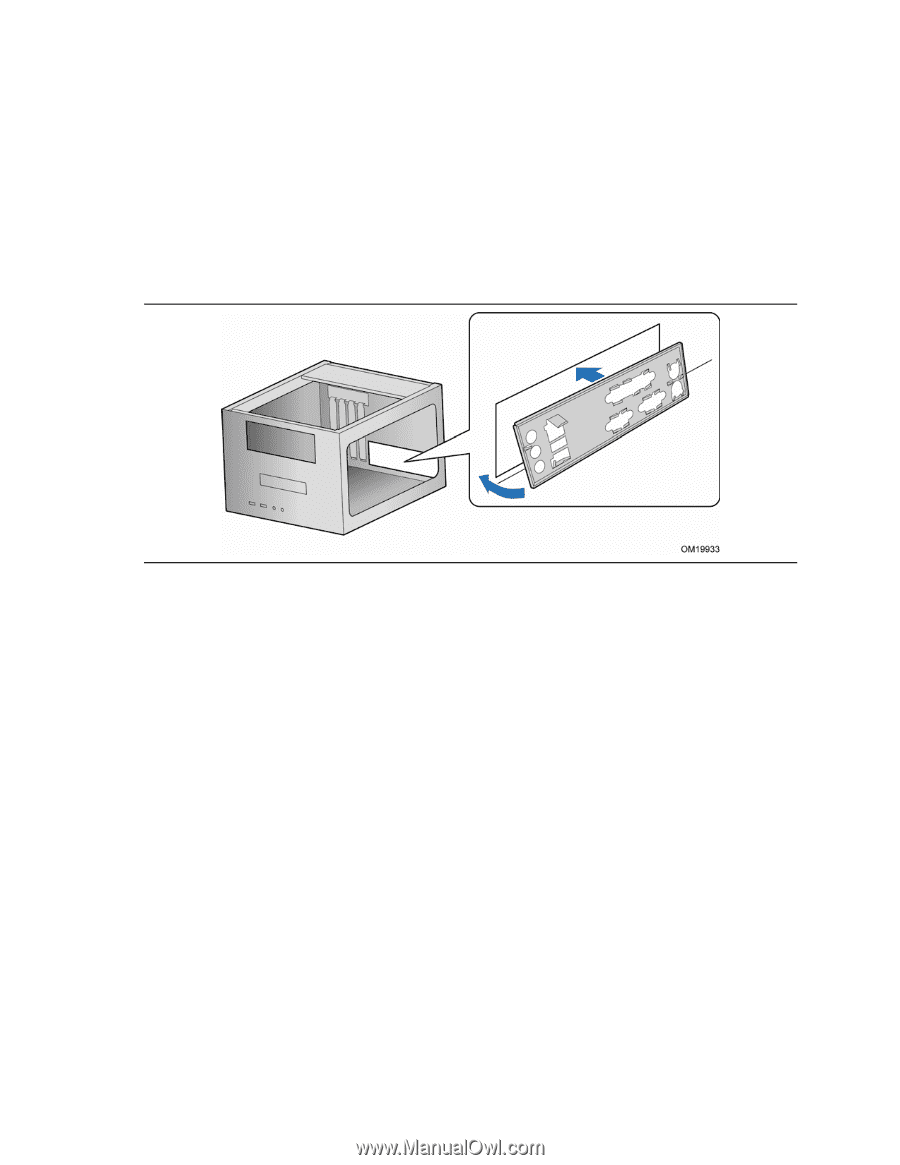
Installing and Replacing Desktop Board Components
25
Installing the I/O Shield
The Desktop Board comes with an I/O shield.
When installed in the chassis, the shield
blocks radio frequency transmissions, protects internal components from dust and
foreign objects, and promotes correct airflow within the chassis.
Install the I/O shield before installing the Desktop Board in the chassis.
Place the
shield inside the chassis as shown in Figure 5.
Press the shield into place so that it fits
tightly and securely.
If the shield does not fit, obtain a properly-sized shield from the
chassis supplier.
Figure 5.
Installing the I/O Shield