Intel D925XHY English Product Guide - Page 36
Installing and Removing a PCI Express x16 Card
 |
View all Intel D925XHY manuals
Add to My Manuals
Save this manual to your list of manuals |
Page 36 highlights
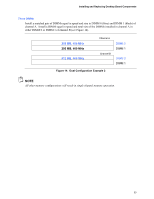
Intel Desktop Board D925XHY Product Guide Removing DIMMs To remove a memory module, follow these steps: 1. Observe the precautions in "Before You Begin" on page 23. 2. Turn off all peripheral devices connected to the computer. Turn off the computer. 3. Remove the AC power cord from the computer. 4. Remove the computer's cover. 5. Remove the PCI Express x16 card if it interferes with the DIMM clips from being easily opened and closed. 6. Gently spread the retaining clips at each end of the DIMM socket. The DIMM pops out of the socket. 7. Hold the DIMM by the edges, lift it away from the socket, and store it in an anti-static package. 8. Reinstall and reconnect any parts you removed or disconnected to reach the DIMM sockets. 9. Replace the computer's cover and reconnect the AC power cord. Installing and Removing a PCI Express x16 Card CAUTION When installing any PCI Express x16 card on the desktop board, ensure that it is fully seated in the PCI Express x16 connector before you power on the system. If the card is not fully seated in the PCI Express x16 connector, an electrical short may result across the PCI Express x16 connector pins. Depending on the over-current protection of the power supply, certain board components and/or traces may be damaged. The desktop board has an integrated PCI Express x16 card retention mechanism (RM). Installing a PCI Express x16 Card Follow these instructions to install a PCI Express x16 card: 1. Observe the precautions in "Before You Begin" on page 23. 2. Place the card in the PCI Express x16 connector. 3. Press down on the card until it is completely seated in the PCI Express x16 connector and the card retention notch snaps into place around the RM pin. 4. Secure the card's metal bracket to the chassis back panel with a screw. 36
-
 1
1 -
2
-
3
-
4
-
5
-
6
-
7
-
8
-
9
-
10
-
11
-
12
-
13
-
14
-
15
-
16
-
17
-
18
-
19
-
20
-
21
-
22
-
23
-
24
-
25
-
26
-
27
-
28
-
29
-
30
-
 31
31 -
 32
32 -
 33
33 -
 34
34 -
 35
35 -
 36
36 -
 37
37 -
 38
38 -
 39
39 -
 40
40 -
 41
41 -
42
-
43
-
44
-
45
-
46
-
47
-
48
-
49
-
50
-
51
-
52
-
53
-
54
-
55
-
56
-
57
-
58
-
59
-
60
-
61
-
62
-
63
-
64
-
65
-
66
-
67
-
68
 |
 |
