Intel SE7520JR2 User Guide - Page 29
Inserting Processor, Closing Socket Lever, align correctly.
 |
UPC - 735858167376
View all Intel SE7520JR2 manuals
Add to My Manuals
Save this manual to your list of manuals |
Page 29 highlights
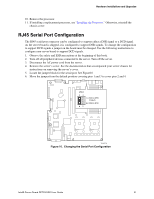
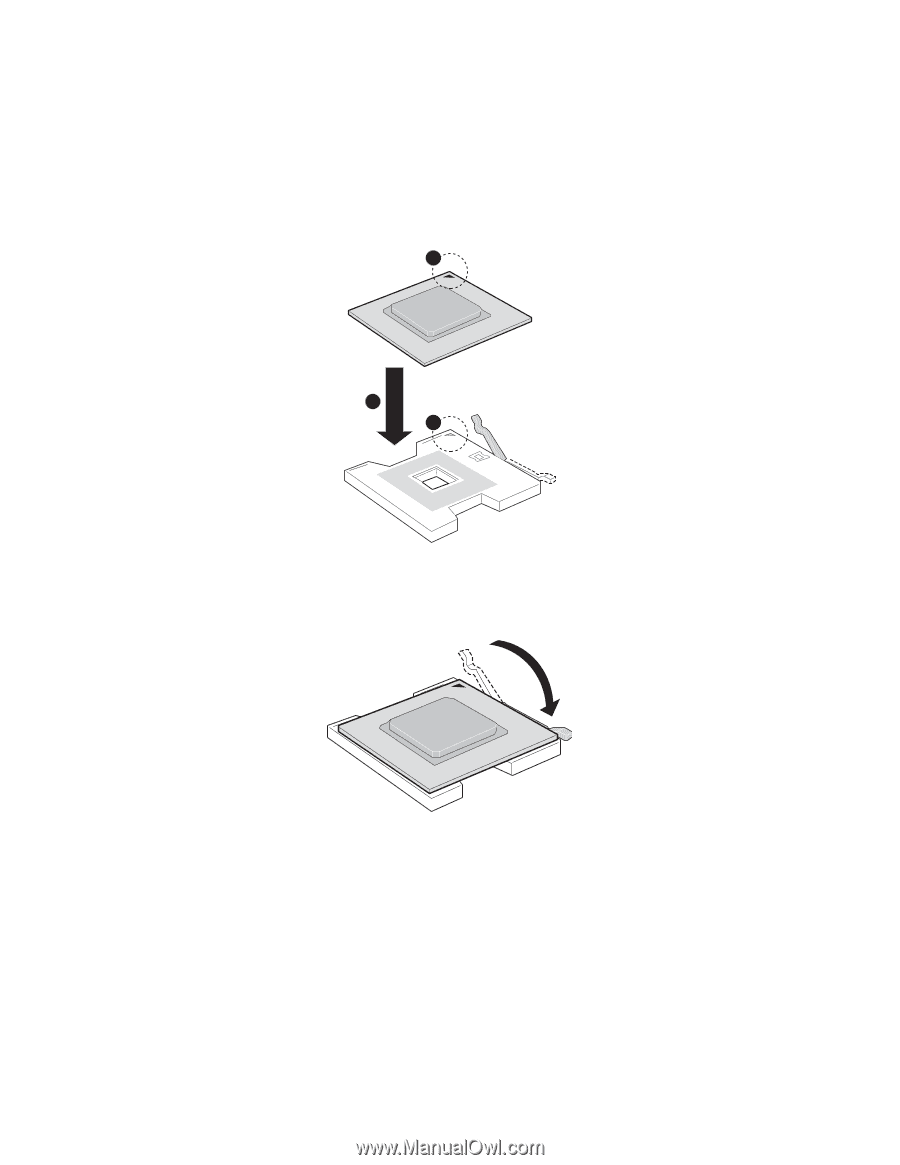
Hardware Installations and Upgrades 6. Align the pins of the processor with the socket, and insert the processor into the socket. ✏ NOTE Make sure the alignment triangle mark and the alignment triangle cutout align correctly. A B A TP00764 Figure 7. Inserting Processor 7. Lower the socket lever completely. TP00765 Figure 8. Closing Socket Lever Intel® Server Board SE7520JR2 User Guide 29
-
 1
1 -
2
-
3
-
4
-
5
-
6
-
7
-
8
-
9
-
10
-
11
-
12
-
13
-
14
-
15
-
16
-
17
-
18
-
19
-
20
-
21
-
22
-
23
-
 24
24 -
 25
25 -
 26
26 -
 27
27 -
 28
28 -
 29
29 -
 30
30 -
 31
31 -
 32
32 -
 33
33 -
 34
34 -
35
-
36
-
37
-
38
-
39
-
40
-
41
-
42
-
43
-
44
-
45
-
46
-
47
-
48
-
49
-
50
-
51
-
52
-
53
-
54
-
55
-
56
-
57
-
58
-
59
-
60
-
61
-
62
-
63
 |
 |
Hardware Installations and Upgrades
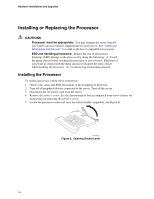
6.
Align the pins of the processor with the socket, and insert the processor into the socket.
✏
NOTE
Make sure the alignment triangle mark and the alignment triangle cutout
align correctly.
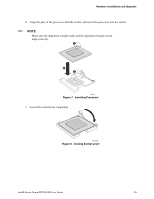
TP00764
A
A
B
Figure 7.
Inserting Processor
7.
Lower the socket lever completely.
TP00765
Figure 8.
Closing Socket Lever
Intel® Server Board SE7520JR2 User Guide
29