Intel SR1500AL User Guide - Page 48
Removing and Installing the System Cover
 |
View all Intel SR1500AL manuals
Add to My Manuals
Save this manual to your list of manuals |
Page 48 highlights
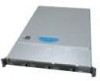
Installing the Front Bezel Use the steps below if your system includes either the standard front bezel or the front bezel for the Intel® Local Control Panel. The front bezel is optional. 1. At each end of the bezel, line up the center notch on the bezel with the center guide on the rack handles. 2. Push the bezel onto the front of the server system until it clicks into place. 3. Connect any necessary cables to the front control panel area at the right side of the server system. Figure 17. Installing the Front Bezel TP02200 Removing and Installing the System Cover Removing the System Cover The server system must be operated with the system cover in place to ensure proper cooling. You will need to remove the top cover to add or replace components inside of the server. Before removing the chassis cover, power down the server and unplug all peripheral devices and the AC power cable(s). Note: A nonskid surface or a stop behind the server system may be needed to prevent the server system from sliding on your work surface. 1. Observe the safety and ESD precautions at the beginning of this book. See "Safety Information". 26 Intel® Server System SR1500AL User's Guide
-
 1
1 -
2
-
3
-
4
-
5
-
6
-
7
-
8
-
9
-
10
-
11
-
12
-
13
-
14
-
15
-
16
-
17
-
18
-
19
-
20
-
21
-
22
-
23
-
24
-
25
-
26
-
27
-
28
-
29
-
30
-
31
-
32
-
33
-
34
-
35
-
36
-
37
-
38
-
39
-
40
-
41
-
42
-
 43
43 -
 44
44 -
 45
45 -
 46
46 -
 47
47 -
 48
48 -
 49
49 -
 50
50 -
 51
51 -
 52
52 -
 53
53 -
54
-
55
-
56
-
57
-
58
-
59
-
60
-
61
-
62
-
63
-
64
-
65
-
66
-
67
-
68
-
69
-
70
-
71
-
72
-
73
-
74
-
75
-
76
-
77
-
78
-
79
-
80
-
81
-
82
-
83
-
84
-
85
-
86
-
87
-
88
-
89
-
90
-
91
-
92
-
93
-
94
-
95
-
96
-
97
-
98
-
99
-
100
-
101
-
102
-
103
-
104
-
105
-
106
-
107
-
108
-
109
-
110
-
111
-
112
-
113
-
114
-
115
-
116
-
117
-
118
-
119
-
120
-
121
-
122
-
123
-
124
-
125
-
126
-
127
-
128
-
129
-
130
-
131
-
132
-
133
-
134
-
135
-
136
-
137
-
138
-
139
-
140
-
141
-
142
-
143
-
144
-
145
-
146
-
147
-
148
-
149
-
150
-
151
-
152
-
153
-
154
-
155
-
156
-
157
-
158
-
159
-
160
-
161
-
162
-
163
-
164
-
165
-
166
-
167
-
168
-
169
-
170
-
171
-
172
-
173
-
174
-
175
-
176
-
177
-
178
-
179
-
180
 |
 |
