Intel SR1560SFHS Service Guide - Page 64
Installing and Removing the Intel, Remote, Management Module 2 and the Intel, RMM 2 NIC
 |
UPC - 735858197595
View all Intel SR1560SFHS manuals
Add to My Manuals
Save this manual to your list of manuals |
Page 64 highlights
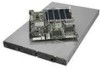
Installing and Removing the Intel® Remote Management Module 2 and the Intel® RMM 2 NIC Installing the Intel® RMM2 and Intel® RMM2 NIC 1. Squeeze the sides of the Intel® RMM2 NIC module cover to disengage it from the server system back panel and remove it. 2. Attach the foam gasket to the bottom of the Intel® RMM2 NIC module (see letter "A"). Note: The Intel® RMM2 NIC module is shown upside down in the first illustration below in order to provide better detail on installing the foam gasket. 3. Attach the standoffs to the server board (see letter "B" in the figure below) and attach the Intel® RMM2 NIC module to the server board (see letter "C"). 4. Insert the standoff into the hole labeled TH4 on the Intel® RMM2 board (see letter "D" in the figure below). The standoff installs on the bottom side of the Intel® RMM2 board. 5. Attach the Intel® RMM2 board to the server board connector and snap the standoff into the matching hole on the server board (see letter "E" in the figure below). A C B E D AF002378 Figure 46. Installing the Intel® RMM2 and the Intel® RMM2 NIC Module to the Server System 42 Intel® Server System SR1560SF Service Guide
-
 1
1 -
2
-
3
-
4
-
5
-
6
-
7
-
8
-
9
-
10
-
11
-
12
-
13
-
14
-
15
-
16
-
17
-
18
-
19
-
20
-
21
-
22
-
23
-
24
-
25
-
26
-
27
-
28
-
29
-
30
-
31
-
32
-
33
-
34
-
35
-
36
-
37
-
38
-
39
-
40
-
41
-
42
-
43
-
44
-
45
-
46
-
47
-
48
-
49
-
50
-
51
-
52
-
53
-
54
-
55
-
56
-
57
-
58
-
 59
59 -
 60
60 -
 61
61 -
 62
62 -
 63
63 -
 64
64 -
 65
65 -
 66
66 -
 67
67 -
 68
68 -
 69
69 -
70
-
71
-
72
-
73
-
74
-
75
-
76
-
77
-
78
-
79
-
80
-
81
-
82
-
83
-
84
-
85
-
86
-
87
-
88
-
89
-
90
-
91
-
92
-
93
-
94
-
95
-
96
-
97
-
98
-
99
-
100
-
101
-
102
-
103
-
104
-
105
-
106
-
107
-
108
-
109
-
110
-
111
-
112
-
113
-
114
-
115
-
116
-
117
-
118
-
119
-
120
-
121
-
122
-
123
-
124
-
125
-
126
-
127
-
128
-
129
-
130
-
131
-
132
-
133
-
134
-
135
-
136
-
137
-
138
-
139
-
140
-
141
-
142
-
143
-
144
-
145
-
146
-
147
-
148
-
149
-
150
-
151
-
152
-
153
-
154
-
155
-
156
-
157
-
158
 |
 |
