Intermec 6822 6820 Printer Installation Instructions - Page 7
Using the Installation Kit, Installing the Battery Cable, Installation Procedures, Tools Required - fixed printer
 |
View all Intermec 6822 manuals
Add to My Manuals
Save this manual to your list of manuals |
Page 7 highlights
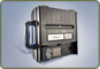
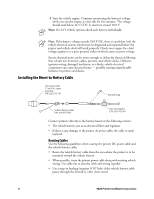
Using the Installation Kit When the installation is complete, you will have a secure place to store the printer and hand-held or mobile computer. The vehicle electrical system provides power to operate the printer, vehicle dock; and charge the printer internal battery. In this installation, the power cable is wired directly to the vehicle battery. This reduces installation problems and the vehicle battery filtering. The installation kits contain all of the hardware (nuts, bolts, washers, a terminal ring, and a fuse link) for connecting the battery cable directly to the vehicle battery. These kits also contain adjustable wire clamps to secure the cable in place. Note: These instructions are required to install the following kit numbers: P/N 203-242-101 (Fixed Mount and Wall Mount Printers) P/N 203-242-102 (Portable Printers). The 6820 Printer and associated electrical wiring should be installed under the supervision of properly trained and qualified personnel. Follow these installation instructions to ensure safe, reliable performance of the 6820 Printer. Installation Procedures There are three steps to install your printer 1 Installing the battery cable. 2 Installing the printer. 3 Performing the final assembly and cable connection. Tools Required You should have a wire crimping and stripping tool, an electric drill with 3/16" and 9/16" drill bits, and common hand tools. Installing the Battery Cable Note: If the vehicle voltage is too high or too low, the printer may not work. The vehicle electrical system must be in good condition for all types of installations. The charging circuit must work properly and vehicle generated electrical "noise" must be minimized. To determine your vehicle's voltage level 1 Measure the vehicle battery voltage with a voltmeter. It should read approximately 13.0 V DC with the engine OFF. 6820 Printer Installation Instructions 7
-
 1
1 -
 2
2 -
 3
3 -
 4
4 -
 5
5 -
 6
6 -
 7
7 -
 8
8 -
 9
9 -
 10
10 -
 11
11 -
 12
12 -
13
-
14
-
15
-
16
-
17
-
18
-
19
-
20
-
21
-
22
-
23
-
24
-
25
-
26
 |
 |
