Intermec PR2 PR2/PR3 Mobile Receipt Printer User Manual - Page 40
Print a Test Label, Problems and Possible Solutions
 |
View all Intermec PR2 manuals
Add to My Manuals
Save this manual to your list of manuals |
Page 40 highlights
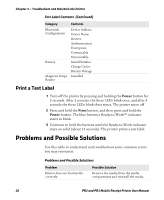
Chapter 3 - Troubleshoot and Maintain the Printer Test Label Contents (Continued) Category Contents Bluetooth Configuration Battery Magnetic Stripe Reader Device Address Device Name Reserve Authentication Encryption Connectable Discoverable Serial Number Charge Cycles Battery Voltage Installed Print a Test Label 1 Turn off the printer by pressing and holding the Power button for 5 seconds. After 2 seconds, the three LEDs blink once, and after 5 seconds the three LEDs blink three times. The printer turns off. 2 Press and hold the Print button, and then press and hold the Power button. The blue Intermec Ready-to-Work™ indicator starts to blink. 3 Continue to hold the buttons until the Ready-to-Work indicator stays on solid (about 15 seconds). The printer prints a test label. Problems and Possible Solutions Use this table to understand and troubleshoot some common errors you may encounter. Problems and Possible Solutions Problem Printer does not feed media correctly. Possible Solution Remove the media from the media compartment and reinstall the media. 28 PR2 and PR3 Mobile Receipt Printer User Manual
-
 1
1 -
2
-
3
-
4
-
5
-
6
-
7
-
8
-
9
-
10
-
11
-
12
-
13
-
14
-
15
-
16
-
17
-
18
-
19
-
20
-
21
-
22
-
23
-
24
-
25
-
26
-
27
-
28
-
29
-
30
-
31
-
32
-
33
-
34
-
 35
35 -
 36
36 -
 37
37 -
 38
38 -
 39
39 -
 40
40 -
 41
41 -
 42
42 -
 43
43 -
 44
44 -
 45
45 -
46
-
47
-
48
-
49
-
50
-
51
-
52
-
53
-
54
-
55
-
56
-
57
-
58
-
59
-
60
-
61
-
62
-
63
-
64
-
65
-
66
 |
 |
