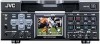
JVC BR-DV6000U User Manual - Page 19
SERIAL REMOTE OUT] terminal, mini jack, REMOTE 1] RS-422A terminal, D-SUB 9-PIN, REMOTE 2] JVC Bus
 |
UPC - 046838325557
View all JVC BR-DV6000U manuals
Add to My Manuals
Save this manual to your list of manuals |
Page 19 highlights
¤ [SERIAL REMOTE OUT] terminal (mini jack) • This terminal is for direct through-output of serial commands of the serial remote input terminal. (Only with OPERATE ON) • If REPLICATION of the SYSTEM (2/2) Menu screen is set to SERIAL, this terminal outputs REC commands when BR-DV6000 begins playback. (REPLICATION mode)Use this function to connect BR-DV6000 to a dubbing device for dubbing its playback video or playback sound. ‹ [REMOTE 1] RS-422A terminal (D-SUB 9-PIN) This terminal is for connecting to an RS-422A serial interface-compatible editing remote controller (e.g. RM-G820). With this terminal, BR-DV6000 can be used as a player or recorder of an editing system. To operate BR-DV6000 with RS-422A, perform the following settings. • Set REMOTE SEL 9-PIN in the REMOTE (1/ 2) Menu screen to "ON". • Set the 4 REMOTE / LOCAL switch on the front panel to "REMOTE". Memo ● Use screws, of the inch, not metric, system, for fastening the connectors. ● This part can be replaced by the RS-232C serial interface board SA-K46U (sold separately). Consult your JVC authorized service agent for such replacements. › [REMOTE 2] JVC Bus terminal (12-PIN) This terminal is for connecting to the JVC bus interface-compatible editing remote controller (RM-G800, RM-G805). With this terminal, BR-DV6000 can be used as a player or recorder of an editing system. To operate BR-DV6000 with this terminal, perform the following settings. • Set REMOTE SEL JVC in the REMOTE (1/2) Menu screen to "ON". • Set the 4 REMOTE / LOCAL switch on the front panel to "REMOTE". fi Slot cover for an optional board This cover can be removed to install any of the following optional boards. • SA-DV6000 network board • SA-X61U AUDIO XLR IN board (2ch) • SA-X62U AUDIO XLR OUT board (2ch) Memo ● With the SA-X61U AUDIO XLR IN board installed, whether sound signals are input to the XLR IN terminal or the AUDIO IN terminal can be selected with AUDIO INPUT SEL in the AUDIO MENU. If the MIC terminal is in use, the MIC terminal precedes. ● With the SA-X62U AUDIO XLR OUT board installed, the audio channel to which signals are output can be selected with the AUDIO OUTPUT switch. 19
-
 1
1 -
2
-
3
-
4
-
5
-
6
-
7
-
8
-
9
-
10
-
11
-
12
-
13
-
 14
14 -
 15
15 -
 16
16 -
 17
17 -
 18
18 -
 19
19 -
 20
20 -
 21
21 -
 22
22 -
 23
23 -
 24
24 -
25
-
26
-
27
-
28
-
29
-
30
-
31
-
32
-
33
-
34
-
35
-
36
-
37
-
38
-
39
-
40
-
41
-
42
-
43
-
44
-
45
-
46
-
47
-
48
-
49
-
50
-
51
-
52
-
53
-
54
-
55
-
56
-
57
-
58
-
59
-
60
-
61
-
62
-
63
-
64
-
65
-
66
-
67
-
68
-
69
-
70
-
71
-
72
-
73
-
74
-
75
-
76
-
77
-
78
-
79
-
80
-
81
-
82
-
83
-
84
-
85
-
86
-
87
-
88
-
89
-
90
-
91
-
92
-
93
-
94
-
95
-
96
-
97
-
98
-
99
-
100
-
101
-
102
-
103
-
104
-
105
-
106
 |
 |
