JVC DVL720U Instruction Manual - Page 26
Memory Card Recording
 |
UPC - 046838160783
View all JVC DVL720U manuals
Add to My Manuals
Save this manual to your list of manuals |
Page 26 highlights
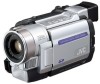
26 EN SNAPSHOT Button Power Switch Lock Button VIDEO/MEMORY Switch (Open the LCD monitor to access this switch.) MEMORY CARD RECORDING Basic Shooting (Snapshot) You can use your camcorder as a digital still camera for taking snapshots. NOTE: You should already have performed the procedures listed below. If not, do so before continuing. ● Power (੬ pg. 8) ● Grip Adjustment (੬ pg. 10) ● Viewfinder Adjustment (੬ pg. 10) ● Loading A Memory Card (੬ pg. 14) ● Picture Quality/Image Size Setting (੬ pg. 14) 1 Set the VIDEO/MEMORY Switch to "MEMORY", then set the Power Switch to " AUTO " or " MANUAL " while pressing down the Lock Button located on the switch. 2 Press SNAPSHOT. "PHOTO" appears while the snapshot is being taken. The image is recorded on the memory card. • Still images are recorded in the snapshot mode with no frame. 1024 Display Image Size Displays the image file size: 1024 (1024 x 768) or 640 (640 x 480) (੬ pg. 14). Shooting icon Appears and blinks during shooting. Card icon Appears during shooting and blinks when a memory card is not loaded: 15 (SD Memory Card) or (MultiMediaCard). Remaining number of shots Displays the remaining number of shots that can be stored. The number increases or decreases depending on the Picture Quality/Image Size, etc. Picture Quality Displays the quality of image: F (Fine) or S (Standard) (in order of quality) (੬ pg. 14).
-
 1
1 -
2
-
3
-
4
-
5
-
6
-
7
-
8
-
9
-
10
-
11
-
12
-
13
-
14
-
15
-
16
-
17
-
18
-
19
-
20
-
 21
21 -
 22
22 -
 23
23 -
 24
24 -
 25
25 -
 26
26 -
 27
27 -
 28
28 -
 29
29 -
 30
30 -
 31
31 -
32
-
33
-
34
-
35
-
36
-
37
-
38
-
39
-
40
-
41
-
42
-
43
-
44
-
45
-
46
-
47
-
48
-
49
-
50
-
51
-
52
-
53
-
54
-
55
-
56
-
57
-
58
-
59
-
60
-
61
-
62
-
63
-
64
-
65
-
66
-
67
-
68
-
69
-
70
-
71
-
72
-
73
-
74
-
75
-
76
-
77
-
78
-
79
-
80
-
81
-
82
-
83
-
84
-
85
-
86
-
87
-
88
 |
 |
