JVC DVL720U Instruction Manual - Page 33
To Print By Selecting Still Images And, No. Of Prints
 |
UPC - 046838160783
View all JVC DVL720U manuals
Add to My Manuals
Save this manual to your list of manuals |
Page 33 highlights
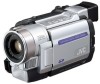
Fast-Forward (3) Button Rewind Button (2) MENU/BRIGHT Wheel VIDEO/MEMORY Switch (Open the LCD monitor to access this switch.) Display DPOF SHEETS 00 RETURN DPOF Screen DPOF SHEETS 05 DPOF SAVE? EXECUTE CANCEL EN 33 TO PRINT BY SELECTING STILL IMAGES AND NO. OF PRINTS 1 Perform steps 1 through 3 on pg. 32. 2 Rotate the MENU/BRIGHT wheel to select "CURRENT" and press it. Selection is complete. The DPOF Screen appears. 3 Press 2 or 3 so that the image you wish to print appears. 4 Rotate the MENU/BRIGHT wheel to move the highlight bar to the SHEETS number indication and press it. 5 Select the number of prints by rotating the MENU/ BRIGHT wheel and press it. Repeat steps 3 through 5 for the desired number of prints. • The number of prints can be set up to 15. • To correct the number of prints, select the image again and change the number. 6 Rotate the MENU/BRIGHT wheel to select "RETURN" and press it. Selection is complete. "SAVE?" appears. • If you did not change any settings in step 3 through 5, the Menu Screen reappears. 7 Rotate the MENU/BRIGHT wheel to select "EXECUTE", then press it to save the setting you have just made. • To cancel selection, rotate the MENU/BRIGHT wheel to select "CANCEL" and press it. To Reset The No. Of Prints select "RESET" in step 4 on pg. 32. The number of prints is reset to 0 for all still images. CAUTION While performing the above, never disconnect power, as this may cause the memory to be corrupted. For safety, all buttons including the Power Switch are disabled in step 6. NOTES: ● "BATTERY LOW" appears if the battery remaining power is too low. ● If you load a memory card already set as shown above in a printer compatible with DPOF, it will make prints of the selected still images automatically. ● To print images recorded on a tape, first dub them to a memory card (੬ pg. 52).
-
 1
1 -
2
-
3
-
4
-
5
-
6
-
7
-
8
-
9
-
10
-
11
-
12
-
13
-
14
-
15
-
16
-
17
-
18
-
19
-
20
-
21
-
22
-
23
-
24
-
25
-
26
-
27
-
 28
28 -
 29
29 -
 30
30 -
 31
31 -
 32
32 -
 33
33 -
 34
34 -
 35
35 -
 36
36 -
 37
37 -
 38
38 -
39
-
40
-
41
-
42
-
43
-
44
-
45
-
46
-
47
-
48
-
49
-
50
-
51
-
52
-
53
-
54
-
55
-
56
-
57
-
58
-
59
-
60
-
61
-
62
-
63
-
64
-
65
-
66
-
67
-
68
-
69
-
70
-
71
-
72
-
73
-
74
-
75
-
76
-
77
-
78
-
79
-
80
-
81
-
82
-
83
-
84
-
85
-
86
-
87
-
88
 |
 |
