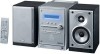
JVC FS-S77 Instructions - Page 38
Others Setup Menu, D. Range Compression, Resume, On Screen Guide, Av Compulink Mode, Parental Lock
 |
UPC - 046838015069
View all JVC FS-S77 manuals
Add to My Manuals
Save this manual to your list of manuals |
Page 38 highlights
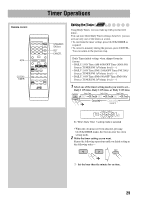
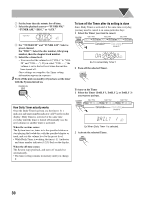
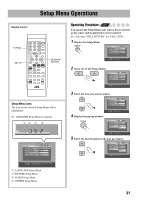
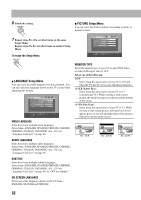
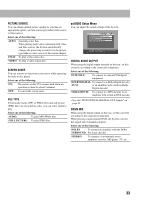
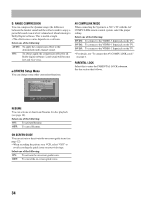
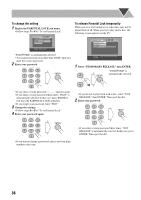
D. RANGE COMPRESSION You can compress the dynamic range (the difference between the loudest sound and the softest sound) to enjoy a powerful sound even at a low volume level when listening to Dolby Digital software. This is useful at night. • The effectiveness varies depends on a software. Select one of the following: AUTO: To apply the compression effect to the downmixed multi-channel sound. ON: To always apply the compression effect for all Dolby digital software. Loud sound will become low and vice versa. 7 OTHERS Setup Menu You can change some other convenient functions. AV COMPULINK MODE When connecting the System to a JVC's TV with the AV COMPU LINK remote control system, select the proper setting. Select one of the following: DVD1: To connect to the VIDEO-3 Input jack on the TV. DVD2: To connect to the VIDEO-1 Input jack on the TV. DVD3: To connect to the VIDEO-2 Input jack on the TV. • For details, see "To connect the AV COMPU LINK cords" on page 6. PARENTAL LOCK Select this to enter the PARENTAL LOCK submenu. See the section that follows. OTHERS RESUME ON SCREEN GUIDE AV COMPULINK MODE PARENTAL LOCK ON ON DVD2 SELECT ENTER USE TO SELECT. USE ENTER TO CONFIRM TO EXIT, PRESS [SET UP]. RESUME You can activate or deactivate Resume for disc playback (see page 12). Select one of the following: ON: To activate Resume. OFF: To cancel Resume. ON SCREEN GUIDE You can activate or deactivate the on-screen guide icons (see page 12). • When recording the picture on a VCR, select "OFF" to avoid recording the guide icons on your video tape. Select one of the following: ON: To activate the on-screen guide icons. OFF: To cancel the on-screen guide icons. 34
-
 1
1 -
2
-
3
-
4
-
5
-
6
-
7
-
8
-
9
-
10
-
11
-
12
-
13
-
14
-
15
-
16
-
17
-
18
-
19
-
20
-
21
-
22
-
23
-
24
-
25
-
26
-
27
-
28
-
29
-
30
-
31
-
32
-
 33
33 -
 34
34 -
 35
35 -
 36
36 -
 37
37 -
 38
38 -
 39
39 -
 40
40 -
 41
41 -
 42
42 -
 43
43 -
44
-
45
-
46
-
47
-
48
-
49
-
50
-
51
-
52
-
53
-
54
-
55
-
56
-
57
-
58
-
59
-
60
-
61
-
62
-
63
-
64
-
65
-
66
-
67
-
68
-
69
-
70
-
71
-
72
-
73
-
74
-
75
-
76
-
77
-
78
-
79
-
80
-
81
-
82
-
83
-
84
-
85
-
86
-
87
-
88
-
89
-
90
-
91
-
92
-
93
-
94
-
95
-
96
-
97
-
98
-
99
-
100
-
101
-
102
-
103
 |
 |