JVC GZ-GX1BUS User Manual - English - Page 184
Recording Menu (Still Image), Shooting According to Scene Subject
 |
View all JVC GZ-GX1BUS manuals
Add to My Manuals
Save this manual to your list of manuals |
Page 184 highlights
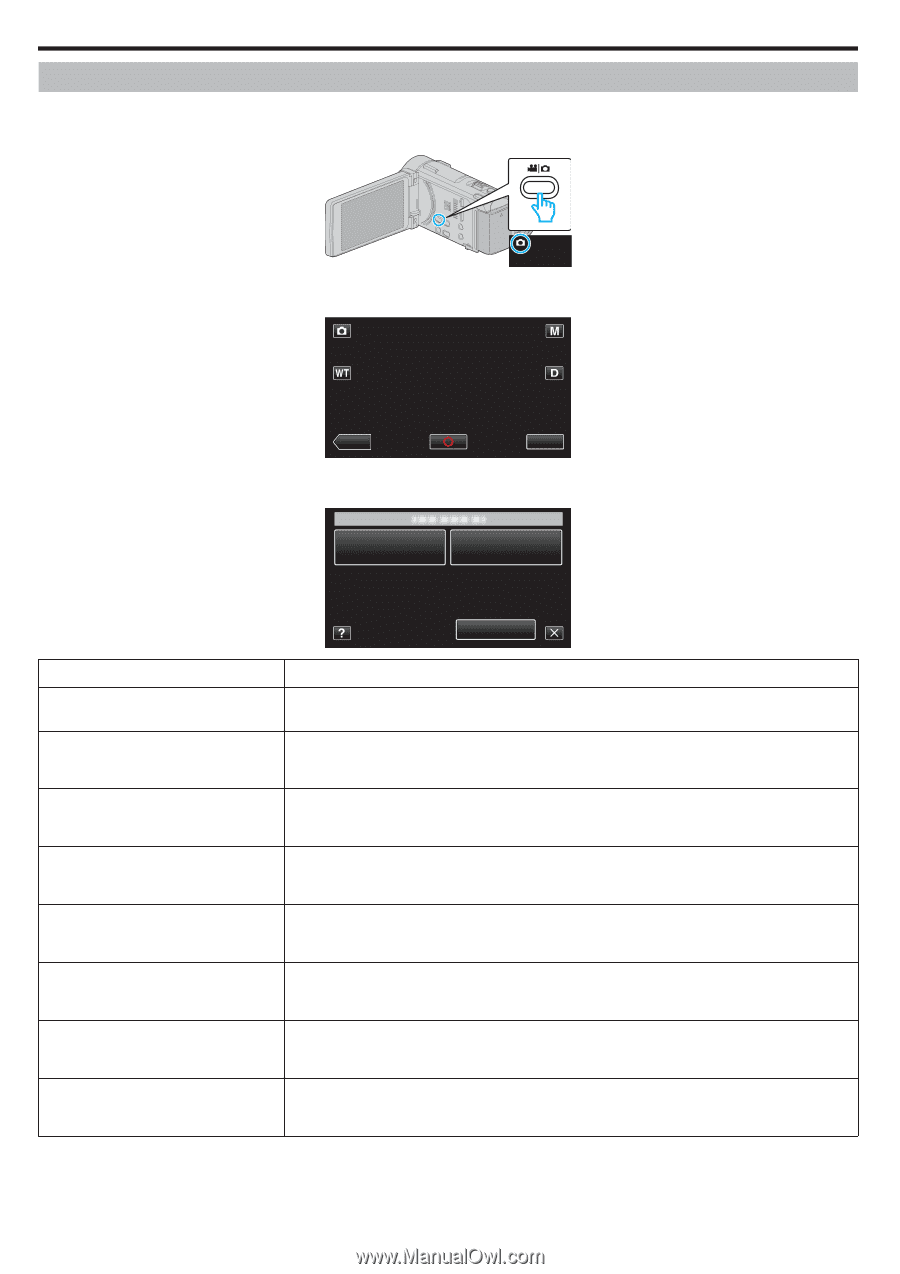
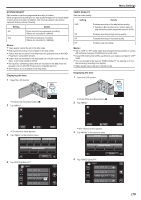
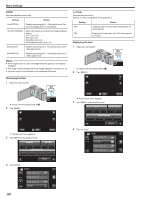
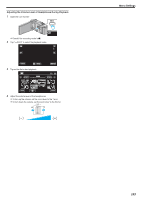
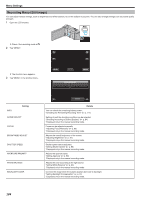
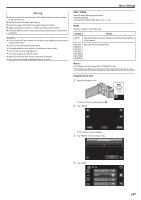
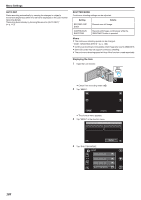
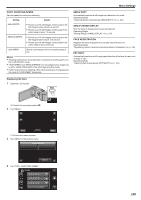
Menu Settings Recording Menu (Still Image) You can adjust various settings, such as brightness and white balance, to suit the subject or purpose. You can also change settings such as picture quality and gain. 1 Open the LCD monitor. . 0 Check if the recording mode is B. 2 Tap "MENU". 0 The shortcut menu appears. 3 Tap "MENU" in the shortcut menu. ˻PLAY . MMEENNUU INFO. Setting SCENE SELECT FOCUS BRIGHTNESS ADJUST SHUTTER SPEED APERTURE PRIORITY WHITE BALANCE BACKLIGHT COMP. 184 MENU . Details You can check the remaining battery power. "Checking the Remaining Recording Time" (A p. 117) Settings to suit the shooting condition can be selected. "Shooting According to Scene (Subject)" (A p. 84) *Displayed only in the manual recording mode. Focus can be adjusted manually. "Adjusting Focus Manually" (A p. 86) *Displayed only in the manual recording mode. Adjusts the overall brightness of the screen. "Adjusting Brightness" (A p. 87) *Displayed only in the manual recording mode. Shutter speed can be adjusted. "Setting Shutter Speed" (A p. 88) *Displayed only in the manual recording mode. Adjusts the aperture value. "Setting Aperture" (A p. 89) *Displayed only in the manual recording mode. Adjusts the color according to the light source. "Setting White Balance" (A p. 90) *Displayed only in the manual recording mode. Corrects the image when the subject appears dark due to backlight. "Setting Backlight Compensation" (A p. 91) *Displayed only in the manual recording mode.
-
 1
1 -
2
-
3
-
4
-
5
-
6
-
7
-
8
-
9
-
10
-
11
-
12
-
13
-
14
-
15
-
16
-
17
-
18
-
19
-
20
-
21
-
22
-
23
-
24
-
25
-
26
-
27
-
28
-
29
-
30
-
31
-
32
-
33
-
34
-
35
-
36
-
37
-
38
-
39
-
40
-
41
-
42
-
43
-
44
-
45
-
46
-
47
-
48
-
49
-
50
-
51
-
52
-
53
-
54
-
55
-
56
-
57
-
58
-
59
-
60
-
61
-
62
-
63
-
64
-
65
-
66
-
67
-
68
-
69
-
70
-
71
-
72
-
73
-
74
-
75
-
76
-
77
-
78
-
79
-
80
-
81
-
82
-
83
-
84
-
85
-
86
-
87
-
88
-
89
-
90
-
91
-
92
-
93
-
94
-
95
-
96
-
97
-
98
-
99
-
100
-
101
-
102
-
103
-
104
-
105
-
106
-
107
-
108
-
109
-
110
-
111
-
112
-
113
-
114
-
115
-
116
-
117
-
118
-
119
-
120
-
121
-
122
-
123
-
124
-
125
-
126
-
127
-
128
-
129
-
130
-
131
-
132
-
133
-
134
-
135
-
136
-
137
-
138
-
139
-
140
-
141
-
142
-
143
-
144
-
145
-
146
-
147
-
148
-
149
-
150
-
151
-
152
-
153
-
154
-
155
-
156
-
157
-
158
-
159
-
160
-
161
-
162
-
163
-
164
-
165
-
166
-
167
-
168
-
169
-
170
-
171
-
172
-
173
-
174
-
175
-
176
-
177
-
178
-
 179
179 -
 180
180 -
 181
181 -
 182
182 -
 183
183 -
 184
184 -
 185
185 -
 186
186 -
 187
187 -
 188
188 -
 189
189 -
190
-
191
-
192
-
193
-
194
-
195
-
196
-
197
-
198
-
199
-
200
-
201
-
202
-
203
-
204
-
205
-
206
-
207
-
208
-
209
-
210
-
211
-
212
-
213
-
214
-
215
-
216
-
217
-
218
-
219
-
220
-
221
-
222
 |
 |