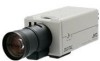
JVC TK-C1530U Instructions - Page 21
DC IRIS lens
 |
UPC - 046838027925
View all JVC TK-C1530U manuals
Add to My Manuals
Save this manual to your list of manuals |
Page 21 highlights
1. Check the mounting method of the lens before mounting ● This camera is set to CS-mount lens before shipment. To use a C-mount lens, loosen the back focus fastening screw with a screwdriver, turn the back focus adjustment ring with your finger or the screwdriver and change the mounting method. ● For the dimension (a) of the lens mounting section as illustrated in the diagram, use the value that is shown in the table below. Note: ● Never use one that exceeds the dimension (a) as it will damage the inner part of the camera and will not allow normal installation. This will result in a malfunction. Lens C-mount lens CS-mount lens Flange back (b) 17.526 mm 12.5 mm Dimension (a) 5.5 mm or less 2. Turn the lens clockwise and mount it securely on the camera. 3. For an automatic iris control lens, select the switch on the side of this camera according to the lens used. VIDEO : When using a lens with a built-in EE amplifier DC : When using a lens without a built-in EE amplifier 4. In the case of an automatic iris control lens, check the pin arrangement and connect the lens cable to the socket. Ⅵ 4 pin plug Pin number 1 2 3 4 DC IRIS lens VIDEO IRIS lens (Without built-in EE amplifier) (With built-in EE amplifier) Brake (-) 9.0 V (Max. 50 mA) Brake (+) NC Drive (+) VIDEO Drive (-) GND 21
-
 1
1 -
2
-
3
-
4
-
5
-
6
-
7
-
8
-
9
-
10
-
11
-
12
-
13
-
14
-
15
-
 16
16 -
 17
17 -
 18
18 -
 19
19 -
 20
20 -
 21
21 -
 22
22 -
 23
23 -
 24
24 -
 25
25 -
 26
26 -
27
-
28
-
29
-
30
-
31
-
32
-
33
-
34
-
35
-
36
-
37
-
38
-
39
-
40
-
41
-
42
-
43
-
44
-
45
-
46
-
47
-
48
-
49
-
50
-
51
-
52
-
53
-
54
-
55
-
56
-
57
-
58
-
59
-
60
-
61
-
62
-
63
-
64
-
65
-
66
-
67
-
68
-
69
-
70
 |
 |
