JVC TMH-1750CGU Instruction Manual - Page 21
Troubleshooting - 17 color monitor
 |
UPC - 046838205880
View all JVC TMH-1750CGU manuals
Add to My Manuals
Save this manual to your list of manuals |
Page 21 highlights
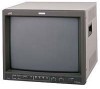
ENGLISH TROUBLESHOOTING Solutions to common problems related to your monitor are described here. If none of the solutions presented here solves the problem, unplug the monitor and consult a JVC-authorized dealer or service center for assistance. Problems No power supply. No picture with the power on. No sound. Shaking picture. No colors, wrong color, or dark picture. Unnatural, irregularly colored, or distorted picture. Dark stripes appear at the top and bottom of the screen, picture vertically squeezed. The overall picture size is too small. Function buttons on the front panel do not function. The INPUT SELECT buttons do not function. Points to be checked Is the power plug loosened or disconnected? Is the main power turned OFF? Is the video signal output from the connected component? Is the input signal selected properly? Is the video cable disconnected? Is the audio signal output from the connected component? Is the volume output set to minimum? Is the audio cable disconnected? Is the monitor close to a device generating a strong magnetic field? Is the color system selected properly? Has the picture control setting (CONTRAST, BRIGHT, CHROMA or PHASE) been changed? Is the monitor close to a speaker, magnet or any other device generating a strong magnetic field? Is the aspect ratio set to 16:9? Has the UNDER SCAN button been pressed so the UNDER SCAN button lights? Has control of the buttons been locked? (Has the CONTROL LOCK function been set to ON?) Is input selection under external control? (Has the REMOTE ENABLE function been set to valid?) Measures (Remedy) Firmly insert the power plug. Turn the main power ON. (See page 6.) Set the connected component correctly. Select the required video signal input with the Input select button. (See page 10.) Connect the video signal cable firmly. (See pages 16 and 17.) Set the connected component correctly. Adjust the speaker volume with the VOLUME/ SELECT button. (See page 10.) Connect the audio signal cable firmly. (See pags 16 and 17.) Move the device away from the monitor until the picture stabilizes. Set COLOR SYSTEM in the screen to AUTO. (See page 12.) Set each picture control to the standard setting. (See page 10.) Press the COLOR OFF button and BLUE CHECK button to adjust. (See page 11.) Move the device away from the monitor and turn the monitor's power off. Wait at least 30 minutes, then turn the power on again. Switch the aspect ratio to 4:3 with the ASPECT button on the front panel. Press the UNDER SCAN button to turn off the button. (See page 4.) Set CONTROL LOCK in the screen to OFF. (See pages 13 and 14.) Set REMOTE ENABLE to OFF (invalid). (See page 18.) The following are not malfunctions: ● When a bright still image (such as a white cloth) is displayed for a long period, it may appear to be colored. This is due to the structure of the cathode ray tube and will be deleted when another image is displayed. ● You experience a mild electric shock when you touch the picture tube. This phenomenon is due to a normal buildup of static electricity on the CRT and is not harmful. ● The monitor emits a strange sound when the room temperature changes suddenly. This is only a problem if an abnormality appears on the screen as well. ● If two or more monitors are operated next to each other, their images may shake or be distorted. This phenomenon is due to mutual interference; it is not a malfunction. Move the monitors away from each other until the interference disappears or turn the power off on any monitor that is not being used. 19
-
 1
1 -
2
-
3
-
4
-
5
-
6
-
7
-
8
-
9
-
10
-
11
-
12
-
13
-
14
-
15
-
 16
16 -
 17
17 -
 18
18 -
 19
19 -
 20
20 -
 21
21 -
 22
22 -
 23
23 -
 24
24 -
 25
25
 |
 |
