Kenmore 2029914 Use and Care Manual - Page 19
Always, followal!safety, precautions, whenperforming, maintenance, tothePowerMate
 |
View all Kenmore 2029914 manuals
Add to My Manuals
Save this manual to your list of manuals |
Page 19 highlights
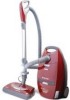
Alwayfsollowal!safetpyrecautiownhsenperformimngaintenantoctehePowerMate ,d_WARNING Electrical Shock Or Personal Injury Hazard Always turn off and unplug vacuum cleaner before performing maintenance to the vacuum cleaner, Failure to do so could result in electrical shock or personal injury from vacuum cleaner suddenly starting. BELT CHANGING AND AGITATOR CLEANING TO REMOVE BELT '__ ,.,.., _ _'_ Ill Wand Quick Release Pedal 1,.Remove the wand by pressing the quick release puepdoant athnedw,ifatinndg.. Screws PowerMate upside down and unscrew two (2) 2P.oTwuerrnMate cover screws, 5. Lift rear latches up Rear Latches Side Latch Handle i= Pedal----_% 3. Turn PowerMate right side up, , 4. Press handle release pedal and lower the swivel. End Cap 9. Check and clean end cap areas. See AGITATOR ASSEMBLY for picture of complete agitator assembly. t9
-
 1
1 -
2
-
3
-
4
-
5
-
6
-
7
-
8
-
9
-
10
-
11
-
12
-
13
-
 14
14 -
 15
15 -
 16
16 -
 17
17 -
 18
18 -
 19
19 -
 20
20 -
 21
21 -
 22
22 -
 23
23 -
 24
24 -
25
-
26
-
27
-
28
-
29
-
30
-
31
-
32
-
33
-
34
-
35
-
36
-
37
-
38
-
39
-
40
-
41
-
42
-
43
-
44
-
45
-
46
-
47
-
48
-
49
-
50
-
51
-
52
 |
 |
