Kenmore 7759 Owners Manual - Page 8
Automatic, lcema ker on, icemaker - water dispenser
 |
View all Kenmore 7759 manuals
Add to My Manuals
Save this manual to your list of manuals |
Page 8 highlights
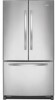
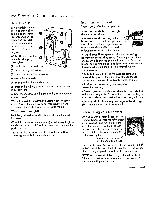
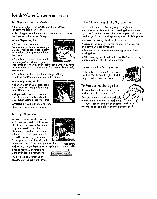
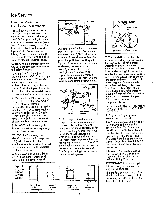
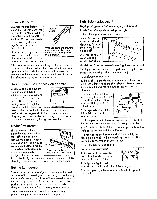
Automatic lcema ker (onicema&kdeisrpenser equipped models) With a newly-installed refrigerator, allow about 24 hours for the freezer compartment to cool down to the proper icemaking temperature, If your refrigerator is __r operated before the water connection is made, keep the icemaker feeler arm in the STOP (up} position, Icemaker / Ice Storage Bin arm in STOP (up) position When the refrigerator has been connected to the water supply and the water has been turned on, move the feeler arm to ON (down) position.. .._L_I Feeler arm in ON (down) position The ice cube mold will automatically fill with water after cooling to freezing temperature, and first cubes normally freeze after several hours, When cubes are solidly frozen, they wil! be ejected from the mold into the ice storage bin by means of a sweeper arm.. lcemaking will continue until the feeler arm senses that there are enough cubes in the bin and halts the operation temporarily, Be sure nothing interferes with the swing of the feeler arm Your icemaker wit1 produce 8 cubes per cycleapproximately 120 cubes in a 24 hour period-depending on freezer temperature, room temperature, number of door openings and other use conditions. To make sure the bin fills with ice, level lhe cubes occasionally,. When cubes fall into the bin they may pile up close to the icemaker and push the feeler arm to the STOP (up) position before the bin gets full Keeping the cubes level allows the icemaker to fill the bin Once your icemaker is in operation, throw away the first few batches of ice cubes. Thiswil! flushaway any impuritiesin the water line, Do the same thing after vacations or extended periods when ice isn'tused Move Feeler Arm to STOP (up) Position when... o Home water supply isto be turned off for several hours • Ice storage bin isto be removed for a period of time ° Going away on vacation, at which time you should also turn off the valve in thewater supply line to your refrigerator e Moving the FreshFood control to OFF. If ice is not used often, old ice cubes will become cloudy and taste stale° Empty the ice storage bin periodically and wash it in lukewarm water, If this is your first icemaker, you wit! hear occasional sounds that may be unfamiliar They are normal icemaking sounds and are not cause for concern,. Ice Trays (onmodels without automatic icemaker) To release ice cubes, turn the tray upside down, hold it over a container, and I,,vist both ends For only one or two ice cubes, leave the tray right-side-up, twist both ends slightly, and remove as many cubes as you want.. Wash the ice trays in lukewarm water and vinegar to remove lime deposits, Do not put them in an automatic dishwasher Automatic Icemaker Accessory Kit (optional at extra cost) If your refrigerator did not come already equipped with an automatic icemaker, you may add one-contact your Sears store or Sears Service Center.. Water Filter Accessory (optional at extra cost) Your ice cubes can only be as fresh-tasting as the water that produces them That's why it's a good idea to purify the water with a water filter, The water filter is an optional part at extra cost and is available from your Sears Service Center° Order Filter No 978488 and it may be installed in minutes when attached to the inlet water tube connection_ Water Supply Accessory Kit (optional at extra cost) A water supply kit containing copper tubing, shut-off valve, fittings and instructionsneeded to connect the icemaker to your cold water line is also available from your Sears store or Sears Service Center,
-
 1
1 -
2
-
 3
3 -
 4
4 -
 5
5 -
 6
6 -
 7
7 -
 8
8 -
 9
9 -
 10
10 -
 11
11 -
 12
12 -
 13
13 -
14
-
15
-
16
-
17
-
18
-
19
-
20
-
21
-
22
-
23
-
24
-
25
-
26
-
27
-
28
-
29
-
30
-
31
-
32
-
33
-
34
-
35
-
36
-
37
-
38
-
39
-
40
-
41
-
42
-
43
-
44
-
45
-
46
-
47
-
48
-
49
-
50
-
51
-
52
 |
 |
