Kenmore 84008 Use and Care Manual - Page 8
Start!Cancel
 |
UPC - 836607001559
View all Kenmore 84008 manuals
Add to My Manuals
Save this manual to your list of manuals |
Page 8 highlights
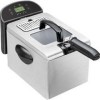
7. Plug cord into a 120-volt wall outlet. Always make sure fryer and cord are out of reach of children. 8. When the cord is ptugged in, the green LCD window lights up and the unit beeps for about 2 seconds. The default setting of 375 ° shows. (If you do nothing the green LCD window goes out after about 30 seconds,) To set temperature, press the "Set Tamp" button. When the button is pressed, the temperature goes to 275°F and changes by 25° each time you press (see Fig. 6). The recommended setting for most frying is 375°E RG. 6 9. When you select the desired temperature setting, press the "Start/Cancel" button on the control panel to start the oil heating. (The unit beeps once each time the "Start!Cancel" button is pressed). A green light will flash to show the unit is heating• Preheat time is about 15to 17 minutes. 10. Place cover on top of fryer while heating oil. 1 t. While the oil is preheating: a. Prepare food for frying, making sure to remove excess moisture from •food by blotting with paper toweling. Moist foods can cause excess foaming, spattering, and overflow of oil. b, Assemble basket handle(s) for frying. See numbers ! and 2 above. c. Set basket(s) on countertop and fill up to 2/3 full with food. Always use the large basket, even when you plan only to fill smaller basket with food, When using the smaller basket, insert it into the large one, and interlock the handles together so the two handles act as one. (see Fig. 2, page 6). 12. When the fryer reaches the selected temperature, il beeps 5 times and the green light stays lit. The unit is now ready to cook. 13. Set the timer to seleCt the cook time. Do this by pressing the ^ and v buttons. The timer can be set for 1 to 30 minutes. 7 I NnoOt tTurEn: poTwheer tiomneor rwooffrktso itnhdeehpeeantdinegntlyelemfreonmt. the fryer's heating unit. It does 8
-
 1
1 -
2
-
 3
3 -
 4
4 -
 5
5 -
 6
6 -
 7
7 -
 8
8 -
 9
9 -
 10
10 -
 11
11 -
 12
12 -
 13
13 -
14
-
15
-
16
-
17
-
18
-
19
-
20
-
21
-
22
-
23
-
24
-
25
-
26
-
27
-
28
-
29
-
30
-
31
 |
 |
