Kenwood DRV-A700W Operation Manual - Page 18
Connect The Device To The Magnetic Charging Port Mount, Connect The Fuse Tap Cable To The Fuse Box,
 |
View all Kenwood DRV-A700W manuals
Add to My Manuals
Save this manual to your list of manuals |
Page 18 highlights
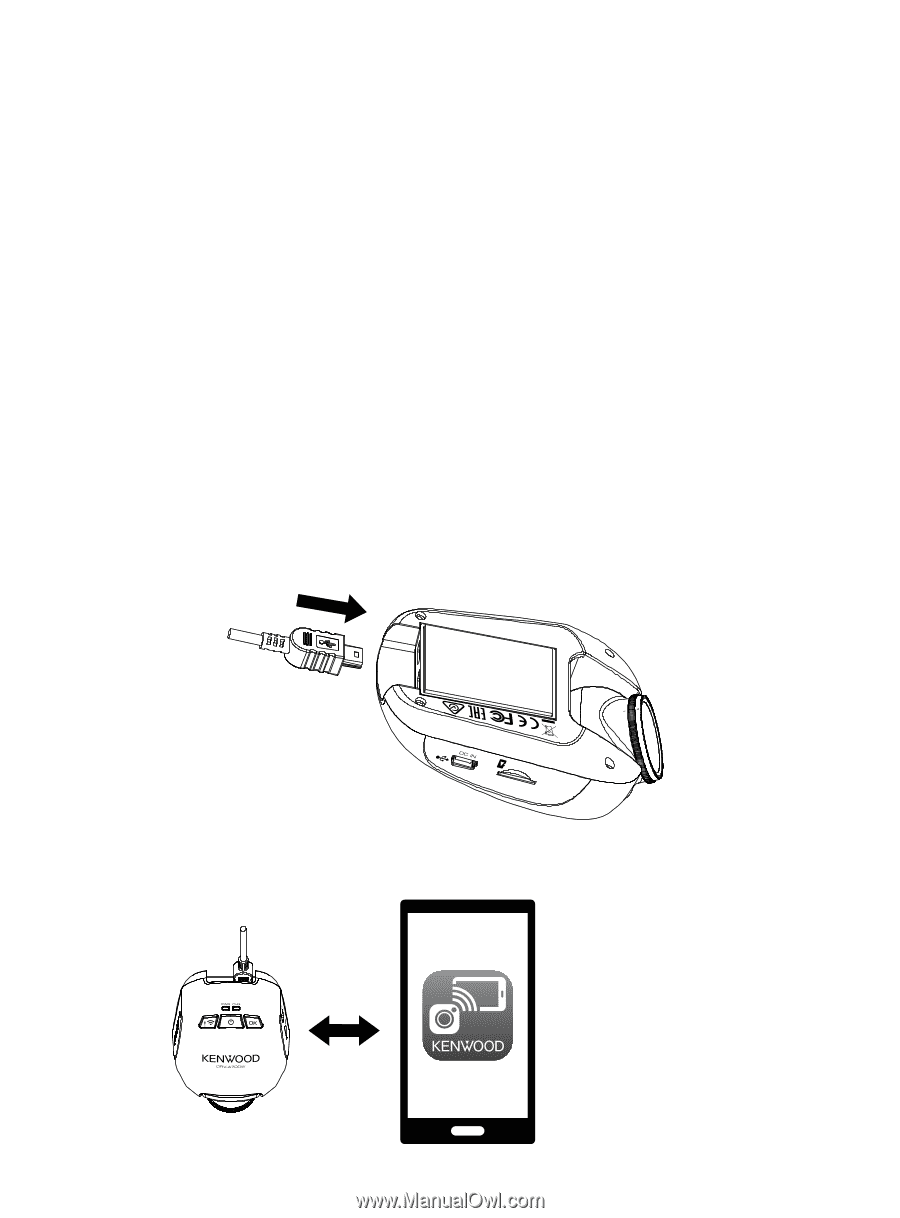
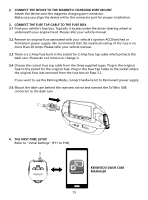
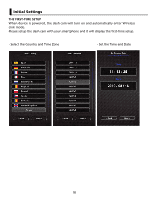
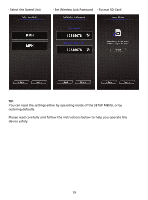
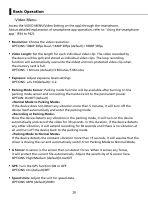
2. CONNECT THE DEVICE TO THE MAGNETIC CHARGING PORT MOUNT Attach the device onto the magnetic charging port connector. Make sure you align the device within the connector port for proper installation. 3. CONNECT THE FUSE TAP CABLE TO THE FUSE BOX 3.1 Find your vehicle's fuse box. Typically it locates under the driver steering wheel or underneath your engine hood. Please refer your vehicle manual. 3.2 Remove an original fuse associated with your vehicle's ignition ACC/Switched or Permanent power supply. We recommend that the maximum rating of the fuse is no more than 20 Amps. Please refer your vehicle manual. 3.3 There is a 2 Amp fuse built in the socket for 2 Amp fuse tap cable which protects the dash cam. Please do not remove or change it. 3.4 Choose the correct fuse tap cable from the three supplied types. Plug in the original fuse to the socket for the original fuse. Plug in the Fuse Tap Cable to the socket where the original fuse was removed from the fuse box on Step 3.2. If you want to use the Parking Mode, connect hardwire kit to Permanent power supply. 3.5 Mount the dash cam behind the rearview mirror and connect the 5V Mini USB connector to the dash cam. 4. THE FIRST-TIME SETUP Refer to "Initial Settings" (P17 to P18). KENWOOD DASH CAM MANAGER 15
-
 1
1 -
2
-
3
-
4
-
5
-
6
-
7
-
8
-
9
-
10
-
11
-
12
-
 13
13 -
 14
14 -
 15
15 -
 16
16 -
 17
17 -
 18
18 -
 19
19 -
 20
20 -
 21
21 -
 22
22 -
 23
23 -
24
-
25
-
26
-
27
-
28
-
29
-
30
-
31
-
32
-
33
-
34
-
35
-
36
-
37
-
38
-
39
-
40
-
41
-
42
-
43
-
44
-
45
-
46
-
47
-
48
-
49
-
50
-
51
-
52
-
53
 |
 |