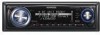
Kenwood KDC MP638U Instruction Manual - Page 13
G-Analyzer Stop Watch, G-Analyzer Calibration Setup - reset button
 |
UPC - 019048177964
View all Kenwood KDC MP638U manuals
Add to My Manuals
Save this manual to your list of manuals |
Page 13 highlights
In Standby mode G-Analyzer Calibration Setup G-Analyzer requires calibration for horizontal acceleration and braking. ⁄ • To ensure accurate calibration, go through the following steps at a level place where you can move the vehicle straight ahead. 1 Park the vehicle in a horizontal location 2 Enter G-Analyzer Calibration setup mode (In Display Type F) Select "DISP" > "GMA" > "CAL". For how to select Function Control item, refer to (page 6). "G-CALIBRATION" is displayed. 3 Start Calibration of horizontal direction Press the Control knob. Once "Move Forward" appears on the display, the vehicle must be advanced. 4 Start Calibration of straight direction Start moving the vehicle ahead. Calibration of straight direction automatically starts. When the Calibration is finished, "Calibration OK" is displayed. ⁄ • If you fail to complete the calibration, "No Calibration" is displayed. In such a case, repeat steps 1 through 4. 5 Exit G-Analyzer Calibration setup mode Press the [FNC] button. G-Analyzer Stop Watch The control of stop watch can be started by GAnalyzer function. ¤ • Do not use G-Analyzer stop watch on the Public roads. 1 Enter G-Analyzer Stop Watch mode (In Display Type F) Select "DISP" > "GMA" > "STOP.W". For how to select Function Control item, refer to (page 6). "STOP WATCH" is displayed. 2 Make the counter ready Press the Control knob. "Ready" is displayed. 3 Start Count When G in the vertical direction is detected during the travel, the count automatically starts. "Running" is displayed. 4 Stop Count Press the Control knob. "Stop" is displayed. When you Reset the Count (While "Stop" is displayed) Press the Control knob for at least 1 second. 5 Exit G-Analyzer Stop Watch mode Press the [FNC] button. ⁄ • Pressing the Control knob in step 3 allows you to start counting. • Pressing the Control knob in step 4 allows you to restart counting. English | 13
-
 1
1 -
2
-
3
-
4
-
5
-
6
-
7
-
 8
8 -
 9
9 -
 10
10 -
 11
11 -
 12
12 -
 13
13 -
 14
14 -
 15
15 -
 16
16 -
 17
17 -
 18
18 -
19
-
20
-
21
-
22
-
23
-
24
-
25
-
26
-
27
-
28
-
29
-
30
-
31
-
32
-
33
-
34
-
35
-
36
-
37
-
38
-
39
-
40
-
41
-
42
-
43
-
44
-
45
-
46
-
47
-
48
-
49
-
50
-
51
-
52
-
53
-
54
-
55
-
56
-
57
-
58
-
59
-
60
-
61
-
62
-
63
-
64
-
65
-
66
-
67
-
68
-
69
-
70
-
71
-
72
-
73
-
74
-
75
-
76
-
77
-
78
-
79
-
80
-
81
-
82
-
83
-
84
-
85
-
86
-
87
-
88
-
89
-
90
-
91
-
92
-
93
-
94
-
95
-
96
-
97
-
98
-
99
-
100
-
101
-
102
-
103
-
104
-
105
-
106
-
107
-
108
-
109
-
110
-
111
-
112
-
113
-
114
-
115
-
116
 |
 |
