KitchenAid KBZU122TSS Use and Care Guide - Page 12
Check and Adjust the Burners
 |
View all KitchenAid KBZU122TSS manuals
Add to My Manuals
Save this manual to your list of manuals |
Page 12 highlights
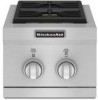
Plug in Side Burner 1. This built-in outdoor side burner comes with 5,000 mAmp power transformer plug assembly for the igniter system. Plug in the single-prong plug in the receptacle on the lower lefthand side of the side burner. A A. Single-prong plug WARNING Check and Adjust the Burners The burners are tested and factory-set for most efficient operation. However, variations in gas supply and other conditions may make minor adjustments to low flame setting necessary. It is recommended that adjustments be made by a qualified person. Checking and adjusting the burner flames requires removing the grate. Low flame adjustment: If flame goes out on the LO setting, the low flame setting must be adjusted. 1. Light the burner and turn control knob to its lowest setting and remove knob. 2. Hold the valve stem with pliers and insert a thin flat blade screwdriver into the shaft. 3. Watch the flame and slowly turn screwdriver counterclockwise. 4. Adjust flame to the minimum stable flame. A Electrical Shock Hazard Plug into a grounded 3 prong outlet. Do not remove ground prong. Do not use an adapter. Do not use an extension cord. Failure to follow these instructions can result in death, fire, or electrical shock. 2. Plug into a grounded 3 prong outlet. 3. Gently slide side burner completely into outdoor enclosure. Assemble Cooking Area 1. Lift off cover and grate and set aside. A B B C A. Valve stem B. Flat-blade screwdriver C. Pliers 5. Replace control knob and turn off the burner. 6. Reassemble grate. A. Cover B. Grate 2. Remove packing from around burners. 3. Reinstall grate. 12
-
 1
1 -
2
-
3
-
4
-
5
-
6
-
 7
7 -
 8
8 -
 9
9 -
 10
10 -
 11
11 -
 12
12 -
 13
13 -
 14
14 -
 15
15 -
 16
16 -
 17
17 -
18
-
19
-
20
-
21
-
22
-
23
-
24
-
25
-
26
-
27
-
28
-
29
-
30
-
31
-
32
 |
 |
